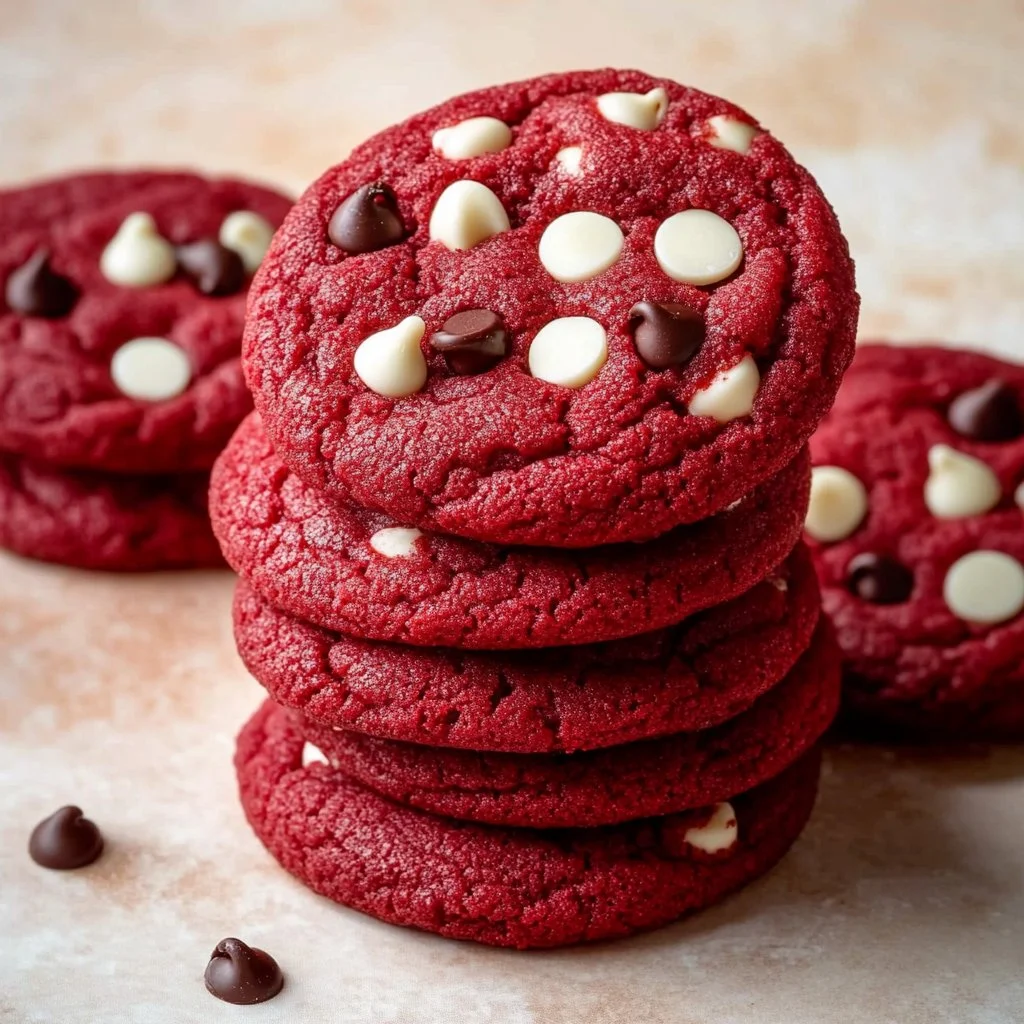
The warm smell of butter and vanilla fills the kitchen as a tray of Delicious Red Velvet Cookies edges toward golden perfection. The tops are soft and slightly glossy, the edges promise a gentle crisp, and the color is a cozy, deep red that feels like a small celebration. I like to pull a cooled cookie close to a steaming mug of coffee and savor that buttery-soft, melt-in-your-mouth bite. If you want to try a slightly different shape or texture later, I keep a favorite red velvet crinkle version bookmarked for chilly afternoons.
Why You’ll Love This Delicious Red Velvet Cookies

There is something about a red velvet cookie that makes ordinary days feel special. The color lifts moods without fuss, and the flavor blends a soft chocolate note with a tangy richness that feels grown-up and cozy at the same time. These cookies sit perfectly between cake and cookie, with tender centers and golden edges that give just the right contrast.
I remember baking a batch for a neighbor’s birthday and watching a small group gather in my kitchen, coffee cups in hand, as the scent drew them near. They called them melt-in-your-mouth treats, and that made me tuck the recipe into regular rotation. If you want them with a tangy cream cheese finish, try pairing the cookie with a small smear of frosting like the cream cheese variety linked in my notes for a gentle upgrade to every bite. You can also use them for small celebrations, coffee chats, or quiet nights in where the dessert really does the comforting work.
These cookies are forgiving. The dough chills well, so you can make it ahead when life is busy. The small white chocolate chips add a sweet pop that balances the cocoa and tang, but they are optional if you want a simpler, more classic bite. Once you taste one warm from the oven, you will understand why these keep showing up at birthdays, casual get-togethers, and slow Sunday afternoons.
Bringing Delicious Red Velvet Cookies Together
“When the kitchen smells like vanilla and butter, you know something special’s baking.”
Before you measure and mix, take a moment to gather everything and preheat the oven. Look for signs while you bake: watch for a slightly glossy surface before the centers set, and notice the very faint golden rim at the edges when the cookies are done. The dough should be soft and a little tacky when you roll it, and chilling it for at least thirty minutes makes the cookies hold shape and bake with even texture.
A quick overview helps. You will cream butter and the sugars until they are light and airy. Then you will mix wet ingredients with the buttermilk blend, fold in the flour and cocoa, and stir in white chocolate if you like. Chill the dough so it becomes easier to handle. When baking, aim for a short time so the centers stay soft while the edges become set. Let the cookies cool on the sheets for a few minutes before transferring to a rack so they finish firming up without overbaking in the oven.
Ingredients You’ll Need
3 cups all-purpose flour
1/4 cup unsweetened cocoa powder
1 teaspoon baking soda
1/2 teaspoon salt
1 cup (2 sticks) unsalted butter, softened
1 1/2 cups granulated sugar
1/2 cup brown sugar, packed
2 large eggs
1 teaspoon vanilla extract
1 cup buttermilk
1 teaspoon white vinegar
2 tablespoons red gel food coloring
1 cup white chocolate chips (optional)
Use real butter if you can; it makes every bite worth it. The cocoa is only a touch, just enough to give that classic red velvet base without making the cookie taste strong with chocolate. Gel food color gives you deeper, truer color without watering down the dough. If you do not have buttermilk, you can make a quick substitute by adding one tablespoon of white vinegar to a cup of milk and letting it sit for five minutes, but the recipe here uses real buttermilk for the tang that bakery-style red velvet is known for.
Step-by-Step Directions
- Preheat oven to 350°F (175°C).
Line baking sheets with parchment paper. Set racks to the center and upper-middle positions for even browning. - In a medium bowl, whisk together the flour, cocoa powder, baking soda, and salt.
Whisk until the cocoa is evenly distributed and the mixture looks uniform with no streaks. - In a large bowl, cream together the softened butter, granulated sugar, and brown sugar until light and fluffy.
Use a stand mixer or hand mixer on medium speed for 3 to 4 minutes until pale and aerated. - Beat in the eggs one at a time, then stir in the vanilla extract.
Beat well after each egg so the mixture stays smooth and glossy. - In a small bowl, whisk together the buttermilk, vinegar, and red food coloring.
Mix until the color is evenly blended and the liquid looks rich and even. - Gradually add the wet ingredients to the dry ingredients, mixing until just combined. Do not overmix.
Fold gently so the dough keeps some texture. Overworking the dough will make the cookies tough. - Stir in the white chocolate chips (if using).
Distribute the chips evenly with a spatula, so each cookie gets a few pockets of sweet creaminess. - Cover the dough and chill in the refrigerator for at least 30 minutes.
Chilling firms the dough for rolling and helps the cookies keep their shape while baking. - Roll the dough into 1-inch balls and place them on the prepared baking sheets.
Leave about 2 inches between each ball for the cookies to spread a touch. - Bake for 8-10 minutes, or until the edges are set and the centers are still slightly soft.
Rotate the pans halfway if your oven has hot spots. Look for edges just turning golden and centers that still look tender. - Let the cookies cool on the baking sheets for a few minutes before transferring them to a wire rack to cool completely.
This lets the bottoms finish setting without continuing to bake in hot pans. Transfer gently with a spatula for neat edges.
Baking tips for texture: aim for a slightly shorter bake time if you want a softer, almost cake-like center. If you prefer a crisper cookie, add two more minutes and watch the color at the edges. Cookies will firm up a bit as they cool. If you ever find the dough too sticky to roll, a quick chill for an extra 15 minutes solves the problem.
Serving Delicious Red Velvet Cookies With Love
These cookies make for sweet, simple presentation. Stack them on a white plate for a bright contrast to the red, or serve a few on small dessert plates with a dollop of whipped cream or a scoop of vanilla ice cream. For a coffee chat, place three cookies alongside a fresh pour of dark roast; the slight bitterness in the coffee balances the sugar and white chocolate.
If you want to turn them into mini desserts, split a warm cookie and place a thin slice of softened cream cheese in the middle for a quick sandwich that brightens birthdays. You can also serve them with fresh berries when the season allows; the fruit adds a light, fresh note that keeps the plate feeling balanced. Small drizzle of melted white chocolate or a dusting of powdered sugar makes them feel a little fancy without much effort.
For a small gathering, arrange the cookies on a tiered tray with a few sprigs of rosemary or thyme as a subtle garnish. If you bring them to a party, pack them in a shallow box with parchment between layers so edges stay pretty and no sticky tops clump together.
Keeping Delicious Red Velvet Cookies Fresh
To keep cookies soft: store at room temperature in an airtight container with a slice of bread or a few apple slices for 1 to 3 days. The bread releases moisture slowly and helps keep the cookies tender.
To keep cookies crisp: place them in a container with a paper towel and leave the lid slightly ajar for short-term storage. This lets a trace of air prevent too much softening.
Refrigerator notes: you can refrigerate the dough for up to 3 days before shaping and baking. Baked cookies also store in the fridge up to one week but bring them to room temperature before serving to restore tenderness.
Freezer notes: freeze unbaked dough balls on a tray, then transfer to a freezer-safe bag for up to 3 months. Bake from frozen adding 1 to 2 minutes to the time. You can also freeze baked cookies in a single layer with parchment for a month. Thaw at room temperature and reheat for 10 to 15 seconds in the microwave or 3 to 5 minutes in a 325°F oven to refresh texture.
My gentle advice: label containers with dates so you always know which pint is freshest. A little care in storage keeps that buttery-soft center waiting for a cozy moment.
Susan’s Baking Notes
- Use room temperature eggs and butter. They blend more evenly and give you a smoother, richer dough.
Cold ingredients make the batter lumpy and can lead to uneven texture. - Gel food coloring works best for bright, even color without changing the dough texture.
Liquid dye can thin the batter a little and change baking times. - Chill the dough. Even 30 minutes makes the cookies easier to roll and keeps them from spreading too thin.
If you forget to chill, pop the rolled balls in the freezer for 10 minutes to firm up quickly. - Clean-up tip: line your mixing bowl with a sheet of plastic wrap while your mixer is still attached. It cuts down on splatter and keeps counters tidy.
Scrape the paddle with a spatula and give the bowl a quick rinse; butter and sugar come off easily with warm water. - If you want a slightly more pronounced tang, increase the vinegar by 1/4 teaspoon. The difference is subtle but classic.
Do not add too much; the cookie should stay gently balanced between sweet and tangy.
For a light, quick alternative, I sometimes make a simple sugar cookie base and press a small circle of red velvet dough into the center before baking. It keeps the baking time predictable and gives a crisp edge to a soft center. You can find a basic sugar cookie method I like on a short recipe page I often reference.
Flavor Twists & Variations
White chocolate chips are the classic finish here, and they melt into sweet ribbons. Try these ideas to change the mood:
- Cream cheese swirl. Drop a teaspoon of sweetened cream cheese on each dough ball before baking and swirl slightly with a toothpick. The tang plays beautifully with red velvet. For a fuller experience, pair the cookie with a thin cream cheese spread after baking.
- Dark chocolate points. Swap white chocolate chips for dark chocolate chips for a deep, less sweet contrast. The slightly bitter chocolate cuts through the sugar and gives a richer finish.
- Orange zest. Add a teaspoon of finely grated orange zest to the dough for a bright, citrus lift that keeps the cookie feeling light and fresh.
- Hazelnut crunch. Fold in 1/2 cup chopped toasted hazelnuts for texture and a toasty note. The nuts create a lovely counterpoint to the tender crumb.
- Seasonal toppings. In winter, press a few crushed peppermint candies into the tops after baking for a festive touch. In summer, top with a single fresh raspberry and a dust of powdered sugar.
If you want a sliceable dessert, press the dough into a shortbread pan and bake slightly longer for a bar version. The edges will crisp and the center will stay soft, giving each slice a buttery red velvet experience. For a cheesecake-adjacent idea, think about pairing cookie crumbs with a no-bake cream cheese filling for a small tart that echoes between cookie and cake. I have a festive baked option using cheesecake flavors that pairs well around holidays and small gatherings.
Sweet Tips & Tricks
- If your dough is too sticky to handle, refrigerate for another 15 to 30 minutes. Firm dough is easier to shape and results in neater cookies. Also, dipping hands in cold water helps with rolling sticky dough.
- For even cookies, use a small cookie scoop to portion dough. This keeps sizes consistent so everything bakes at the same rate. A 1-inch scoop works well for these.
- Keep an eye on the bake time. Start checking at 8 minutes. The centers should look soft and slightly puffy, not raw, when you pull them from the oven.
- If you want cleaner cookie tops, roll dough in cocoa powder or powdered sugar before rolling in a little extra white sugar for sparkle. This can make the surface smoother and more uniform.
- If you love crisp edges and soft centers, use a double baking sheet method. Place one sheet on top of another for slightly softer bottoms, and use only one thin sheet for crisper bottoms.
For a simple white-sugar sparkle, roll the dough briefly in granulated sugar before shaping. It gives a faint crackle and a subtle crunch to the top. If you need inspiration for other texture balances, a short list of basic cookie recipes, including a three-ingredient sugar cookie, is helpful to compare textures and techniques.
FAQs About Delicious Red Velvet Cookies
Can I make this dough ahead of time?
Yes. The dough chills well for up to three days. Keep it tightly covered. When you are ready to bake, let it sit at room temperature for a few minutes to make rolling easier.
Can I leave out the white chocolate chips?
Absolutely. The chips add sweet pockets, but the cookie is delicious plain. If you want a deeper chocolate note, try dark chocolate chips or small chunks.
How do I keep cookies soft for longer?
Store cookies in an airtight container at room temperature. Add a slice of fresh bread or a piece of apple to keep them moist for 2 to 3 days. Replace the bread daily.
Can I make these gluten-free?
You can substitute a 1-to-1 gluten-free flour blend, but watch the texture since gluten-free flours absorb moisture differently. Add a tablespoon or two of extra buttermilk if the dough seems too dry.
Will these keep their red color after baking?
Gel food coloring holds color well. A hint of cocoa is essential to the flavor, and small amounts will not mute the red when you use gel dye.
A Final Sweet Note
I hope these Delicious Red Velvet Cookies bring your kitchen the same buttery joy they bring mine. Baking these is a quiet way to celebrate small moments, whether you are sharing them with friends, tucking one into a lunch, or enjoying a lazy morning with coffee. The gentle tang of buttermilk, the tender crumb, and those little pockets of white chocolate feel like comfort in each bite.
If you enjoy a bakery twist on this idea, you might like the New York take shared by Jane’s Patisserie in her own recipe, which highlights crisp edges and bold color in a unique way: NYC Red Velvet Cookies! – Jane’s Patisserie. For another home-baker friendly variation that folds chocolate chips into the red velvet batter and explores texture, see the thoughtful method at Sally’s Baking: Red Velvet Chocolate Chip Cookies – Sally’s Baking.
Thank you for letting these cookies step into your kitchen. I hope they make small moments feel like tiny celebrations and that sharing them becomes a warm habit.

Delicious Red Velvet Cookies
Ingredients
Dry Ingredients
- 3 cups all-purpose flour
- 1/4 cup unsweetened cocoa powder
- 1 teaspoon baking soda
- 1/2 teaspoon salt
Wet Ingredients
- 1 cup unsalted butter, softened Use real butter for best flavor.
- 1 1/2 cups granulated sugar
- 1/2 cup brown sugar, packed
- 2 large eggs Use room temperature.
- 1 teaspoon vanilla extract
- 1 cup buttermilk Can substitute with milk and vinegar mixture.
- 1 teaspoon white vinegar
- 2 tablespoons red gel food coloring Gel coloring gives better color without affecting texture.
- 1 cup white chocolate chips (optional) Adds a sweet pop, can be omitted for classic flavor.
Instructions
Preparation
- Preheat oven to 350°F (175°C). Line baking sheets with parchment paper.
- In a medium bowl, whisk together the flour, cocoa powder, baking soda, and salt until well combined.
- In a large bowl, cream the softened butter, granulated sugar, and brown sugar until light and fluffy.
- Beat in the eggs one at a time, then stir in the vanilla extract.
- In a small bowl, whisk the buttermilk, vinegar, and red food coloring until evenly mixed.
- Gradually add the wet mixture to the dry ingredients, mixing until just combined. Fold gently to avoid overmixing.
- Stir in the white chocolate chips if using.
- Cover the dough and chill in the refrigerator for at least 30 minutes.
Baking
- Roll the chilled dough into 1-inch balls and place on prepared baking sheets, leaving about 2 inches between each.
- Bake for 8-10 minutes, or until edges are set and centers are soft. Rotate pans halfway for even baking.
- Let cool on baking sheets for a few minutes before transferring to wire racks to cool completely.