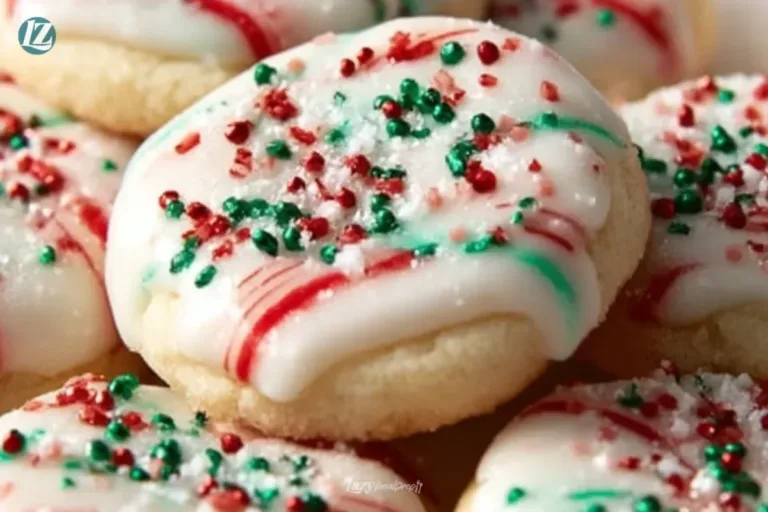
The smell of butter and crushed peppermint filling the kitchen is a small kind of magic. I love the moment when I slide a tray of Peppermint Meltaways into the oven and the room shifts to a warm, minty hush. These little cookies are buttery-soft at the center, with just enough peppermint crunch to make each bite sing. They are the kind of treat you bring to a quiet night in with tea, a bright holiday table, or a slow morning of coffee and conversation.
Why You’ll Love These Peppermint Meltaways
There is a soft, comforting feeling to baking Peppermint Meltaways that goes beyond their melt-in-your-mouth texture. They are simple to make, and they offer a comforting rhythm: cream the butter, fold in the flour, roll the dough, and watch tiny snowballs emerge from the oven with golden edges on their undersides.
I make them when I want to celebrate small moments. A friend popping by for a chat, a birthday that needs a gentle note, or a cold evening that calls for warmth in every sense. The peppermint gives a fresh lift that keeps these cookies from feeling too rich, while the butter keeps them indulgent in the best way.
For a similar seasonal feel, you might enjoy a festive spin on other treats like a quick peppermint pie that pairs well with these meltaways: Quick Christmas Peppermint Pie.
The Baking Process Explained
“When the kitchen smells like vanilla and butter, you know something special’s baking.”
Before we list the ingredients, here is a short overview of what to expect while you bake. These cookies mix together in moments, then rest only long enough to shape. Look for dough that holds together but stays soft. As the cookies bake, you will see tiny pale domes form and the very bottoms take on a light golden tint. The aroma moves from buttery to bright peppermint as they cool.
When the cookie edges remain pale and the bottoms are lightly golden, they are ready. After dusting with confectioners’ sugar, they look like little winter moons. If you love soft cookies with a crisp dusting, these will become a trusted recipe.
Ingredients You’ll Need
1 cup unsalted butter, softened
1/2 cup confectioners’ sugar
1/4 teaspoon salt
1 teaspoon peppermint extract
2 cups all-purpose flour
1/2 cup crushed peppermint candies
1/2 cup confectioners’ sugar for dusting
A few indulgent notes before you begin. Use real butter if you can; it makes every bite worth it. If your confectioners’ sugar is lumpy, sift it for a fine, smooth texture in the dough and a light, even dusting on top. For crushed peppermint candies, use a gentle hand with a rolling pin or pulse briefly in a food processor so you keep a range of tiny pieces and small crunches rather than a powder.
If you want a soft peppermint note that is not too strong, stick to 1 teaspoon of peppermint extract. For a brighter, more candy-like flavor, increase by a quarter teaspoon, but taste carefully. If you need another peppermint idea while planning your dessert table, this soft peppermint recipe offers a different texture to try: Soft Christmas Peppermints.
Step-by-Step Directions
- Preheat your oven to 350°F (175°C).
Position a rack in the center of the oven so cookies bake evenly. - In a large bowl, cream together the softened butter and 1/2 cup of confectioners’ sugar until smooth.
Beat on medium speed for about 2 to 3 minutes until the mixture looks light and slightly fluffy. - Mix in the salt and peppermint extract.
Scrape the sides of the bowl and stir until the flavor is well distributed through the butter. - Gradually blend in the flour until well combined.
Add the flour in two additions, stirring gently until the dough comes together without overmixing. - Stir in the crushed peppermint candies.
Use a spatula to fold them evenly through the dough so each bite gets a little sparkle of peppermint. - Roll the dough into small balls and place them on a baking sheet lined with parchment paper.
Aim for walnut-sized balls spaced about 2 inches apart to allow for a little spreading. - Bake for 10-12 minutes, or until the bottoms are lightly golden.
Watch closely near the 10-minute mark; the tops should remain pale while the undersides show a faint golden rim. - Allow to cool slightly, then dust with the remaining confectioners’ sugar before serving.
Cool for about 5 minutes on the baking sheet, then transfer to a wire rack and dust while still warm so the sugar melts a touch and creates a delicate crust.
Each step is designed to keep the cookies tender. The creaming time affects texture directly. Beat the butter and sugar until soft and airy to ensure the cookies have that buttery-soft crumb. Folding in flour gently avoids tough cookies. Finally, dusting with confectioners’ sugar while the cookies are slightly warm creates a glossy, delicate finish that feels like a small indulgence.
Serving Peppermint Meltaways With Love

These meltaways are happiest when shared. Serve them on a shallow plate lined with parchment, with a few whole peppermint sticks as garnish, or on a small cake stand for a simple centerpiece. Pair them with a steaming cup of strong coffee or a creamy hot chocolate. A light scoop of vanilla bean ice cream alongside three or four cookie halves makes a dessert that feels like a small celebration.
For a bright brunch idea, serve a plate of these alongside a peppermint float for a playful pairing: Tasty Peppermint Christmas Float. The creamy, cold float contrasts with the soft warmth of the cookies, and peppermint notes echo across the table.
When I present them at a casual gathering, I arrange a few on small napkins, then add a sprig of fresh mint or a single red cranberry for color. These small touches make the cookies feel special without much fuss. For a birthday, place them around a simple cake or pass them with coffee after a meal to extend the moment into conversation.
Storage & Reheat Tips
Keeping Peppermint Meltaways fresh is simple when you follow a few gentle rules. Store them at room temperature in an airtight container layered with parchment for up to a week. They will stay soft and tender when kept away from direct heat and humidity.
For longer storage, freeze the baked cookies in a single layer until firm, then transfer to a freezer-safe container with parchment between layers. They keep well for up to three months. Thaw at room temperature for 30 to 60 minutes. If you prefer them slightly warm, heat in a 300°F oven for 5 to 7 minutes or microwave a single cookie for about 7 to 10 seconds. Be careful not to overheat; these are best when the center remains soft.
If you need to freeze the raw dough, shape the balls and lay them on a tray to freeze solid. Once firm, store them in a sealed bag for up to two months. Bake directly from frozen, adding a minute or two to the baking time. This technique saves time and keeps the texture as intended.
To keep the powdered sugar dusting fresh, add it after reheating. If the cookies absorb moisture in the fridge and become a bit too soft, a quick 3-minute bake on a sheet will revive crisp edges while preserving a tender center.
Susan’s Baking Notes
- Butter temperature matters. Softened butter should give slightly to the touch but not be greasy. If too warm, cookies spread. If too cold, dough will be hard to shape.
A room temperature butter helps the sugar cream properly and gives you that buttery-soft texture. - Crushing peppermint candies with care. Use a rolling pin over a sealed bag, keeping some larger pieces for crunch.
Fine dust will melt into the dough and lose the textural contrast that makes these cookies delightful. - Sift the confectioners’ sugar for the dough and the dusting. This keeps the dough smooth and the coating delicate.
A thin, even dusting feels elegant and avoids a clumpy look. - Watch the bottoms, not the tops. These cookies do not brown heavily on top. Check the undersides for a faint golden edge to time your bake perfectly.
Remove from oven when the bottoms show just a hint of gold for the best tender result. - Mix-ins and upgrades. Add a tablespoon of finely chopped white chocolate for an extra layer of richness, or press a small peppermint candy into the center after baking for a decorative touch.
A quick chill before baking can help the cookies hold shape if your kitchen is warm.
I like to add a short memory here. The first time I baked these, the smell brought my neighbor in from the hallway. We shared them with tea and a slow conversation that turned a regular Tuesday into a small holiday. That is the very best part of baking: the way sweet things gather people.
Flavor Twists & Variations
Peppermint Meltaways are a lovely base for small changes that keep the cookies fresh and seasonal.
- Chocolate-dipped meltaways. Dip half of each cookie in melted dark or white chocolate and let them set on parchment. The chocolate adds a glossy contrast to the powdered sugar.
- Citrus hint. Add 1 teaspoon of finely grated orange zest to the dough for a bright citrus lift that pairs well with peppermint.
- Almond or vanilla swap. Swap half the peppermint extract for almond extract to create a toasty, nutty warmth. Or use pure vanilla for a classically simple meltaway.
- Festive toppings. After rolling the dough balls, press a pinch of crushed candy cane into the top before baking for a striped finish. Or sprinkle a pinch of coarse sanding sugar for sparkle.
- Mini sandwich. Spread a thin layer of peppermint buttercream or chocolate ganache between two cookies for an elegant sandwich cookie.
Small changes can make these cookies fit a different mood or table. For afternoon coffee, I prefer the simple original. For a holiday platter, the chocolate-dipped version looks and tastes like a tiny gift.

Peppermint Meltaways
Ingredients
Cookie Ingredients
- 1 cup unsalted butter, softened Real butter is recommended for best flavor.
- 1/2 cup confectioners’ sugar Sift if lumpy for a smooth texture.
- 1/4 teaspoon salt
- 1 teaspoon peppermint extract Adjust based on desired peppermint strength.
- 2 cups all-purpose flour Can be substituted with gluten-free blend.
- 1/2 cup crushed peppermint candies Use a gentle hand to preserve texture.
- 1/2 cup confectioners’ sugar for dusting Dust while cookies are warm for best results.
Instructions
Preparation
- Preheat your oven to 350°F (175°C) and position a rack in the center.
- In a large bowl, cream together softened butter and 1/2 cup confectioners’ sugar until smooth.
- Beat on medium speed for 2 to 3 minutes until light and fluffy.
- Mix in salt and peppermint extract, scraping the sides of the bowl to ensure even flavor distribution.
- Gradually blend in the flour until well combined, adding it in two additions without overmixing.
- Fold in the crushed peppermint candies evenly through the dough.
Baking
- Roll the dough into walnut-sized balls and place them on a lined baking sheet, spaced 2 inches apart.
- Bake for 10-12 minutes, or until the bottoms are lightly golden while tops remain pale.
- Cool for about 5 minutes on the baking sheet before dusting with remaining confectioners’ sugar.
Notes
Nutrition
FAQs About Peppermint Meltaways
Can I make this ahead?
Yes. These cookies keep well. Bake them up to three days ahead and store in an airtight container. For longer storage, freeze baked cookies for up to three months. Thaw at room temperature before serving.
Can I substitute margarine or a plant-based butter?
You can, but the texture and flavor will change. Real unsalted butter gives the best melt-in-your-mouth texture. If you use a plant-based butter, choose one labeled for baking and expect a slightly different mouthfeel.
My cookies spread too much. What did I do wrong?
This usually happens when the butter is too warm or you over-creamed the butter and sugar. Chill the dough for 15 to 20 minutes before rolling if your kitchen is warm. Also check your baking temperature with an oven thermometer.
How do I keep the peppermint from watering down the dough?
Use crushed hard peppermint candies rather than peppermint syrup or a liquid. The candies add crunch without moisture. Also avoid overmixing after adding the candies so you do not break them down too finely.
Can I make these gluten-free?
Yes. Replace the all-purpose flour with a 1:1 gluten-free flour blend that contains xanthan gum. The texture will be slightly different but still tender and delightful. You may need to adjust bake time by a minute or two.
Conclusion
I hope this Peppermint Meltaways recipe brings your kitchen the same buttery joy it brings mine. They are small, easy to share, and full of quiet celebration, whether you pack them for a picnic, set them next to a teapot, or tuck a few into a gift box for a friend.
For a classic takes and a similar set of tips, you might also enjoy this detailed guide: Peppermint Meltaways Recipe: How to Make It. If you love a crunchy candy finish and pretty presentation ideas, this version offers charming photos and ideas: Peppermint Meltaways – Cookies for Days.
Until the next small sweet, thank you for letting me bake with you. I look forward to hearing how these meltaways filled your kitchen with warmth and good flavor.