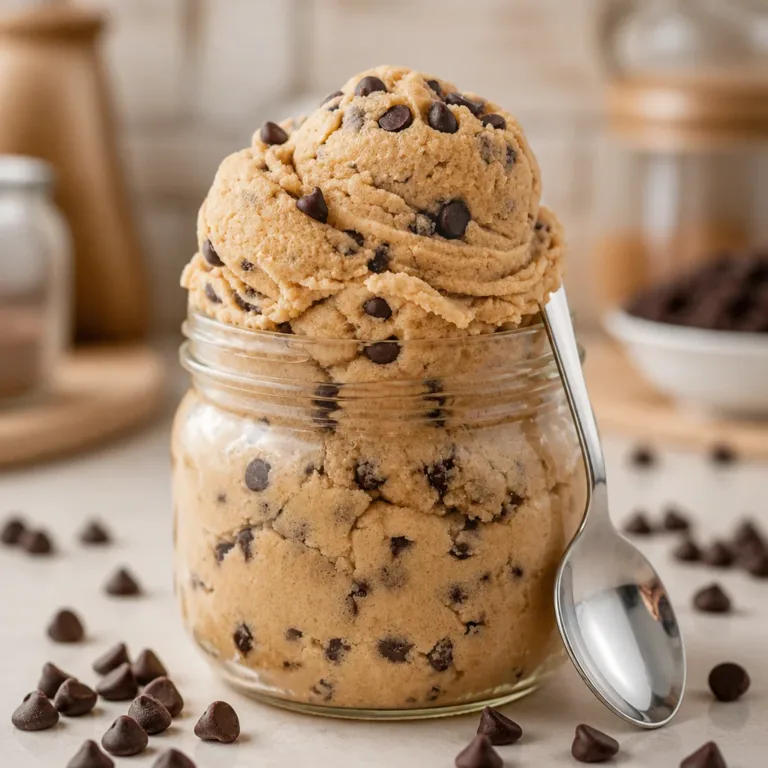
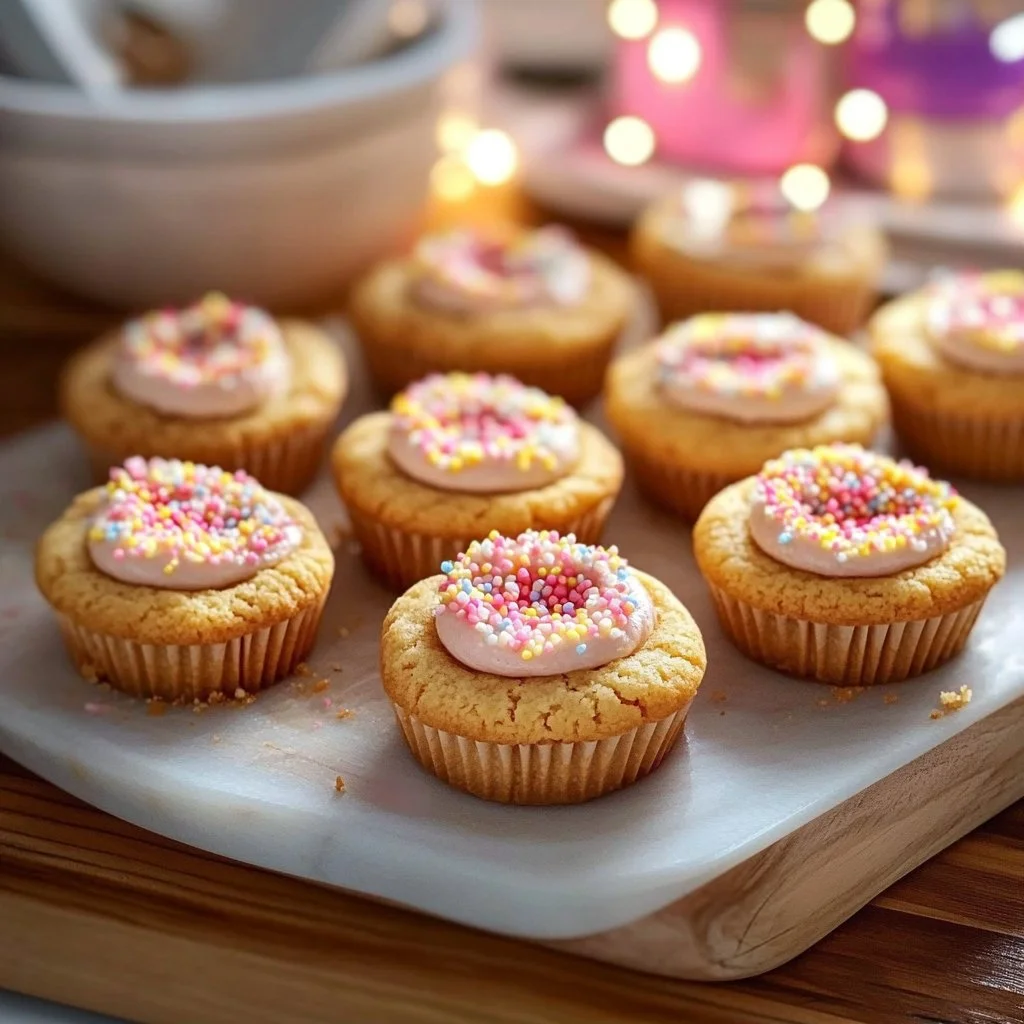
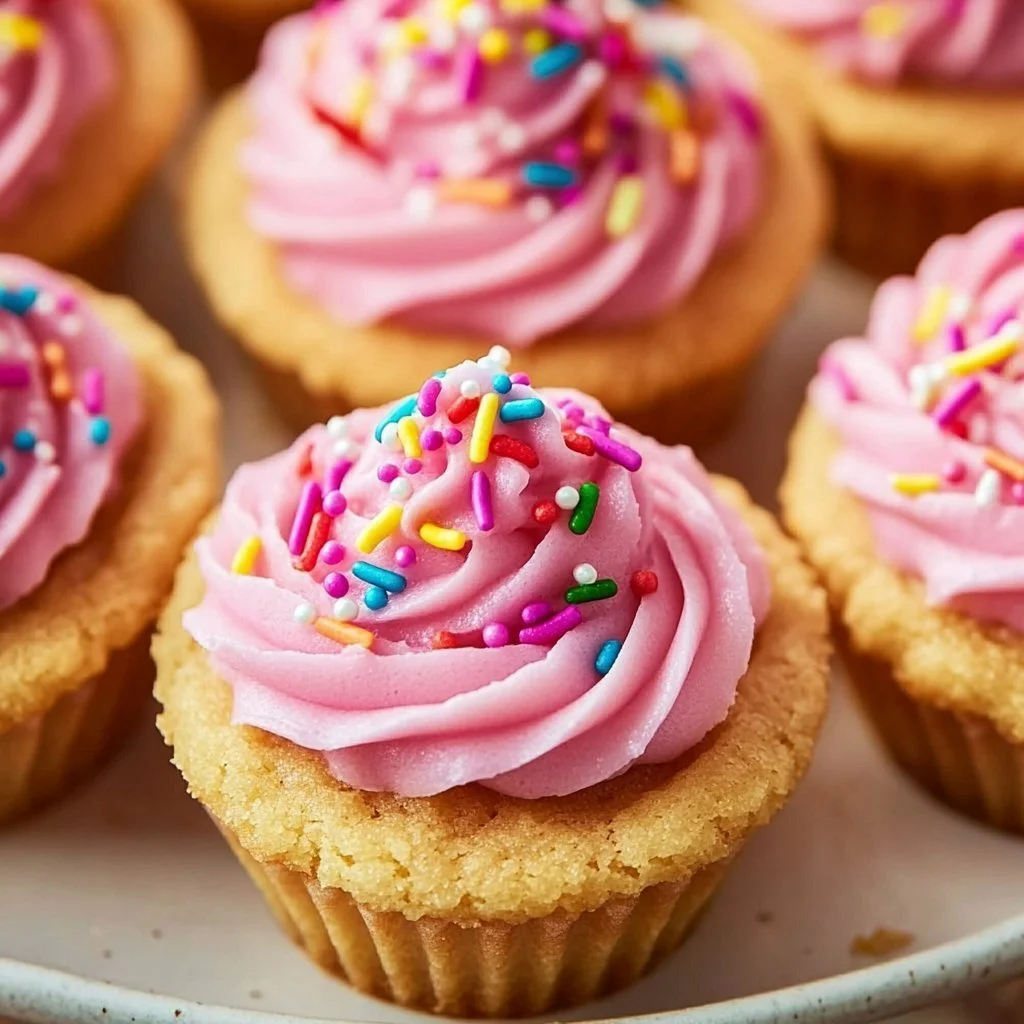
The kitchen smells like sugar and butter, and the kids are already hovering at the counter asking if they can lick the spoon. You set a timer, tell them “five minutes,” and go back to chopping something for dinner. Sugar Cookie Cups are the little dessert that makes everyone smile without a lot of work. They bake up like thick, soft sugar cookies with a hollow center that gets filled with creamy frosting and sprinkles. If you like simple dessert wins that still feel a little special, this one will be on repeat.
I like to pair a batch of these with a slow weeknight main. If you want an extra-simple cookie base for other treats, check out a straightforward version I rely on sometimes for speed: 3-ingredient sugar cookies they remind me how small swaps can save time and still taste great.
Why Sugar Cookie Cups Deserves a Spot in Your Weeknight Rotation
These cookie cups hit a sweet spot: they look special, but they act like a quick fix. You get the comfort of a classic sugar cookie with the fun of a mini cupcake shape. That means kids love them, friends notice them, and you do not need to spend an hour decorating each one.
They matter on busy nights because you can make a single pan and have dessert ready in about half an hour of active time. You can also freeze the baked shells and frost them later. That makes them great for planning ahead.
I also like that the recipe is forgiving. The dough is soft and easy to press into muffin tins. If you press a little more or less, you still get a tasty cup. For a richer flavor, try a batch with brown butter or a nutty twist like I sometimes do on the weekend: it reminds me of a warm bakery and a quiet Saturday morning with coffee and a book, like the time I tried a maple version that stole the show, similar to these cozy soft maple brown sugar cookies.
This is the kind of recipe that works whether you plan it or wing it. Keep flour on the counter, the mixer can be a whisk and elbow grease, and the kids can help press the dough and choose sprinkles. You get dessert and you get a small shared kitchen win.
How to Make Sugar Cookie Cups the Easy Way
“If it smells this good halfway through, you know dinner’s gonna be great.”
Here’s the basic idea before you get into the steps. Cream butter and sugar, add an egg and extracts, then mix in the dry ingredients until a soft dough forms. Press spoonfuls into muffin cups, bake until set with a touch of golden color, then press the centers while warm to form the cup. Finish with a quick cream cheese frosting and a scatter of sprinkles.
You are looking for a dough that is soft but not sticky. After baking, the edge should be pale golden while the center stays slightly lighter. That sign tells you the cookie will stay tender but hold shape when you press the center.
A fast flavor tip: if you want a deeper, richer note, brown the butter lightly first for a nutty scent. I do that for special occasions. If you want a buttery, simple profile that keeps things quick, follow the recipe as written. For a fun twist that plays with browned butter flavors, I use a different cookie base sometimes and it always gets compliments like my go-to for a deeper cookie flavor, the brown butter sugar cookies. It’s an easy swap if you have a few extra minutes.
Ingredients You’ll Need
3/4 cup salted butter (softened)
3/4 cup granulated sugar
1 large egg
1 1/2 teaspoons vanilla extract
1/2 teaspoon almond extract
2 cups all-purpose flour
1 teaspoon baking powder
1/2 teaspoon baking soda
sprinkles
2 ounces cream cheese (softened)
3 cups powdered sugar
1/4 cup butter
2 tablespoons milk
1/4 teaspoon vanilla extract
pink or red food coloring gel (optional)
Friendly note: no fancy equipment required. Use what you have. If your butter is a bit too cold, zap it for 5–10 seconds in the microwave to soften. If you do not have almond extract, skip it or add a little extra vanilla. Powdered sugar can be sifted or left as-is depending on how smooth you want the frosting. And don’t worry about matching every teaspoon exactly; these cookies are friendly that way.
If you like brown sugar notes, a small swap can add warmth try replacing a spoonful of granulated sugar with brown sugar. Or if you want to keep it ultra-simple, the list above gives you everything you need from the pantry.
Step-by-Step Directions
- Preheat oven to 350°F and grease 2 muffin pans with nonstick cooking spray.
Have the oven fully warmed; that first burst of heat helps the edges set quickly. - Cream together butter and sugar until light and fluffy.
Use a mixer or strong wrist and a wooden spoon. Scrape the bowl so everything mixes evenly. - Add egg and extracts, mix until smooth.
Beat until the mixture looks glossy and uniform. A little extra stirring gives a lighter texture. - In a separate bowl, whisk flour, baking powder, and baking soda.
This helps distribute the leavening so the cups bake evenly. - Combine wet and dry mixtures until a dough forms.
Mix just until incorporated. Overmixing can make the cookies tough, so keep it gentle. - Press 2 tablespoons of dough into each muffin cup.
Use slightly greased fingers or the back of a spoon. Press to cover the bottom and sides but leave a small hollow in the center. - Bake for 12 minutes and let cool for 15 minutes.
Look for a pale golden edge. The center should feel firm but not hard. Let them cool before the next step. - Press centers to form a cup shape after cooling.
Use the back of a spoon or a small measuring cup to press gently. If they have popped up too much, press while still a little warm. - For the frosting, beat cream cheese and butter until smooth, then add powdered sugar, vanilla, and milk to achieve desired consistency.
If you want a stiffer frosting, add less milk. For a silkier spread, add a splash more. Tint with a gel drop if you like pink or red. - Pipe frosting into cooled cookie cups and top with sprinkles. Enjoy!
A piping bag gives a neat finish, but a spoon works fine. Let the frosting set for a few minutes before serving.
A few quick tips tucked into the steps: when you press the dough into the pan, do not overfill. A level two tablespoons is right for a neat cup. If your cookie tops get too brown, lower the oven by 10 degrees and add a minute or two to the baking time. You can also use a silicone muffin pan for easier release.
If you want to freeze extras, stop after step 7 and freeze the baked shells on a tray. Once solid, move them to a freezer bag and frost later. These hold up well in the freezer for several weeks.
Serving Sugar Cookie Cups at the Table
These look great on a platter. Arrange them in lines or a loose circle so everyone can grab one without juggling plates. If you serve them family-style, put a small bowl of extra sprinkles or mini chocolates nearby for little hands to personalize.
For a casual crowd, pack them into small paper cups or cupcake liners. They travel well to potlucks or school events. I often put a batch into reusable meal prep boxes for a dessert treat after school; kids love opening a lid to a little frosting surprise.
If you want a more grown-up touch, top a few with a tiny sliver of candied orange or a sprinkle of flaky salt. That contrast of sweet frosting and a small sour or salty note makes them feel a bit fancier.
For a themed party, color the frosting or use seasonal sprinkles. I once did red and green for a holiday bake night and it took ten extra minutes for a lot of joy. If you are serving them with coffee or tea, add a small plate of plain cookies for contrast. They pair well with milk because the frosting is creamy and the cookie is tender.
If you are bringing these to a gathering, pack them flat in a single layer, or use a shallow container with parchment between layers. Transport them chilled so the frosting stays put. If you need a visual idea, I often pull inspiration from recipes that balance sweet and cozy flavors, like these brown sugar maple cookies, and adapt presentation ideas from there.
Storage & Reheat (No Soggy Leftovers)
Short-term storage: keep your frosted cups in an airtight container in the fridge for up to 3 days. Chill keeps the frosting firm and stops cream cheese from softening too much.
Room temperature: if you want to leave them out for a party, do so for up to 2 hours. After that, pop them back in the fridge. The cookie shell will stay fine, but the frosting holds up better when cool.
Freezing: freeze baked, unfrosted shells on a tray until solid, then move them to a freezer bag for up to 2 months. Thaw in the fridge before frosting. If you freeze them after frosting, be aware the frosting may change texture slightly; it still tastes great, but it will be softer.
Reheating: if you want a slightly warm cookie, skip the microwave. A short time in a 300°F oven (5–7 minutes) brings back a little freshness without making the filling run. The microwave works for one or two cups in a pinch, but it can make the cookie very soft.
A quick sanity rule: if your frosting softens too much at room temp, give it 15 minutes in the fridge before serving. That quick chill restores some structure and makes the cups easier to handle.
Got Leftovers? Make Them Work for You
Leftovers aren’t a punishment they’re tomorrow’s head start. Chop last night’s roasted veg into a quick omelet, tuck shredded chicken into warm tortillas, or stash a soup portion in the freezer for a lazy-night rescue. Store smart, reheat gently, and keep the add-ins simple so flavors stay bright. Want more no-stress ideas? See more easy tips here.
Quick Tips & Shortcuts
- Pressing hack: use a small measuring cup or the rounded back of a spoon to press centers for uniform cups.
- Mix by hand: if you do not have a mixer, a whisk and good arm work. Cream the butter and sugar longer to get light texture.
- Frosting speed: put frosting into a zip-top bag, snip a tiny corner, and squeeze like a DIY piping bag.
- Make ahead: bake shells and freeze them. Frost only when you need them for a fresher finish.
- Clean up: grease the muffin pan with a thin layer of butter instead of spray to avoid sticky residue that sticks to some sprays. Line the bottom with small parchment circles for easy lift-out.
I learned the measuring-cup press trick the hard way after guests arrived and my spoon-pressed centers looked lopsided. The small cup gives even depth and makes the finished tray look like you actually planned it.
Variations That Work
Add jam cups: place a small dollop of raspberry or apricot jam in the center instead of frosting for a thumbprint-style treat.
Citrus twist: fold a teaspoon of lemon or orange zest into the dough for a fresh brightness. Add a tiny bit of citrus juice to the frosting and cut the powdered sugar by a couple of tablespoons to keep it from getting too stiff.
Chocolate dip: half-dip cooled cookie cups into melted chocolate and let set before frosting the center for a neat two-tone look.
Nutty crunch: sprinkle chopped toasted pecans or almonds over the frosting. Toasting the nuts first brings out a deeper flavor.
Maple or brown sugar: swap a small amount of granulated sugar for brown sugar and use maple extract in the frosting for fall vibes. If you love that deep, cozy flavor, try combining this idea with my notes on softer brown sugar cookies for inspiration from similar recipes like brown sugar cinnamon cookies.
Mini cheesecake style: add an extra ounce of cream cheese and reduce the powdered sugar by 1/2 cup to get a tangy cheesecake-like filling. Chill thoroughly for a firmer bite.
Use cookie cutters: if you want a flat cookie instead of a cup, roll the dough and cut shapes. The dough is versatile enough for both.
These swaps keep things simple and let you play without wrecking the base recipe. Start small with one variation until you find a favorite.
Ethan’s Notes From the Kitchen
I make these when life feels tight for time but I want something that looks homemade. They are forgiving, so I do not stress when my mixing is a little off or my oven runs a degree hot.
When my kids were younger, we turned frosting time into a quick craft. They picked sprinkles, I piped, and we all agreed that a few extra sprinkles never hurt anyone. That small ritual often turned a rough day into a quiet, happy five minutes.
If you have picky eaters, keep a plain frosted batch and a decorated batch. Plain is often the first to disappear, so make a few extra.
Don’t overthink the extracts. A half teaspoon of almond lifts the flavor without shouting. If you are unsure, use the vanilla only and add a tiny pinch of salt to boost the sweetness.
When I test recipes, I bake one pan for checking and tweak time or oven temp from there. That way I do not ruin the whole batch if my oven has an off day. Try that if you are baking for a crowd.
Lazy Cook’s Pro Tips
Smart tweaks make all the difference. Line sheet pans with parchment to skip the scrub, stash minced garlic in the fridge for instant flavor, and double-batch sauces so you’ve always got a quick fix ready for busy nights. These small habits keep weeknight cooking simple without losing an ounce of taste. See more time-saving tips here and make dinner feel easy again.
FAQs About Sugar Cookie Cups
Can I make this ahead?
Yes. Bake the shells and freeze them. Thaw in the fridge and frost when you are ready. They actually taste very fresh when you do it this way.
Do I have to use cream cheese in the frosting?
No. You can use all butter frosting if you prefer. Cream cheese adds a tang that balances the sweetness, but buttercream keeps things simple.
Why are my centers collapsing?
If you press too hard while they are hot, the center can collapse. Let them cool for several minutes and press gently. If your oven runs very hot, reduce the temperature by 10 degrees and add a minute to prevent overbaking.
Can I make the dough ahead of time?
Yes. Keep the dough in the fridge for up to 24 hours wrapped tightly. Let it warm up slightly before pressing into the pan.
How do I keep the frosting from getting runny?
Chill the frosting briefly if it looks too soft. Use less milk for a thicker consistency and pipe only when the shells are fully cool.
A Final Bite
If your family ends up licking the tray, well, that is a success in my kitchen. These Sugar Cookie Cups are easy to fit into a busy week, and they still feel like a dessert worth smiling about. Keep a pan in the freezer, grab a tub of frosting in a pinch, and let the little things add up to a simple, sweet win. You’ve got this.

Sugar Cookie Cups
Ingredients
For the cookie base
- 3/4 cup salted butter (softened) If butter is too cold, microwave for 5–10 seconds.
- 3/4 cup granulated sugar Can swap a spoonful with brown sugar for warmth.
- 1 large egg
- 1 1/2 teaspoons vanilla extract Can add extra if omitting almond extract.
- 1/2 teaspoon almond extract Optional; can skip if you prefer.
- 2 cups all-purpose flour
- 1 teaspoon baking powder
- 1/2 teaspoon baking soda
- sprinkles For decoration.
For the frosting
- 2 ounces cream cheese (softened)
- 3 cups powdered sugar Sift if desired for smoothness.
- 1/4 cup butter Softened.
- 2 tablespoons milk Adjust for desired consistency.
- 1/4 teaspoon vanilla extract
- pink or red food coloring gel (optional) For tinting frosting.
Instructions
Preparation
- Preheat oven to 350°F and grease 2 muffin pans with nonstick cooking spray.
- Cream together butter and sugar until light and fluffy.
- Add egg and extracts, mix until smooth.
- In a separate bowl, whisk flour, baking powder, and baking soda.
- Combine wet and dry mixtures until a dough forms.
- Press 2 tablespoons of dough into each muffin cup.
Baking
- Bake for 12 minutes and let cool for 15 minutes.
- Press centers to form a cup shape after cooling.
Frosting
- Beat cream cheese and butter until smooth, then add powdered sugar, vanilla, and milk to achieve desired consistency.
- Pipe frosting into cooled cookie cups and top with sprinkles.
Notes
Nutrition
What’s Cooking in Your Kitchen?
Tried this recipe your own way? I want to see it. Snap a quick pic and tag us, or drop a comment with what you tweaked. Lazy cooking works best when we swap ideas and your spin might be the next Lazy Meal Prep favorite.
Post your photo and tag @lazy_mealprep I’ll share my favorites in stories.