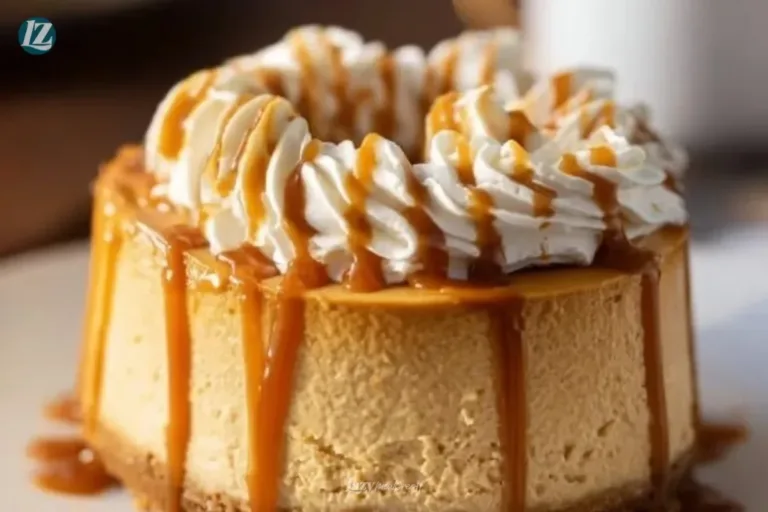
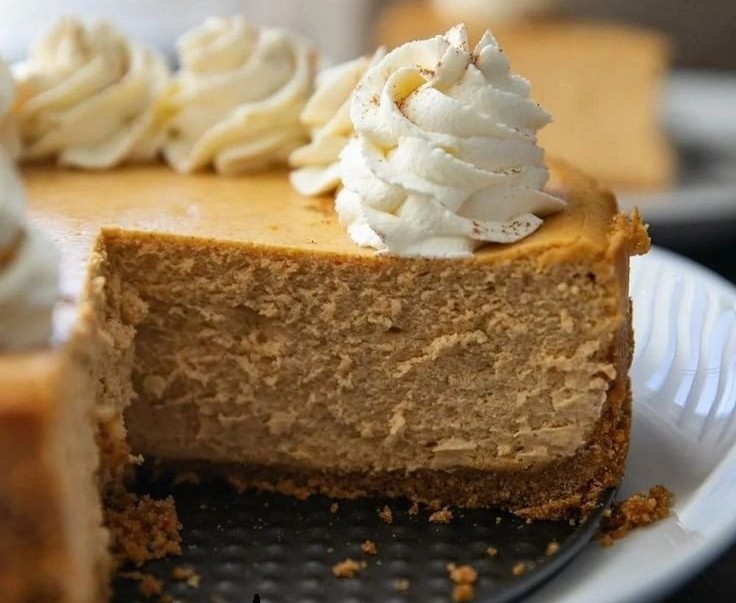
The warm scent of butter and vanilla drifts through the kitchen as the oven hums, and for a moment everything slows. The top of a just-baked pumpkin cheesecake blisters into a glossy, golden skin, and the room fills with a cozy, spicy perfume that says quiet celebration. This is a dessert for small gatherings, for birthdays that feel like home, and for slow afternoons with coffee and a soft blanket.
The Sweet Story Behind Pumpkin Cheesecake (no water bath)
There is something about pumpkin and cream cheese together that feels like a warm hug. I remember making my first pumpkin cheesecake on a rainy autumn afternoon, the radio low and a mug of tea at my elbow. The filling was buttery-soft and melt-in-your-mouth, with the tang of cream cheese balanced by the quiet spice of cinnamon and pumpkin pie seasoning.
This version skips the water bath but still gives you a creamy, crack-light top and golden edges that make each slice look homemade and elegant. It’s the kind of dessert you bring to a birthday, serve at a coffee chat, or enjoy for a quiet night in with someone you love. The texture is dense yet tender, with a sheen on top that invites a fork and promises comfort.
If you like a little extra texture in the base, try swapping some graham crumbs for gingersnap crumbs for a spicier bite. For a quick, no-fuss inspiration while you prep, I sometimes glance at a simple no-bake idea to keep things cozy, like this no-bake pumpkin cheesecake I love for busy afternoons.
Bringing Pumpkin Cheesecake (no water bath) Together
“When the kitchen smells like vanilla and butter, you know something special’s baking.”
Before you sift spices and set out your pans, here is a short overview of what to expect. You will start with a golden crust that hugs the filling. The batter is creamy and smooth, and when you tap the bowl you will see tiny bubbles pop. Look for a center that is just-set and a top that has a glossy, warm finish.
Visual cues matter. Aim for a crust that is gently browned after the first quick bake. When the cheesecake comes out after the long bake it will still have a little wobble in the center. That wobble means it is silk inside. After the rest and refrigeration, it firms to a perfect sliceable texture with buttery-soft edges and melt-in-your-mouth creaminess.
Ingredients You’ll Need
Gather these staples before you begin. Use real butter if you can. It makes every bite worth it.
- 1 3/4 cups graham cracker crumbs (see note below on using gingersnaps)
- 5 tablespoons granulated sugar
- 6 tablespoons butter (melted)
- 32 ounces cream cheese (at room temperature; 4-8 oz. packages); Philadelphia brand preferred
- 1 1/4 cups granulated sugar
- 2 teaspoons vanilla extract
- 1 cup pure pumpkin (Libby’s brand preferred)
- 1 teaspoon pumpkin pie spice
- 1 teaspoon cinnamon
- 4 large eggs (at room temperature)
- Any desired cheesecake toppings (list each one per line)
- Whipped cream
- Toasted pecans
- Caramel sauce
- Cinnamon sugar
- Freshly whipped maple cream
Tip: Let your cream cheese sit on the counter for at least an hour so it mixes smoothly. Cold lumps will keep the batter from being glossy. If you prefer deeper spice notes, add a pinch of ground cloves or nutmeg. For a crispier crust, bake a little longer in the initial step until the edges look golden.
If you are in the mood to add a little crunch on the side, roast some pumpkin seeds for a snack while the cheesecake chills. I often pair a slice with a small bowl of roasted seeds done right, like these air-fryer pumpkin seeds I reach for when company comes.
Step-by-Step Directions
- Place oven racks in the center of the oven. Preheat oven to 350 degrees.
In a medium sized bowl, stir graham cracker crumbs together with sugar and melted butter until well incorporated and mixture looks like damp sand. Using the bottom of a measuring cup, press crust into the bottom and half way up the sides of a 9-inch springform pan. Bake 7 minutes.
Remove from oven and set aside. - Reduce oven temperature to 325 degrees.
In a large bowl or bowl of a stand mixer, mix cream cheese 30 seconds until smooth.
Scrape the sides and bottom of the bowl and add in granulated sugar. - Stir until smooth.
Stir in vanilla, pumpkin, pumpkin pie spice and cinnamon.
Scrape the sides and bottom of bowl and mix again to ensure the cheesecake batter is getting evenly mixed. - Crack eggs into a liquid measuring cup and using a fork, beat until well scrambled.
With the mixer on low, slowly pour in the eggs into the cream cheese mixture and stop stirring once egg has been incorporated.
Remove bowl from mixer and scrape the sides and bottom again, ensuring the entire mixture is smooth. - If there are a few small lumps, try to fold them in using the rubber scraper.
Once the batter is completely smooth and ready, tap the bowl on the counter for 30-45 seconds to remove as many air bubbles as possible.
You should see them popping on the surface as you tap the bowl. - Pour filling into the center of the graham cracker crust and gently smooth the top.
Will be very full!
Bake for 40 minutes at 325 degrees. - Reduce temperature to 250 degrees and continue cooking for 45 minutes more.
Once this time has elapsed, turn oven off and keep cheesecake inside for another 30 minutes for some carryover cooking without opening the oven door.
Crack oven door to let cheesecake cool slowly for one hour before removing. - At this point, cheesecake should be slightly warm.
Bring cheesecake to room temperature on the counter (3-4 hours) before covering with plastic wrap and transferring to the fridge.
Refrigerate until chilled completely (6 hours to overnight). - To serve, open springform pan and remove collar.
Decorate as desired.
Dip a sharp knife into hot water, wipe off any excess water and slice. I like to dip my knife in water between each slice to get really clean-looking pieces.
Texture tips: Aim for a top that is glossy and just set. Do not rush the cooling. Slow cooling keeps cracks to a minimum and helps the center finish gently. If you see a small crack, hide it with a ribbon of caramel or a circle of whipped cream.
Timing tips: Room temperature eggs blend more seamlessly. If your kitchen is very cold, let the batter sit uncovered for a few minutes before pouring into the crust so the butter and filling relax into a smooth pour.
If you prefer a slightly firmer slice, give the cheesecake a full 24 hours in the fridge. The flavor deepens and the spices settle in a way that feels indulgent.
Serving Pumpkin Cheesecake (no water bath) With Love
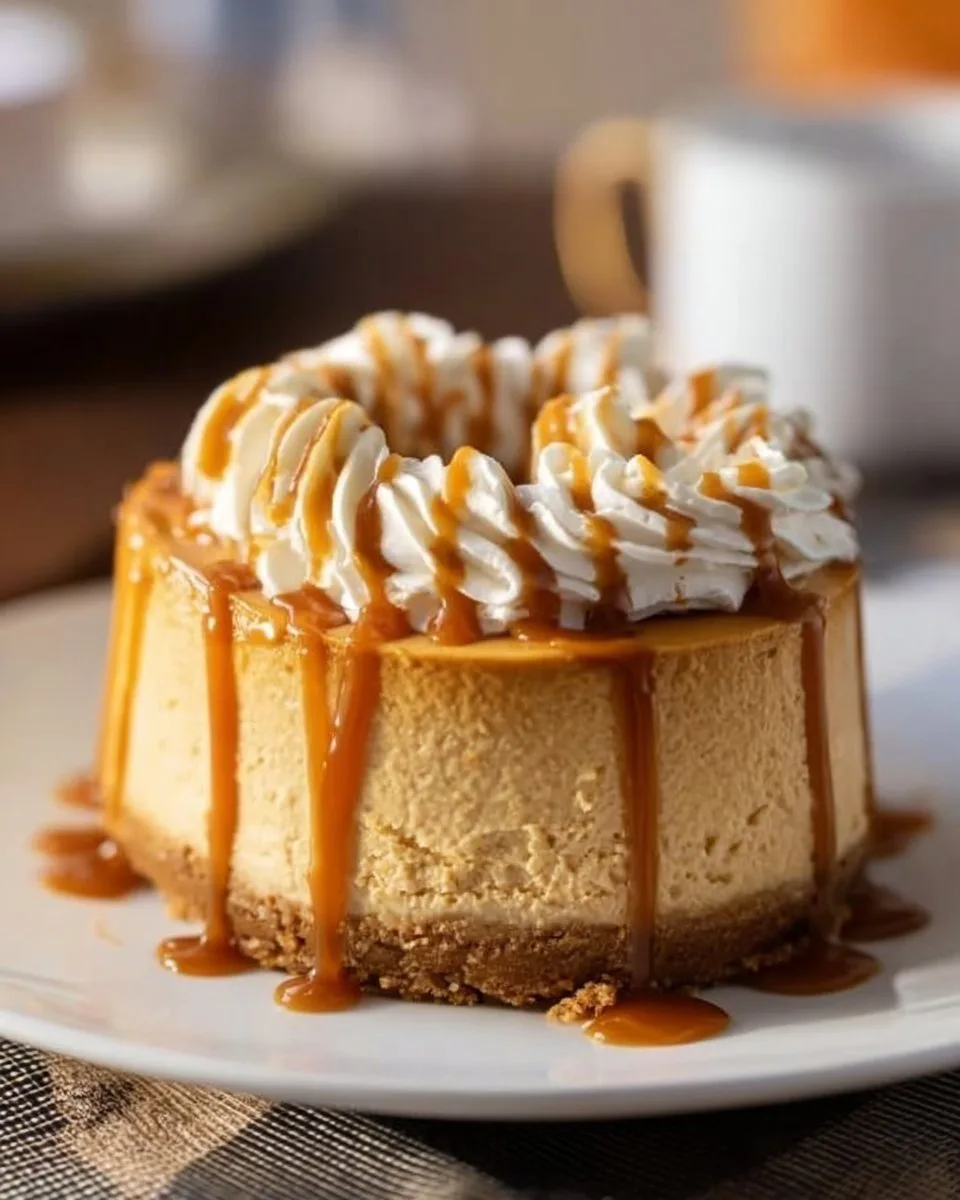
When you are ready to serve, think small moments of joy. A thick slice on a simple white plate looks beautiful. A dusting of cinnamon on top, a small quenelle of whipped cream, and a drizzle of caramel make each forkful feel like a gentle celebration.
Serve this cheesecake with a strong cup of coffee for a mid-morning treat or a mug of spiced tea for a cozy afternoon. For birthdays, top with a ring of toasted pecans and a few whole walnuts for texture. For a quiet night in, pair a slice with a scoop of vanilla ice cream and watch the cold meet the buttery-soft center.
For a lighter pairing, try fresh apple slices or a bowl of poached pears on the side. A small spoonful of cinnamon-sugar roasted fruit complements the pumpkin notes without overwhelming them.
If you want a slightly different presentation, make mini cheesecakes in a muffin tin using this same batter and a shorter bake time. I sometimes turn this into a handheld dessert for potlucks and find that guests always notice the golden edges and creamy interior.
Looking for a chewy pumpkin-chocolate accompaniment? I sometimes bake cookies alongside and serve a tiny cookie with each slice. If you love cookies as I do, try these pumpkin chocolate chip cookies for a snack board feel: pumpkin chocolate chip cookies.
Storage & Reheat Tips
To keep your cheesecake perfect, cover it with plastic wrap and store in the refrigerator.
It will stay fresh and creamy for up to 5 days. For best texture, slice only what you plan to serve.
Wrap leftover slices tightly to protect against fridge odors.
Freezing: You can freeze the cheesecake for up to 2 months.
Wrap the whole cake in plastic wrap and then in aluminum foil.
Thaw overnight in the refrigerator before serving.
Reheating: Cheesecake is best served chilled, but if you prefer it slightly warmed, let the slice sit at room temperature for 20 minutes.
You can also give a single slice 10 seconds in a microwave on low power to take the chill off.
Avoid overheating. Warmth should be gentle so the texture remains buttery-soft.
If you plan to transport the cheesecake, use a rigid container and keep it chilled with ice packs. A little care will keep the crust crisp and the filling silky.
Susan’s Baking Notes
- Room temperature ingredients matter. Cold cream cheese or eggs make a lumpy batter.
Let items sit out for about an hour before starting.
You will get a silkier filling and fewer lumps. - Use a good, sturdy springform pan.
I prefer a 9-inch pan with a tight-sealing bottom for this recipe.
Lining the pan bottom with parchment makes release easier. - Tap the bowl before you pour.
Tapping expels air bubbles that cause tunnels and uneven texture.
Watch for small bubbles popping on the surface. - Don’t rush the cooling.
The oven-off rest and the slow cooling prevent cracks and make the filling set evenly.
Plan ahead so the cheesecake has time to rest and chill. - Clean knife slices.
Dip your knife in hot water and wipe between cuts.
This keeps slices neat and the presentation refined.
For a small, seasonal treat, roast pumpkin seeds and offer them on the side. These little bites add a satisfying crunch that contrasts the creamy filling. If you want a cozy snack idea while things cool, try this baked bagel seed recipe that makes a lovely nibble: bagel pumpkin seeds.
Flavor Twists & Variations
If you want to play with flavors, here are gentle changes that keep the heart of this cheesecake but give it a new voice.
- Maple Pecan: Add 1/4 cup pure maple syrup to the filling and top with toasted pecans. The maple note rounds the pumpkin.
- Brown Butter Crust: Brown the butter before adding to the crumbs for a deeper, nutty base.
- Ginger Snap Crust: Swap graham crumbs for gingersnap crumbs for a spicier, more robust crust.
- Chocolate Swirl: Fold in 1/2 cup melted bittersweet chocolate in a ribbon pattern for a marbled look.
- Lemon Lift: Add a teaspoon of lemon zest to the crust for a bright counterpoint to the pumpkin spice.
For a lighter take, try making mini cheesecakes and topping each with a spoon of apple crisp. I sometimes use a small tartlet and finish with a crumble on the side for a pretty fall dessert board. If you enjoy small cheesecakes, these apple crisp mini cheesecakes are a lovely companion for a holiday table: apple crisp mini cheesecakes.
Pumpkin Cheesecake
Ingredients
For the crust
- 1 3/4 cups graham cracker crumbs can substitute some with gingersnap crumbs for extra flavor
- 5 tablespoons granulated sugar
- 6 tablespoons butter melted
For the filling
- 32 ounces cream cheese at room temperature; Philadelphia brand preferred
- 1 1/4 cups granulated sugar
- 2 teaspoons vanilla extract
- 1 cup pure pumpkin Libby’s brand preferred
- 1 teaspoon pumpkin pie spice
- 1 teaspoon cinnamon
- 4 large eggs at room temperature
Toppings (optional)
- Whipped cream
- Toasted pecans
- Caramel sauce
- Cinnamon sugar
- Freshly whipped maple cream
Instructions
Preparation
- Place oven racks in the center of the oven. Preheat oven to 350°F.
- In a medium-sized bowl, stir graham cracker crumbs together with sugar and melted butter until well incorporated.
- Using the bottom of a measuring cup, press crust into the bottom and halfway up the sides of a 9-inch springform pan. Bake for 7 minutes.
- Remove crust from oven and set aside.
Mixing the filling
- Reduce oven temperature to 325°F.
- In a large bowl or bowl of a stand mixer, mix cream cheese for 30 seconds until smooth.
- Scrape the sides and bottom of the bowl and add in granulated sugar, mixing until smooth.
- Stir in vanilla, pumpkin, pumpkin pie spice, and cinnamon.
- Scrape the sides and bottom of the bowl and mix again.
- Crack eggs into a liquid measuring cup and beat until well scrambled.
- With the mixer on low, slowly pour in the eggs into the cream cheese mixture and stop stirring once the egg has been incorporated.
- Remove the bowl from the mixer and scrape the sides and bottom again.
- Tap the bowl on the counter for 30-45 seconds to remove as many air bubbles as possible.
- Pour filling into the center of the graham cracker crust and gently smooth the top.
Baking the cheesecake
- Bake for 40 minutes at 325°F.
- Reduce temperature to 250°F and continue cooking for 45 minutes more.
- Once this time has elapsed, turn oven off and keep cheesecake inside for another 30 minutes.
- Crack oven door to let cheesecake cool slowly for one hour before removing.
- Bring cheesecake to room temperature for 3-4 hours before covering with plastic wrap and transferring to the fridge.
- Refrigerate until chilled completely for 6 hours to overnight.
Serving
- To serve, open springform pan and remove collar.
- Decorate as desired.
- Use a hot knife for slicing for clean pieces.
Notes
Nutrition
FAQs About Pumpkin Cheesecake (no water bath)
Can I make this ahead?
Yes. Most desserts taste even better after resting overnight when the flavors meld perfectly. Make the cheesecake a day ahead, chill fully, and take it out 30 minutes before serving.
Why no water bath?
A water bath helps prevent cracks but is not necessary for a dense, creamy pumpkin cheesecake. The key is the lower bake temperature, the oven-off rest, and slow cooling. These steps give the filling gentle, even heat without a bath.
My top cracked. What can I do?
Small cracks are normal and can be disguised with toppings. A ring of whipped cream, a ribbon of caramel, or a scatter of toasted seeds hides imperfections and looks elegant.
Can I use canned evaporated milk or heavy cream?
You can add a splash of heavy cream (2 to 4 tablespoons) for extra silkiness, but it is not required. The pumpkin and cream cheese create a lush texture on their own.
How do I keep the crust from getting soggy?
Bake the crust for the initial 7 minutes as instructed and press it firmly into the pan. A tight crust seal helps it hold against the filling’s moisture. If you worry about sogginess, brush the crust with a thin layer of melted chocolate and let it set before pouring in the batter.
A Final Sweet Note
I hope this Pumpkin Cheesecake (no water bath) brings your kitchen the same buttery joy it brings mine. There is a quiet, simple luxury in each slice: golden edges, a glossy top, and a creamy center that tastes of spice and warmth.
This cheesecake is for small celebrations and gentle moments. Serve it for a birthday with family, a coffee chat with a friend, or a cozy night in when you want something comforting that feels a little special. The make-ahead ease and timeless flavor mean you can plan ahead and enjoy more of the moment.
Thank you for letting me share this recipe from my kitchen. If you make it, I would love to hear how it turned out and any small twists you tried.
Conclusion
For another no-bake approach and ideas that pair well with a chilled slice, see this Pumpkin Cheesecake (no water bath!) – Lauren’s Latest for inspiration and presentation ideas.
If you prefer a classic textured recipe with step-by-step photos and helpful visuals, this Pumpkin Cheesecake – Sugar Spun Run is a lovely resource to compare techniques and find presentation tips.