
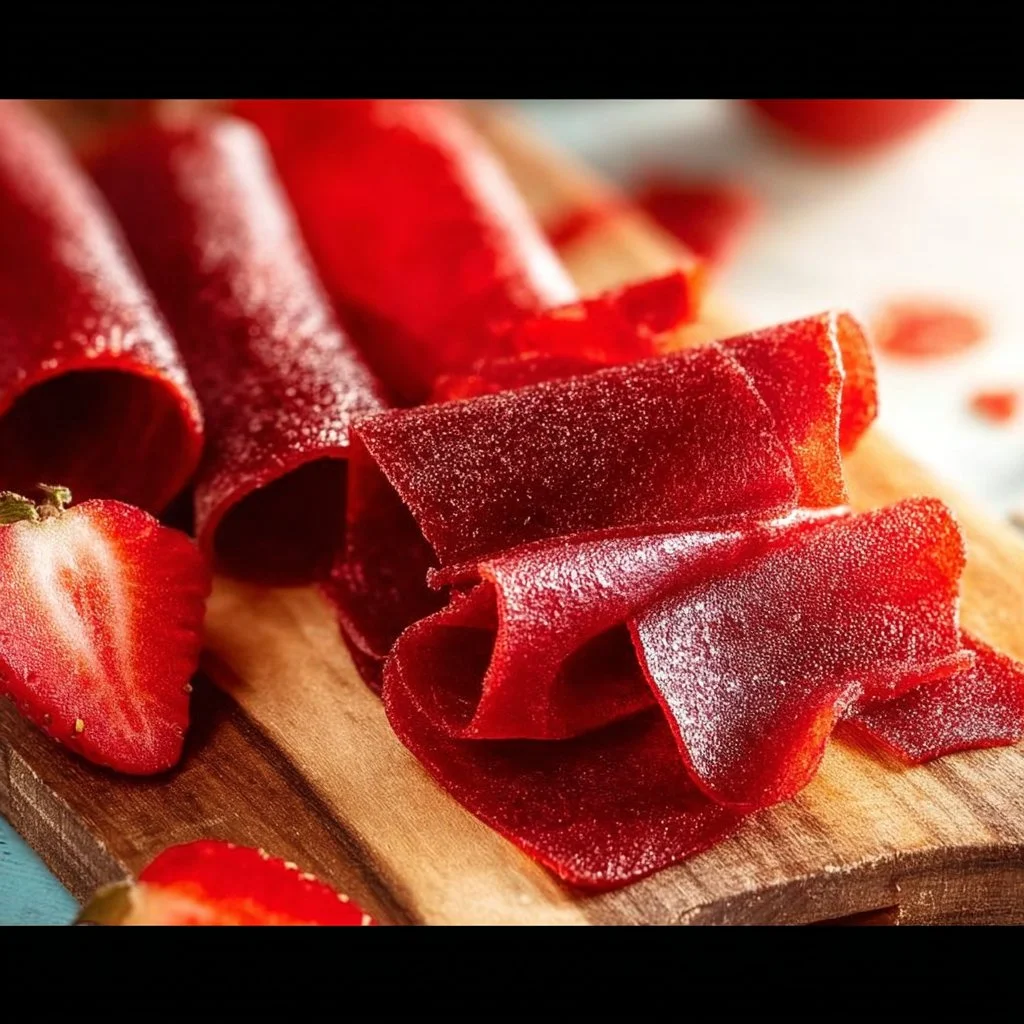
I can still smell the strawberries when I close my eyes: warm from the sun, a little sweet, and bright like a child’s laugh. I remember the mornings when the kids would pull their chairs up to the counter and watch the red puree spread across the pan. We would talk about small things while the house filled with that slow, fruity scent. That quiet togetherness is why I make Homemade Strawberry Fruit Roll-Ups the way I do, and how I hope this recipe brings a similar calm into your kitchen. Try a simple three-ingredient version if you want a quick start.
Why Homemade Strawberry Fruit Roll-Ups Still Feels Like Home
This recipe holds little marks of family life. It began as an answer to lunchboxes full of store sweets and grew into a ritual. I think of the first time I spread the puree for my oldest and watched their brow lift when the smell filled the kitchen. That small moment felt like giving them a piece of home.
When the fruit shimmers in the pan, I am reminded of summers with baskets of berries and sticky fingers. The sound of the blender hums like quiet company. From there, the slow pull of the cooled fruit leather at the edge of the paper becomes almost a small triumph. These roll-ups carry the kind of comfort that keeps returning, no matter the season.
I place the pan on the counter and call the kids. We fold towels and talk about our day. Sometimes we add a sprinkle of cinnamon. Sometimes someone peels a slice and tastes it with a grin. Those small changes made it our own, and they remind me that recipes are not just formulas; they are memories that grow with every batch. For a fuller homemade guide, see my other take on fruit roll-ups that keeps things simple and honest: my classic page on homemade fruit roll-ups.
How to Make Homemade Strawberry Fruit Roll-Ups
“Every time I stir this pot, it smells just like Sunday at home.”
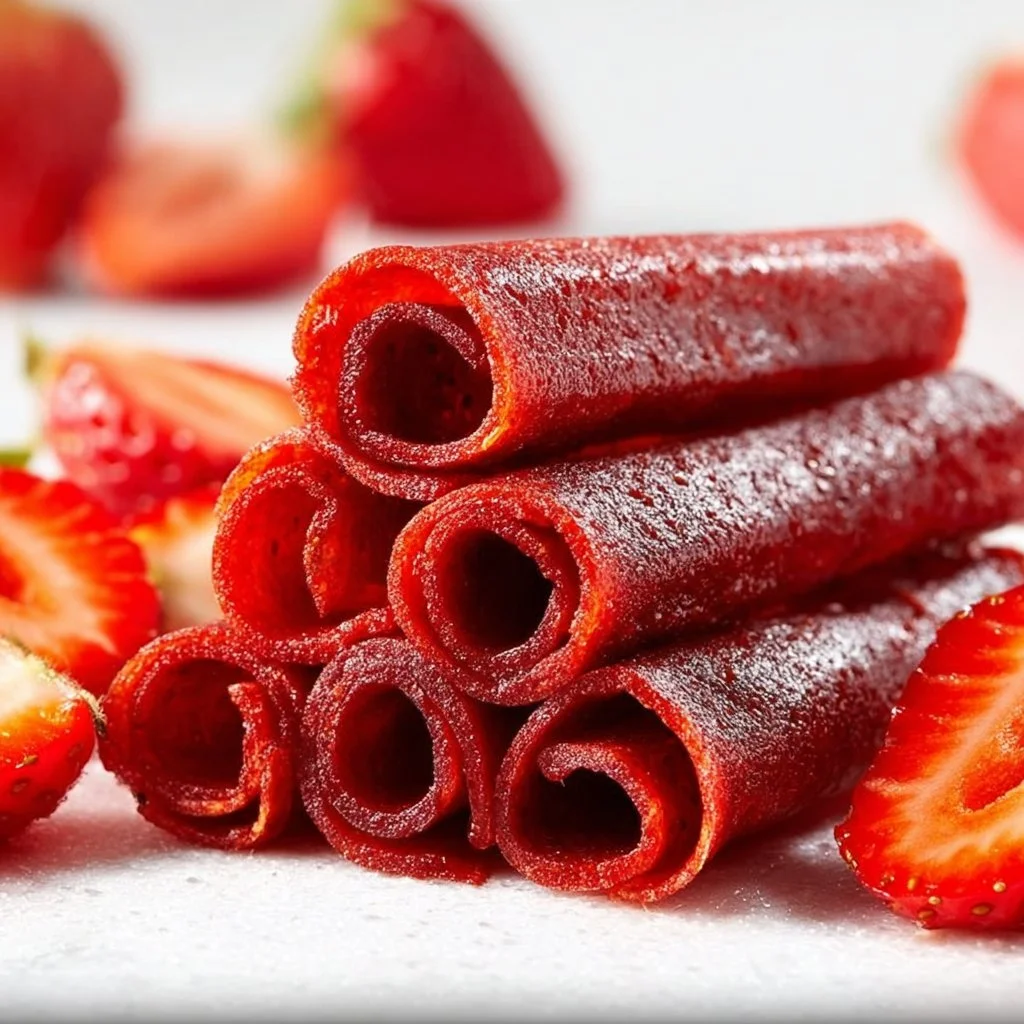
Before we list the ingredients, take a moment to imagine color and texture. The strawberries start bright and glossy, a deep red that almost glows. As they cook down, they darken a touch and become thicker, like jam but silkier. You will hear the low bubble of the puree as it loses water and concentration builds. These are the cues that tell you the roll-up will be soft, not brittle.
A gentle overview helps when you are busy. You will blend, spread, and dry. The drying is patient work; the oven hums while you make tea or read a book. Look for a surface that is no longer sticky and peels away easily. When the edges take on a faint caramel hue, you are close. Then, once cooled, you cut and roll for lunchboxes, snacks, or a little treat after dinner.
If you are new to this, set aside an afternoon when you are near the kitchen. The timing is forgiving, and the hands-on parts are short. The long part is waiting, which is a kind of gentle company.
Ingredients You’ll Need
- 3 cups fresh strawberries
- 1 tablespoon honey (optional)
- 1 tablespoon lemon juice
A few warm side notes: if you love a cozy spice, add a dash more cinnamon. If your berries are very sweet, skip the honey. Use the freshest strawberries you can find; they make a difference in both scent and flavor. If your puree seems thin, let it reduce a little longer. For related strawberry baking ideas, I often pair these roll-ups with treats like easy homemade strawberry muffins when friends come over.
Step-by-Step Directions
- Preheat your oven to 170°F (77°C) and line a baking sheet with parchment paper.
I like to set the sheet on a rack at eye level so the oven hum feels steady. Take a breath and enjoy the warm scent that will arrive later. - In a blender or food processor, puree the strawberries until smooth. If desired, add honey for sweetness and lemon juice for flavor.
Blend until the mixture shines and looks thick, like a soft jam. Taste it; adjust a touch more lemon if the berries need brightness. - Spread the strawberry puree evenly on the prepared baking sheet.
Use a spatula to smooth it into a thin, even layer about 1/16 to 1/8 inch thick. Watch for tiny bubbles that rise and pop; they tell you it is thinning out as it dries. - Bake in the preheated oven for about 6-8 hours or until the fruit leather is no longer sticky.
Check at the six-hour mark. The top should be matte, not glossy, and the edges will lift a little from the paper. If it still feels tacky, leave it a bit longer. - Allow to cool, then peel off the parchment and cut into strips. Roll them up and store in an airtight container.
Peel slowly so the sheet comes away clean. Use kitchen scissors or a sharp knife to cut even strips. Roll them tight or loose, however your family likes them.
These steps are simple, but I want to highlight a few texture cues that I have learned over years of making this for my family. The puree should spread smoothly and not be so thin that it runs like juice. The dried surface should feel like soft leather when touched lightly. If you see any bubbling or rough spots, those small patches can be trimmed away before rolling.
Timing will shift by a little with different ovens and humidity. I have found that on a humid day the drying takes longer by an hour or two. On a dry afternoon, it may be closer to six hours. Trust your touch and your eyes; those senses are as valuable as the clock.
Serving Homemade Strawberry Fruit Roll-Ups With Family Warmth
We serve these with a kind of relaxed joy. Lay them in a wooden bowl on the table and let everyone choose their roll. For a Sunday snack, I pair them with simple cheese and water crackers. For school lunches, I slip a roll-up into a small waxed paper square and tuck it beside a sandwich.
Sometimes we add thin slices of banana inside before rolling for a sweet surprise. Other times I sprinkle a few sesame seeds or a whisper of powdered sugar on top for a tea-party feeling. The kids love cutting them into fun shapes with cookie cutters when they are slightly cooled but still flexible.
For a picnic, I wrap them in parchment and pack them with a small jar of peanut butter for dipping. The chew of the fruit and the soft salt of the peanut butter make a small, quiet celebration. And when friends come by, I place a stack on a little tray with coffee and we chat while the roll-ups bring a bright, home-baked note to the table.
Storing Homemade Strawberry Fruit Roll-Ups for Tomorrow
Keep these roll-ups in an airtight container at room temperature for up to two weeks. They keep best when wrapped individually in parchment or plastic wrap. If your kitchen is very warm, store them in the refrigerator to keep them from getting too soft.
If you want longer storage, you can freeze them. Place sheets between layers of parchment and put them in a freezer bag. They thaw quickly on the counter and taste almost fresh because the fruit is the only ingredient.
When I pack them for the week, I like to let them sit overnight. The flavor deepens and they become chewier in a good way. The lemon brightens after a day, and the honey settles into the strawberry, which makes them taste a little more like the bakery treats we love but kinder and simpler. For a sweet family twist that borrows from dessert ideas, I sometimes pair a batch with a slice of our favorite home cake as a small after-dinner treat. If you want ideas on how to pair them with sweet breads, I find this recipe page helpful: a simple homemade strawberry cake.
Little Kitchen Notes
- Substitutions: You can swap honey for maple syrup or skip the sweetener if your berries are very ripe. I do this in late summer when the berries are so sweet they almost taste like candy.
- Prep shortcuts: Puree the strawberries the night before and store the puree in the fridge. Spread and dry the next day to save time. I often do this when I know the oven will be busy with other baking.
- Texture cues: If the fruit leather peels too easily and snaps, it is too thin. If it stays sticky, it needs more drying time. Aim for a tender, flexible leather.
- Cleanup: Use a silicone spatula to scrape the blender clean and pour the puree directly onto the parchment. If any sugar sticks to the blender, soak it in warm water immediately; it comes clean faster.
- Kid helpers: Give small tasks to the children like measuring the lemon juice, helping spread the puree, or labeling the storage container. It keeps hands busy and makes them proud of the food they helped make.
These notes come from years of making this recipe with friends and family. Each little change taught me something new about timing, texture, and how to keep the process kind and simple.
Family Variations on Homemade Strawberry Fruit Roll-Ups
Our family loves small, gentle changes. One version adds a handful of blueberries to the puree for a darker color and a berry mix that tastes like summer after rain. Another version adds a pinch of ginger for a warm, surprising note that older kids and adults like.
If you live where stone fruits are plentiful, try mixing a peach or apricot with the strawberries at a one-to-one ratio. The roll-ups gain a gentle, floral sweetness. In cooler months, a little orange zest in the puree brightens things up. We rarely use sugar because the fruit shines on its own, but when berries are tart, a spoonful of honey keeps the flavor friendly for little mouths.
For a festive change, spread a thin layer of nut butter over the dried leather before adding a second strip of dried fruit and rolling them together. This makes a sandwich-style roll-up that is richer and perfect for a picnic.
These small twists keep the recipe lively without making it complicated. They let you keep the heart of the dish while making it feel new.
FAQs About Homemade Strawberry Fruit Roll-Ups
Can I bake this a day ahead?
Yes, and honestly, it tastes even better the next day when the flavors settle together. Store it in an airtight container overnight for a softer, deeper taste.
How thin should I spread the puree?
Aim for about 1/16 to 1/8 inch thick. Too thin will make it brittle; too thick will lengthen drying time and make it chewier.
Can I use frozen strawberries?
Yes. Thaw them fully and drain any extra water before pureeing. You may need a little more drying time.
Is honey necessary?
No. Honey is optional. If your strawberries are ripe and sweet, you can skip it.
How do I prevent sticking?
Use parchment paper and let the dried leather cool fully before peeling. If it still sticks, slide a thin spatula under the edge to help lift it gently.
A Final Thought
Conclusion
I hope this Homemade Strawberry Fruit Roll-Ups brings your kitchen the same quiet joy it brings mine. If you want a step-by-step take from another home cook with a similar heart, I like this helpful write-up from Fifteen Spatulas: Strawberry Fruit Roll Ups (Homemade, Real Fruit) – Fifteen Spatulas. For a short, three-ingredient approach that is fast and bright, this simple guide is a good companion: 3-Ingredient Homemade Strawberry Fruit Roll-Ups.
Baking, in my kitchen, is mostly about making room for small conversations. These roll-ups are a gentle way to feed those moments. Roll one up, hand it to someone you love, and listen to the small sigh of contentment. That sound is what keeps me coming back to the stove and the berry basket, season after season.

Homemade Strawberry Fruit Roll-Ups
Ingredients
Main Ingredients
- 3 cups fresh strawberries Use the freshest strawberries for the best flavor.
- 1 tablespoon honey Optional, skip if strawberries are sweet enough.
- 1 tablespoon lemon juice Adds brightness to the flavor.
Instructions
Preparation
- Preheat your oven to 170°F (77°C) and line a baking sheet with parchment paper.
- In a blender or food processor, puree the strawberries until smooth. Add honey and lemon juice if desired.
- Blend until the mixture shines and thickens, tasting and adjusting lemon juice as needed.
- Spread the strawberry puree evenly on the prepared baking sheet, making a thin layer about 1/16 to 1/8 inch thick.
Drying
- Bake in the preheated oven for about 6-8 hours or until the fruit leather is no longer sticky.
- Check at the six-hour mark; the top should be matte, and the edges will lift slightly from the paper.
Finishing Touches
- Allow the roll-up to cool, then peel off the parchment and cut into strips.
- Roll the strips up and store in an airtight container.