There’s a familiar hush that falls over my kitchen when the smell of something sweet and minty rises from the oven. My kids stop whatever they are doing and come floating in like little referees checking the play. Peppermint Meltaways have that magic: warm, buttery cookies that melt on your tongue with a cool peppermint finish. It’s the kind of cookie that makes a busy weeknight feel special without stealing the whole evening.
I keep a batch of these on standby for last-minute dessert saves, holiday cookie swaps, and those moments when the family needs a quick, comforting treat. This recipe is straightforward, fast, and forgiving. You’ll be surprised how little effort it takes to impress a table full of hungry people. If you like easy wins in the kitchen, you’ll want this in your pocket. For a quick reference while you’re prepping, check out this easy guide to Peppermint Meltaways at Lazy Meal Prep for a snapshot of the process.
Why Peppermint Meltaways Deserves a Spot in Your Weeknight Rotation
Peppermint Meltaways matter because they fit neatly into the chaos of family life. They do not demand precision baking skills or a mountain of gadgets. You can have dough mixed and in the oven in under 20 minutes. The payoff is tender, delicate cookies that taste like a holiday memory without the fuss.
These cookies are also forgiving if you make small substitutions. Swap peppermint extract for vanilla if kids prefer milder flavors. Use dairy-free butter if someone in the house needs it. They travel well, freeze well, and make a solid contribution to cookie plates or school bake sales. You get a feel-good dessert that looks and tastes special with very little cleanup.
They are also a great tool for teaching kitchen skills. Rolling dough, chilling, and a gentle dusting of powdered sugar are small, satisfying tasks kids can handle. I’ve taught my youngest how to roll the little balls and gently press them. They feel proud. I get to keep things moving. That’s a win for everyone.
How to Make Peppermint Meltaways the Easy Way
“If it smells this good halfway through, you know dinner’s gonna be great.”
The big picture: cream the butter and sugars, add extracts and flour, shape the dough into small balls, bake until barely golden, then roll in powdered sugar once cool enough. The cookies should look pale and slightly cracked on top. When you bite in, they should melt and leave a soft peppermint whisper.
Texture cues: the surface should stay light in color. If they start to brown, your oven is running hot. Aroma cues: the kitchen should smell buttery and faintly minty. If the peppermint is strong before baking, you added too much extract. Start with the amount listed and adjust next time.
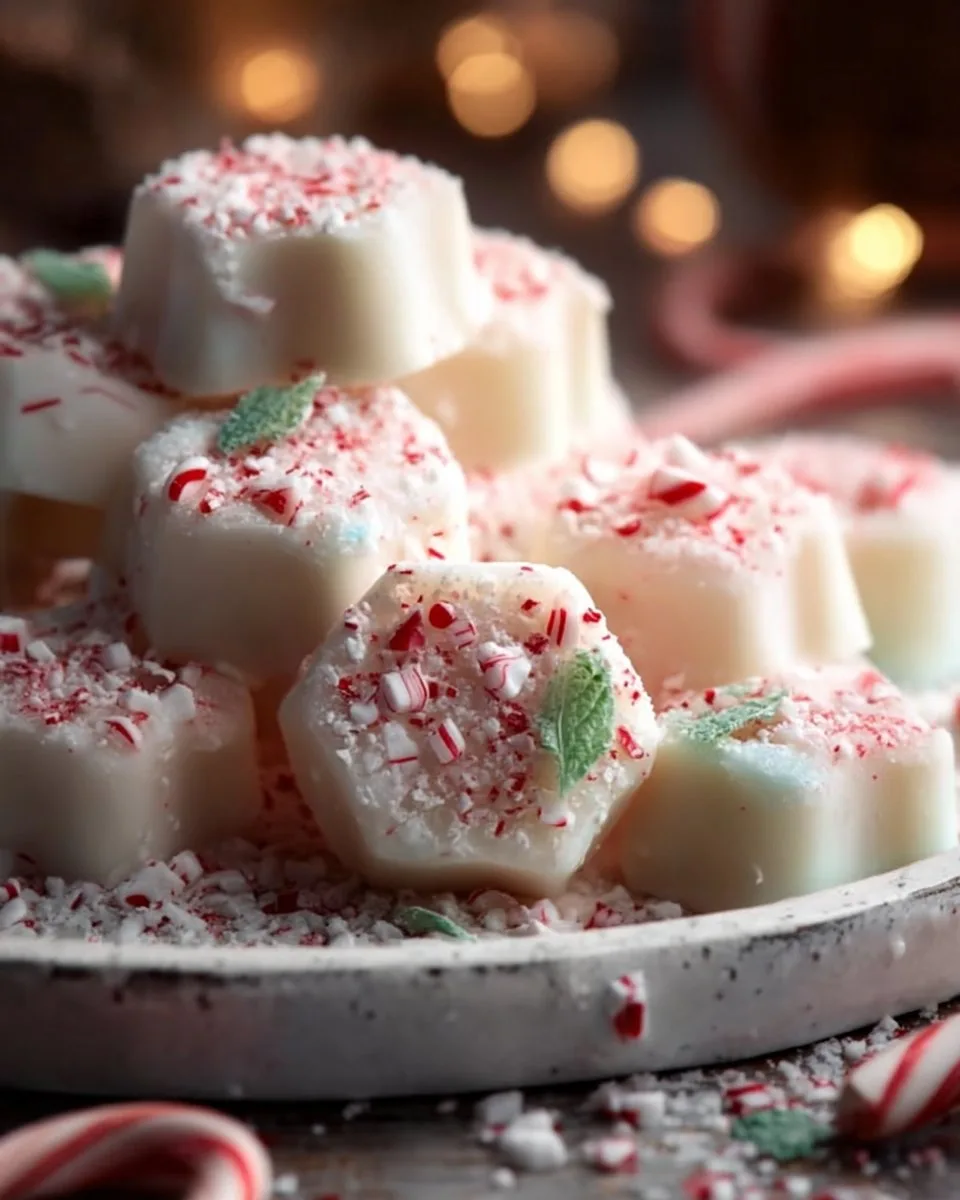
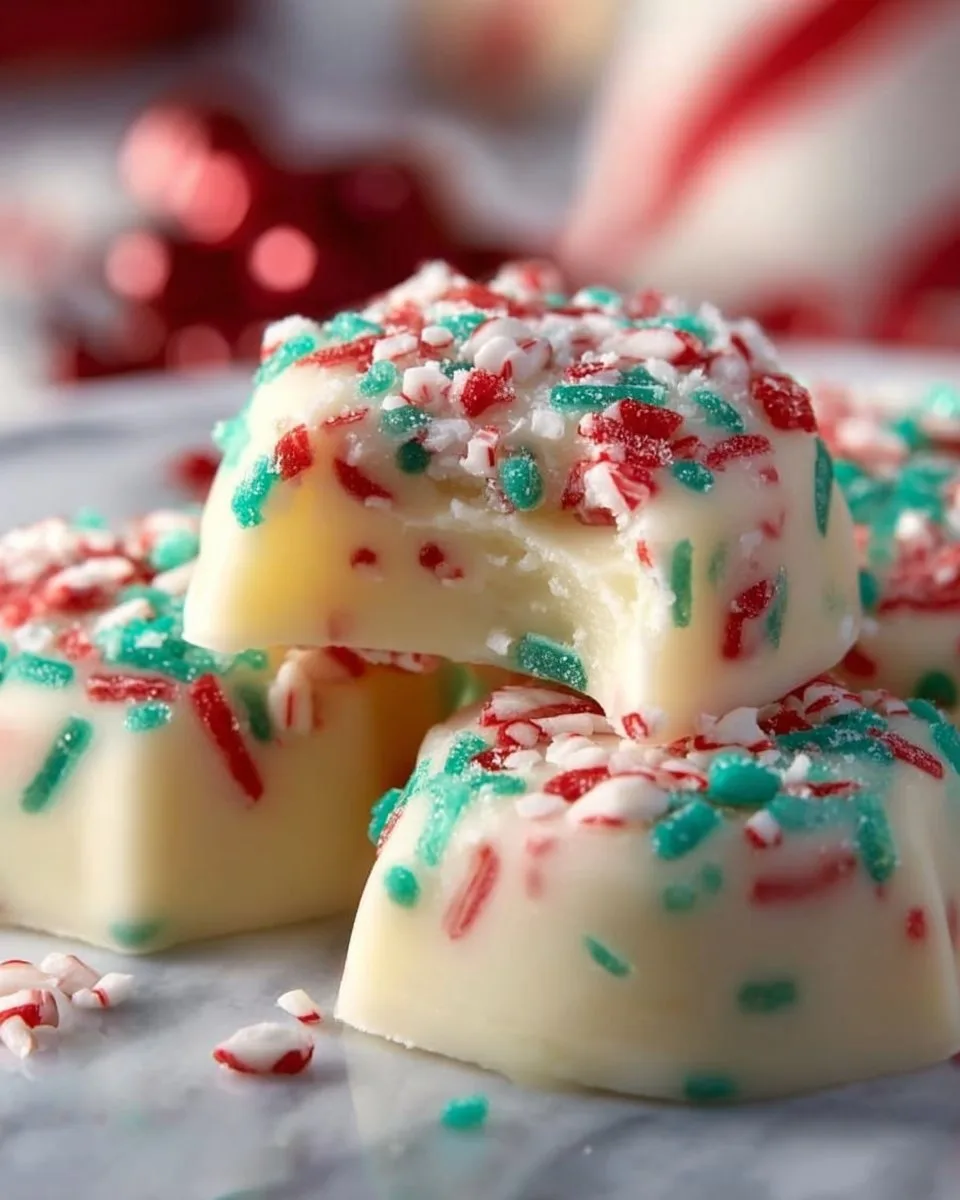
Color cues: these are meant to be pale, almost snow-like cookies. The powdered sugar finish makes them look like little winter pillows. If you want a festive pop, sprinkle a few crushed peppermint candy pieces on top after the powdered sugar, but keep the base cookie delicate.
Ingredients You’ll Need
1 cup unsalted butter, softened (Bring to room temperature for easier mixing.)
1/2 cup powdered sugar (Additional for dusting after baking.)
1/4 cup granulated sugar (Adds sweetness and texture.)
2 cups all-purpose flour (Can use gluten-free flour as a substitute.)
1/4 teaspoon salt (Enhances the sweetness.)
1 teaspoon peppermint extract (Can be replaced with vanilla extract for a different flavor.)
1/4 teaspoon vanilla extract (For added depth of flavor.)
Additional powdered sugar (For a finishing touch.)
Notes on ingredients: don’t overcomplicate this. Use good, real butter when you can it makes a difference in the mouthfeel. But if you only have margarine or a plant-based stick, you can still get good results in a pinch. For powdered sugar, sift it if it’s clumpy. The vanilla is there to round the mint out; it’s a small detail that matters. And yes, you’ll want that extra powdered sugar for the final dusting. Don’t skip it.
I like to keep a bag of powdered sugar, a small bottle of peppermint extract, and a tub of butter in the fridge around December. Little habits like that save time when a craving hits or when last-minute guests drop by.
Step-by-Step Directions
Preparation:
- Preheat the oven to 350°F. Line a baking sheet with parchment paper or a silicone mat.
Tip: If you use parchment, you can reuse it for several trays that day to save cleanup time. - In a medium bowl, cream the softened butter with the powdered sugar and granulated sugar until light and fluffy.
Tip: Use a hand mixer or stand mixer for 1–2 minutes. If you’re doing it by hand, keep stirring until it’s smooth and pale. - Add the peppermint extract and vanilla extract. Mix briefly until combined.
Tip: Don’t overmix once the extracts are added; you want the dough tender, not tough. - Add the flour and salt. Stir until the dough just comes together. It will be soft but not sticky.
Tip: If the dough feels too crumbly, add a teaspoon of milk or water. If too sticky, dust with a little flour.
Baking:
- Roll the dough into 1-inch balls and place them about 2 inches apart on the prepared baking sheet.
Tip: Use a small cookie scoop to keep the sizes even. Even sizes bake more evenly. - Bake for 10–12 minutes. The edges should look set and the bottoms should be just barely starting to color.
Tip: Avoid baking until golden brown. These cookies are best when they stay pale. - Remove from the oven and let the cookies sit on the hot pan for 2 minutes. Transfer to a cooling rack and let cool for 5 minutes.
Tip: Rolling them in powdered sugar while they are very warm can make the sugar wet and clumpy. Wait until they are warm, not piping hot. - Once cooled to warm, toss the cookies in the additional powdered sugar until well coated. Let them finish cooling before serving.
Tip: For the classic look, do one final light dusting right before you serve.
A few process notes: timing in ovens varies. If this is your first batch, set a timer at 9 minutes and check. You’re aiming for a pale color and a soft center. They will firm as they cool. Also, chilling the shaped dough for 15 minutes before baking can help the cookies hold their shape if your kitchen is very warm.
Serving Peppermint Meltaways at the Table
Peppermint Meltaways are best when they look simple and inviting. Arrange them on a platter with a few sprigs of fresh mint or a scattering of crushed peppermint for a festive look. Serve family-style so everyone can pick their favorites. They pair beautifully with a glass of cold milk, a cup of strong coffee, or a steaming mug of cocoa.
For holiday gatherings, place a small bowl of extra powdered sugar on the side for guests to add more if they like. I also like to serve these with little bowls of dark chocolate ganache or caramel for dipping. You do not need to overdo it. The cookie shines on its own.
If you want to pack cookies for neighbors or last-minute treats, stack them in a small box separated by parchment paper to keep them from sticking. They travel well and stay tender the next day. For a more playful pairing, make a peppermint-themed platter with other sweet bites. For inspiration on similar peppermint treats, you can peek at this quick idea for a Quick Christmas Peppermint Pie that goes great on a dessert table.
Storage & Reheat (No Soggy Leftovers)
Short-term storage: Store cooled Peppermint Meltaways in an airtight container at room temperature for up to 5 days. Put a small piece of parchment between layers to prevent sticking. Don’t refrigerate them cold can make the texture firmer and less melt-in-your-mouth.
Freezing: You can freeze unbaked dough balls or baked cookies. For unbaked dough, shape the balls and freeze on a tray until solid. Transfer to a freezer bag for up to 3 months. When ready, bake from frozen, adding a couple of minutes to the baking time.
Reheating: If you want to revive a stored cookie, warm it in a 300°F oven for 5–7 minutes. The oven brings back the gentle crisp and the soft center. The microwave will warm them faster, but can make them a touch gummy. If you must microwave, do a short burst and let them rest for 30 seconds.
Honest tip: they are best fresh. But if life hands you leftovers, warming them briefly in the oven will get you close to just-baked joy.
Quick Tips & Shortcuts
- Use a small cookie scoop. It saves time and gives consistent cookies. No guesswork, fewer ruined batches.
- Swap extracts carefully. If peppermint is strong for your family, try half peppermint and half vanilla. That balances the flavor without losing the minty spark.
- Make a double batch and freeze half. You’ll have fresh-feeling cookies with half the work next time.
- Use parchment paper. It speeds cleanup and prevents any scorching on the bottom of the cookies.
- Clean as you go. While the first tray bakes, wash the mixing bowl and tools. It keeps the kitchen manageable and reduces stress.
Try this trick: if you’re short on time, shape the dough into a log, chill it, and slice into rounds. They bake a touch faster and still taste great. I use this when I’m multitasking dinner and homework.
For another quick peppermint option to pair with these, take a look at Soft Christmas Peppermints for an easy extra treat to add to your cookie plate.
Variations That Work
Change the flavor: Substitute half the peppermint extract with almond extract for a rich, nutty background note. You’ll be surprised how good this is.
Add chocolate: Fold in 1/4 cup finely chopped dark chocolate or white chocolate chips for pockets of goo. If you do this, reduce the flour by a tablespoon or two if the dough seems stiff.
Make them sandwich-style: Spread a thin layer of chocolate ganache or peppermint buttercream between two cookies for a little upgrade.
Make them gluten-free: Use a 1:1 gluten-free flour blend that contains xanthan gum and follow the recipe exactly. The texture should stay tender.
Roll in toppings: Press a few crushed peppermint candies into the tops after baking for a bit of crunch and color. Be careful too many candies can overpower the delicate texture.
Lower-sugar option: Reduce granulated sugar to 2 tablespoons and increase powdered sugar dusting if you want a less sweet cookie that still feels indulgent.
Lighten up: Use a light butter or butter alternative if you need to reduce saturated fat. The texture will change slightly, but flavor remains pleasant for family treats.
Family crowd-sourced idea: My cousin likes adding a teaspoon of instant espresso powder to the dough. It deepens the chocolate if you do the chocolate chip variation and complements the mint surprisingly well.
FAQs About Peppermint Meltaways
Can I make this ahead?
Yes. The dough can be made and refrigerated for up to 48 hours. Bring it back to room temperature slightly before rolling. You can also freeze dough balls for longer storage.
Do these cookies need to be chilled?
Not strictly. You can bake right after shaping. Chilling helps with shape and handling if your kitchen is warm, but it is not required.
What if I don’t have peppermint extract?
Vanilla works fine and gives a classic, comforting cookie. If you have candy canes, crush a small amount and fold them into the dough for natural peppermint flavor.
Are these kid-friendly?
Very. Kids can help roll the dough, press a thumbprint if you want to add jam, or dust the powdered sugar. Keep an eye on the peppermint extract amount for little ones.
How do I keep them from falling apart?
Don’t overbake and avoid too much flour. The dough should come together but not be dry. If it is crumbly, add a teaspoon of milk to bring it together.
A Final Bite
If you’re looking for a low-stress cookie that looks like you spent more time than you did, Peppermint Meltaways are your friend. They are forgiving, quick, and bring a little holiday cheer any time of year. I love how kids can help without turning the kitchen into a construction zone. Keep it simple, focus on texture, and remember: cookies are supposed to be shared.
If your family licks the plate clean, don’t say I didn’t warn you. You’ve got this. Bake, share, laugh, and enjoy the tiny minty victories.
Conclusion
If you want another take on the classic method, see the detailed version at Peppermint Meltaways Recipe: How to Make It for additional tips and photos.
For a playful riff and flavor ideas, check out Peppermint Meltaways – Cookies for Days to compare notes and get inspired.

Peppermint Meltaways
Ingredients
Main ingredients
- 1 cup unsalted butter, softened Bring to room temperature for easier mixing.
- 1/2 cup powdered sugar Additional for dusting after baking.
- 1/4 cup granulated sugar Adds sweetness and texture.
- 2 cups all-purpose flour Can use gluten-free flour as a substitute.
- 1/4 teaspoon salt Enhances the sweetness.
- 1 teaspoon peppermint extract Can be replaced with vanilla extract for a different flavor.
- 1/4 teaspoon vanilla extract For added depth of flavor.
- additional powdered sugar for a finishing touch
Instructions
Preparation
- Preheat the oven to 350°F and line a baking sheet with parchment paper or a silicone mat.
- In a medium bowl, cream the softened butter with the powdered sugar and granulated sugar until light and fluffy.
- Add the peppermint extract and vanilla extract, mixing briefly until combined.
- Add the flour and salt, stirring until the dough just comes together; it will be soft but not sticky.
Baking
- Roll the dough into 1-inch balls and place them about 2 inches apart on the prepared baking sheet.
- Bake for 10–12 minutes; the edges should look set and the bottoms should be barely starting to color.
- Remove from the oven and let the cookies sit on the hot pan for 2 minutes before transferring to a cooling rack to cool for 5 minutes.
- Once cooled to warm, toss the cookies in the additional powdered sugar until well coated.
Notes
Nutrition
What’s Cooking in Your Kitchen?
Tried this recipe your own way? I want to see it. Snap a quick pic and tag us, or drop a comment with what you tweaked. Lazy cooking works best when we swap ideas and your spin might be the next Lazy Meal Prep favorite.
Post your photo and tag @lazy_mealprep I’ll share my favorites in stories.