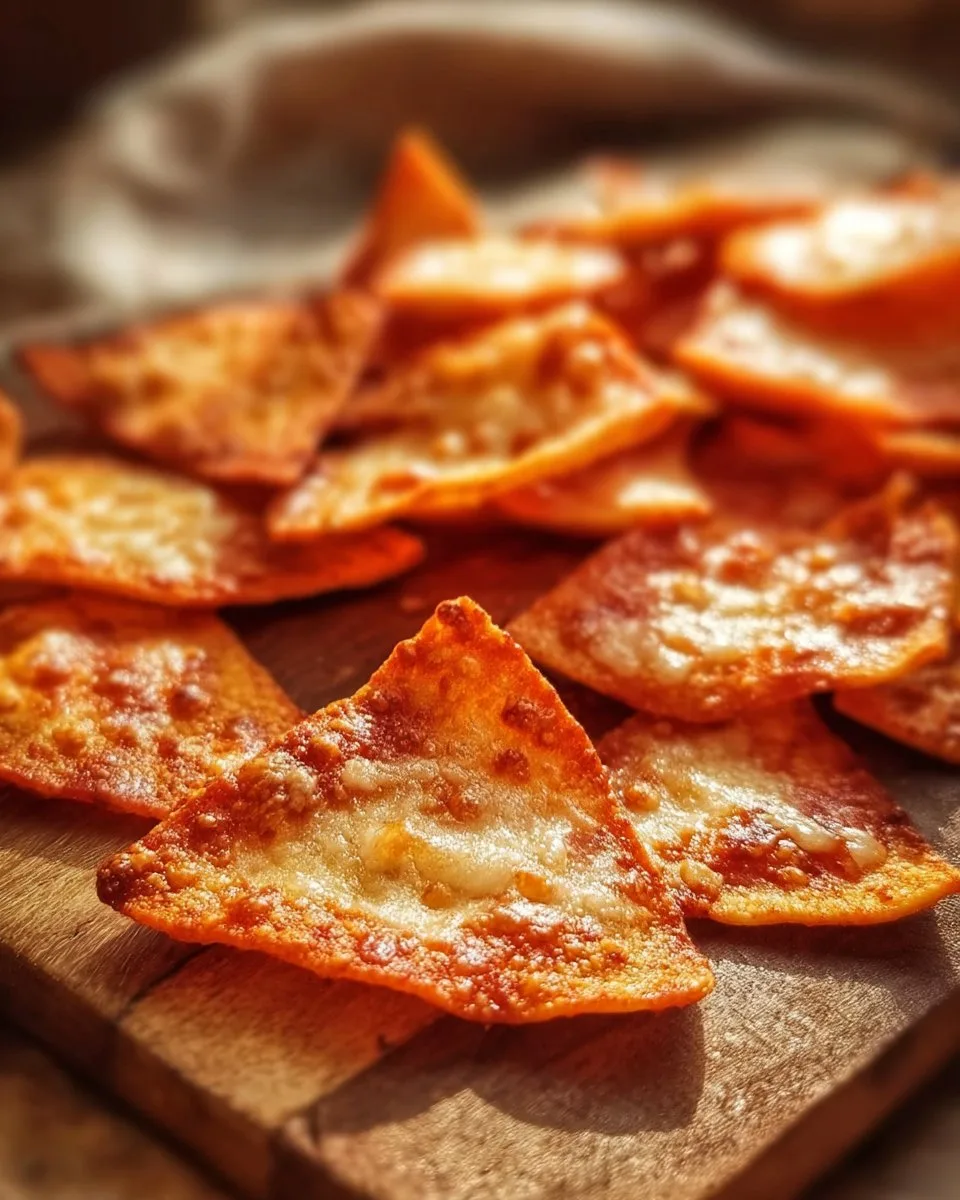
The family circling the kitchen counter, kids trading stories while you pull a tray from the oven that smells like a pizzeria and a party all at once. That is the honest moment this recipe lives for. Crispy Pizza Chips: Your New Favorite Snack Adventure is the kind of simple, fast, crowd-pleasing snack that makes weeknights feel a little less busy and a lot more fun. You don’t need special skills, and you won’t end up with a sink full of dishes. Just tortillas, sauce, cheese, and your favorite toppings. Slip a plate onto the table and watch the smiles start.
Why Crispy Pizza Chips Deserves a Spot in Your Weeknight Rotation
This recipe matters because it saves time and keeps everyone happy. It’s great for nights when dinner needs to be quick and satisfying. The whole thing takes under 30 minutes, and you only dirty one baking sheet. Kids can help add toppings, which keeps them occupied and more likely to eat what you made.
You’ll find it flexible. Use corn tortillas for extra crunch, or flour for a softer bite. Throw on whatever is left in the fridge. I often pair this with a simple salad and some sliced fruit to round things out. If you want to go full snack mode, set out several sauces and let folks dip away. If you like other quick wins in the kitchen, check out this fun take on burgers that fits busy nights too: Crack Burgers: Your New Go-To Burger Recipe.
Why it works: the tortillas crisp up in the oven while the cheese melts and the sauce shortens the cooking time so you get big flavor without the fuss. It’s a small plate that feels like a celebration, and it’s forgiving. Burned one? Pop on another chip and call it rustic. Don’t overthink it. You’ve got this.
Preparing Crispy Pizza Chips Without the Fuss
“If it smells this good halfway through, you know dinner’s gonna be great.”
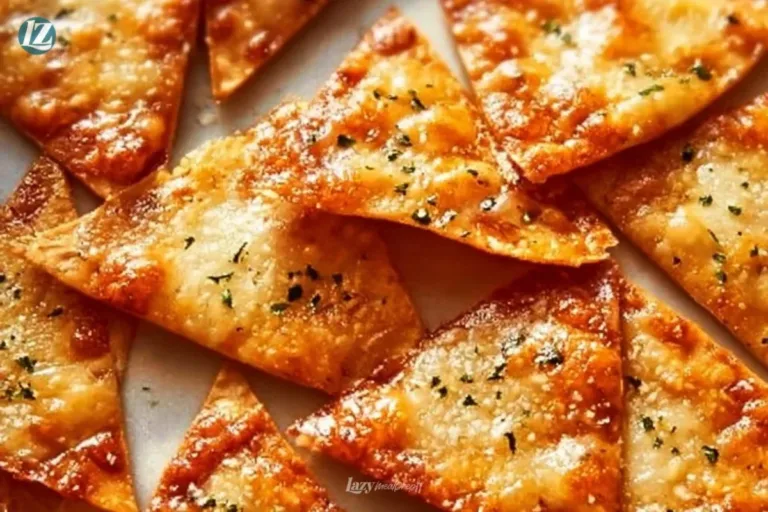
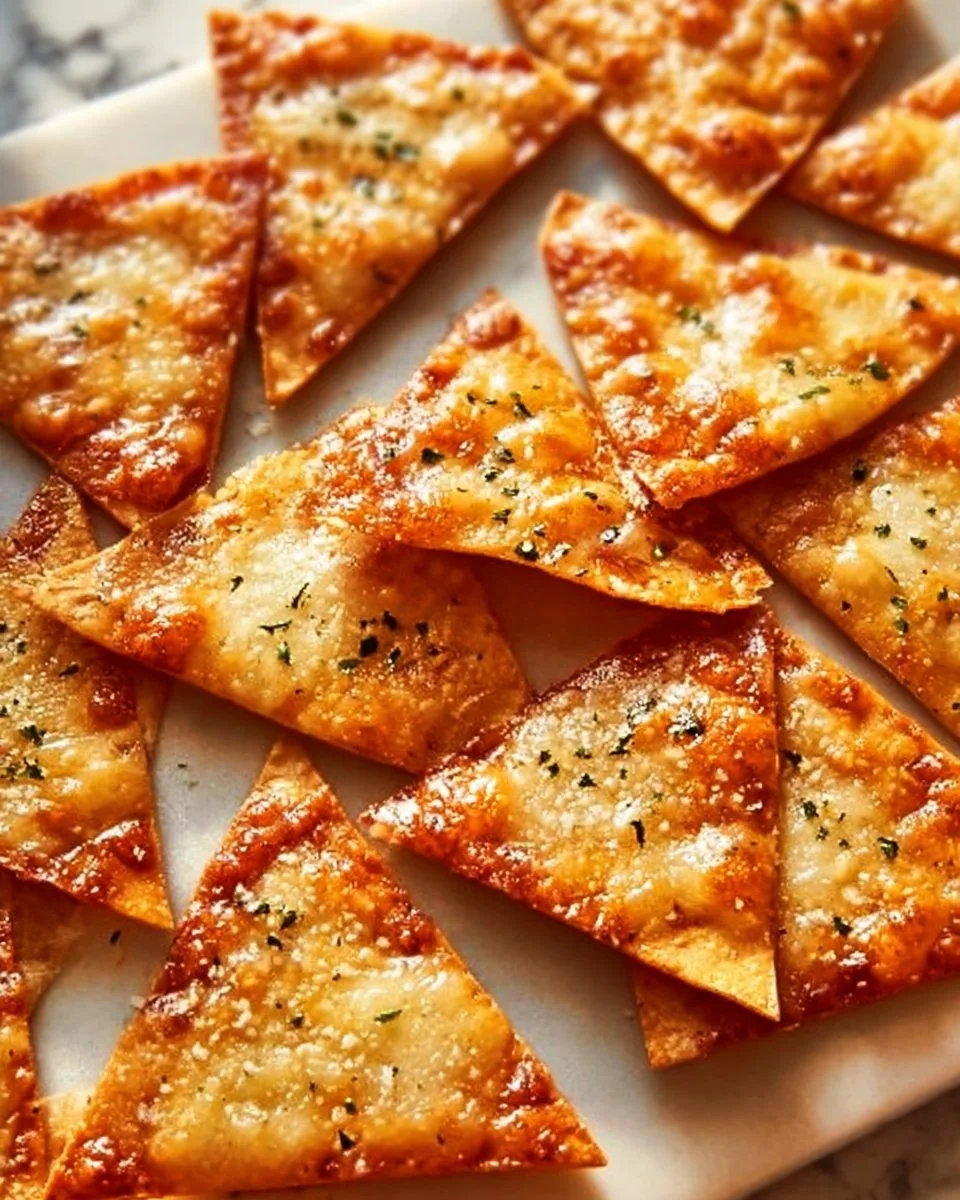
Before we dive into the exact steps, here is the quick process in plain terms. Lay out tortillas, spread a thin layer of sauce, top with cheese and whatever else you like, bake until the edges are golden and the cheese bubbles, then break into chips. The goal is a mix of crunchy edges and melty centers. Look for golden brown edges on the tortillas and bubbling, slightly browned cheese as the cues that you are finished.
While that tray is in the oven, use the time to clean up a few prep items or toss together a quick side. For another speedy, oven-based snack, you might like how frozen mini pizzas crisp up in the air fryer: Air Fryer Frozen Pizza. Meanwhile, if you want a crunchy base that’s a little different, swap in corn tortillas for a more robust crunch and flavor.
Ingredients You’ll Need
4 tortillas Corn or Flour Tortillas (Choose corn for a traditional crunch or flour for a softer bite.)
1 cup Pizza Sauce or Marinara Sauce (Opt for thicker sauces to keep chips crispy.)
1 cup Shredded Mozzarella Cheese (Feel free to mix in cheddar, provolone, or Parmesan.)
1 cup Toppings (Customize with favorites like pepperoni, bell peppers, or olives.)
1 teaspoon Italian Herbs (Sprinkle on basil or oregano.)
1 teaspoon Garlic Powder (Adds a warm, aromatic layer.)
1/2 teaspoon Crushed Red Pepper Flakes (For a spicy kick.)
Side notes: don’t skip the garlic powder; it adds a quick boost without extra prep. Use what’s in your fridge — leftover rotisserie chicken, canned olives, or a handful of chopped bell peppers all work. If you need a guided dip idea for something sweet and crunchy on the side, this fruit salsa with cinnamon chips is a winner for parties: Air Fryer Totino’s Pizza.
Step-by-Step Directions
- Preheat and prep. Preheat your oven to 425°F (220°C). Line a baking sheet with parchment or a silicone mat for easy cleanup.
Tip: No parchment? A light spray of oil works fine. The hotter oven helps the edges get crisp without overcooking the cheese. - Arrange tortillas. Place the tortillas on the baking sheet in a single layer. If your baking sheet is small, you can cut tortillas into quarters to make more manageable chips.
Tip: Press them slightly flat so they sit evenly. Corn tortillas crisp better when flat. - Sauce the tortillas. Spread about 2 tablespoons of pizza sauce on each tortilla, leaving a small border around the edge. Less is more here — too much sauce makes them soggy.
Tip: Use a spoon or a small offset spatula for even spreading. Keep it thin. - Add cheese and toppings. Sprinkle shredded mozzarella evenly, then add your chosen toppings in a single thin layer so the heat reaches everything. Finish with a light dusting of Italian herbs, garlic powder, and red pepper flakes.
Tip: Save any big toppings, like pepperoni slices, for the very top so they crisp up. - Bake until bubbly. Slide the tray into the oven and bake for 8 to 12 minutes. Watch for the cheese to melt and bubble and for the tortilla edges to turn a light golden brown.
Tip: Rotate the pan halfway if your oven runs uneven. A little browning on the cheese adds flavor. - Broil for extra color. If you want extra browning, switch to broil for 30 to 60 seconds at the end. Stand close and watch carefully so it does not burn.
Tip: Keep the oven door slightly open if your broiler is fierce. - Cool and crisp. Remove the tray and let the tortillas cool for 3 to 5 minutes to firm up. Break into chips with your hands or a knife. Serve warm.
Tip: Once cooled, transfer to a platter so steam does not make them soggy. - Clean up fast. Toss the parchment or rinse the sheet while it cools to avoid stuck-on cheese. Wipe counters and you’re done.
Tip: If you used a silicone mat, soak it in warm soapy water for a few minutes to remove oil and cheese.
Serving Crispy Pizza Chips at Home
Serve these chips family-style on a big platter so everyone can pick their favorites. Add small bowls of extra pizza sauce, ranch, or garlic butter for dipping. If you’re serving kids, consider separating plain cheese chips from those with strong toppings like olives or peppers.
For a casual dinner, pair the chips with a green salad, carrot sticks, and a simple fruit bowl. They also shine as a game-night snack. Lay out a few topping bowls and let guests customize before the final bake. If you want a satisfying appetizer pairing, try a bruschetta-style dip that complements the pizza flavors: Bruschetta Dip: An Appetizer to Your Guests.
Create meal-prep boxes by packing chips in a container with sauce in a small separate cup. They reheat well and make for an easy lunch on busier days. For a party, stack several trays and rotate them so everyone gets a warm batch.
Storage & Reheat (No Soggy Leftovers)
Leftovers are realistic with this recipe. Store cooled chips in an airtight container in the fridge for up to 2 days. Layer sheets of parchment between stacks to keep chips from sticking.
To reheat without losing crispiness, preheat the oven to 375°F (190°C). Spread the chips on a baking sheet and heat for 5 to 8 minutes until warmed and crisp. Avoid the microwave if you can; it heats fast but makes them limp. If you must microwave, do so in short bursts and then pop them under the broiler or in a toaster oven for a minute to restore crunch.
Freezing is possible but less ideal. Freeze in a single layer on a tray for 1 hour, then transfer to a freezer bag for up to 1 month. Reheat from frozen in a 400°F oven for 8 to 12 minutes.
A practical note: don’t seal hot chips in a container or condensation will make them soggy. Let them cool fully before storing. If you make too many, I sometimes repurpose leftover chips as a pizza-flavored breadcrumb on pasta or baked veggies — a small waste-saving trick that adds texture and flavor.
Quick Tips & Shortcuts
- Use pre-shredded cheese to save time. Freshly shredded melts nicer but pre-shredded is fine for weeknights.
- Keep toppings thin. Thick pieces take longer to heat and can make chips soggy. Slice bell peppers and mushrooms thinly to cook through.
- Bake on a hot sheet. Put the baking sheet in the oven while it preheats and place tortillas on it carefully for faster crisping. Use an oven mitt.
- Make two trays at once. Rotate them halfway so both bake evenly. This is great when feeding a crowd.
- Clean as you go. Put used bowls in the sink or dishwasher while chips bake.
I’ve learned that small adjustments make a big difference. A thin layer of sauce is the single most important tip. I once doused the tortillas and ended up with a floppy mess. Since then, less has been more.
Here’s another time-saver: use already-cooked toppings like leftover chicken or pre-cooked sausage. That speeds things up and keeps the chip crisp.
One more practical shortcut: if you need a quicker oven time, crisp the tortillas alone for 3 to 4 minutes, then pull them out to add cheese and toppings and bake for another 4 to 6 minutes.
Variations That Work
Keep it simple, or get creative. Here are ideas that I rotate based on what’s in the fridge and how hungry we are.
- Classic pepperoni and extra cheese. Arrange pepperoni slices single-layer and top with mozzarella. Quick, familiar, and always a hit.
- Veggie friendly. Use thinly sliced bell peppers, red onion, mushrooms, and a sprinkle of goat cheese or Parmesan for kick. Great for a lighter bite.
- BBQ chicken. Swap pizza sauce for a thin layer of BBQ sauce, top with cooked shredded chicken and red onion, and finish with cilantro after baking.
- Margherita style. Use a thin spread of sauce, slices of fresh mozzarella, torn basil leaves after baking, and a drizzle of olive oil. Keep it light.
- Spicy meat lover. Use cooked Italian sausage, pepperoni, and finish with extra red pepper flakes. For extra heat, add a squeeze of hot honey after baking.
- Breakfast twist. Use a thin layer of marinara, cooked crumbled bacon, a sprinkle of cheddar, and a runny egg on top of each chip after baking for a brunch-style treat.
Want it lighter? Choose low-fat cheese and load up on fresh veggies. Want to make it vegetarian? Leave out meat and add more herbs and roasted vegetables. Don’t be afraid to mix cheeses — mozzarella with a little sharp cheddar is a favorite in my house.
FAQs About Crispy Pizza Chips
Q: Can I make this ahead?
A: Yes. You can assemble the chips up to 4 hours ahead and bake when you are ready. For longer holds, store covered in the fridge and bake from chilled for an extra 2 to 3 minutes.
Q: Can I use flour tortillas?
A: Absolutely. Flour tortillas give a slightly softer, chewier chip. Corn tortillas crisp more and hold up better for dippable chips. Use what you have.
Q: My chips went soggy. What did I do wrong?
A: Likely too much sauce or stacking while hot. Make sure sauce is thinly spread and allow chips to cool on a rack before storing.
Q: Can I make these in an air fryer?
A: Yes, in small batches. Set the air fryer to 375°F and cook for 5 to 8 minutes, watching for browning. The air fryer crisps nicely but you may need to do several batches.
Q: How long do they keep?
A: Best within 48 hours for texture. Stored well in the fridge, they are safe a bit longer but will lose crispness.
Ethan’s Notes From the Kitchen
I make these when I want something that tastes like Friday night but can happen any night. They are forgiving and fast, which is the point for me as a parent juggling school runs, work, and the endless “what’s for dinner?” question.
A habit that helps: line one half of your baking sheet with the finished chips and leave the other half empty. That way you can start a second round when the first batch goes down, keeping a steady flow of hot snacks. Kids love the assembly part. Let them sprinkle cheese and pick toppings. It’s a small win that buys you time.
I also keep a small jar of Italian seasoning mixed with garlic powder and red pepper flakes in the pantry. A quick sprinkle just before baking lifts the flavor without asking for another bowl or tool.
If you want a full-on party trick, make a layered platter. Arrange plain cheese chips on one corner, pepperoni on another, and veggies on a third. Label them if you have picky eaters. It makes the spread look intentional and less chaotic.
Helpful Troubleshooting
If the cheese won’t brown, pop under broil for a few seconds — but stay close. If the tortillas come out too crisp before the cheese melts, lower the oven to 400°F and give it a couple more minutes. Ovens vary, and that is normal. A small oven thermometer helps you trust your settings.
If your toppings release water and make chips soggy, pre-cook wet vegetables like mushrooms for a minute in a hot pan to remove excess moisture. Alternatively, slice them very thin so they cook fully during the bake.
My Favorite Serving Combinations
- Classic combo: chips + extra marinara + side salad. Simple, comforting, fast.
- Game night: chips + ranch + blue cheese + extra pepperoni. Set out napkins and expect happy hands.
- Kid dinner: chips + carrot sticks + fruit cup + milk. Balanced and fast.
- Casual date night at home: chips + a glass of red wine + a small charcuterie board. Easy and fun.
A family favorite in our house is pairing the chips with a quick cucumber and tomato salad dressed in olive oil and lemon. It cuts through the richness and adds fresh crunch.
A Few Extra Ways to Save Time
- Double the mix. Make two trays at once and refrigerate the second tray for a quick reheat later.
- Keep a bag of shredded cheese in the freezer for faster melting and less fuss on busy nights.
- Use pre-sliced pepperoni and pre-cooked sausage to shave off prep time.
- If you have an extra hand, have someone on sauce duty while another handles cheese and toppings.
Conclusion
If you want something that feels special without the fuss, Crispy Pizza Chips: Your New Favorite Snack Adventure is the small miracle you need on a busy night. It cooks fast, cleans up easy, and hits that satisfying crunch-and-cheese spot. Try the variations and tricks here, and you’ll have a go-to that your family asks for without needing a long prep list.
For ideas that pair well with this kind of quick, adaptable snack, check out this guide to vegan and vegetarian food options for more ways to feed different eaters: Guide to Vegan and Vegetarian Food Options at Universal Orlando. And if you are planning a party that mixes sweet and savory, this fruit salsa with cinnamon chips is a bright, easy companion that guests love: Simple and Easy Fruit Salsa Recipe With Cinnamon Chips.
If you try this recipe, tell me what twist you made. Did you go spicy, veggie, or breakfast? If the family licks the pan clean, don’t say I didn’t warn you.

Crispy Pizza Chips
Ingredients
Main Ingredients
- 4 pieces Tortillas (Corn or Flour) Choose corn for a traditional crunch or flour for a softer bite.
- 1 cup Pizza Sauce or Marinara Sauce Opt for thicker sauces to keep chips crispy.
- 1 cup Shredded Mozzarella Cheese Feel free to mix in cheddar, provolone, or Parmesan.
- 1 cup Toppings Customize with favorites like pepperoni, bell peppers, or olives.
Seasonings
- 1 teaspoon Italian Herbs Sprinkle on basil or oregano.
- 1 teaspoon Garlic Powder Adds a warm, aromatic layer.
- 1/2 teaspoon Crushed Red Pepper Flakes For a spicy kick.
Instructions
Preparation
- Preheat your oven to 425°F (220°C) and line a baking sheet with parchment or a silicone mat.
- Arrange the tortillas on the baking sheet in a single layer, pressing them slightly flat.
- Spread about 2 tablespoons of pizza sauce on each tortilla, leaving a small border around the edge.
- Sprinkle shredded mozzarella evenly, then add your chosen toppings, and finish with a light dusting of Italian herbs, garlic powder, and red pepper flakes.
Baking
- Slide the tray into the oven and bake for 8 to 12 minutes, watching for the cheese to melt and the tortilla edges to turn golden brown.
- For extra browning, switch to broil for 30 to 60 seconds at the end, keeping an eye on it to prevent burning.
Cooling and Serving
- Remove the tray and let the tortillas cool for 3 to 5 minutes to firm up before breaking them into chips.
- Serve warm, family-style with extra sauce for dipping.