The warm scent of butter and vanilla fills the kitchen as the oven hums, and for a moment the day pauses. I imagine a child pressing a flour-dusted palm to the counter while I slip a golden rectangle out of the pan, the edges catching a little more color, promising a tender crumb. That memory is the heartbeat of this Copycat Little Debbie Christmas Tree Cake small, joyful, and perfectly made for sharing over coffee, at birthday table corners, or during a quiet evening when a slice and a soft blanket feel like comfort.
The Sweet Story Behind Copycat Little Debbie Christmas Tree Cake

There is something about tiny cakes shaped like evergreen trees that pulls us back to winter mornings, holiday lunches, and lunchbox surprises. This Copycat Little Debbie Christmas Tree Cake brings that nostalgia home in a way that always feels thoughtful and a little indulgent. I baked the very first copycat with my sister one December when we wanted a taste of childhood without the store run. We laughed over flour on our sleeves and took careful bites while they were still warm. That memory keeps this recipe sweet beyond its sugar.
These little trees are more than a novelty. They are buttery-soft sponge and a melt-in-your-mouth buttercream wrapped in festive cheer. They make lovely additions to bake sale tables, coffee chats with friends, or as a small gift tucked into brown paper. If you love tiny treats that taste like childhood and look beautiful on a plate, this recipe will be a favorite. And if you are curious about other small festive bites, try this Christmas tree snacks for easy holiday nibblers.
Bringing Copycat Little Debbie Christmas Tree Cake Together
“When the kitchen smells like vanilla and butter, you know something special’s baking.”
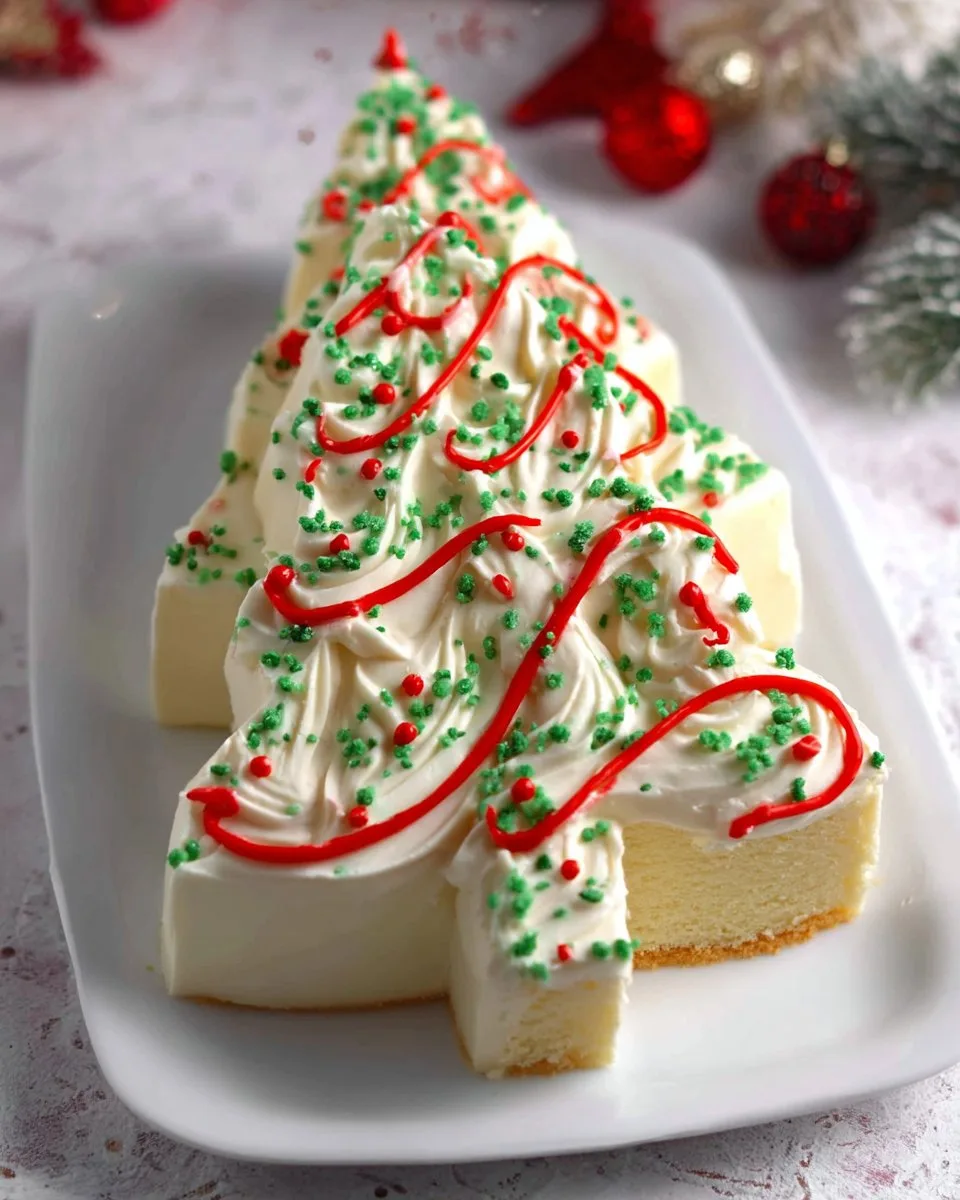
Before we lay out the ingredients and start, here is the short view. You will make a soft vanilla cake in one 9″ x 13″ pan, bake the batter in two goes for even layers, and then shape each layer into a tree. The buttercream is glossy and soft, easy to pipe and smooth, and it clings to the cake with a creamy, stable finish. Watch for golden edges on the cake, a pale sheen on the buttercream when you whisk it, and the bright shine of red gel when you add the tiny decorations.
The scent cues will tell you more than any timer. When the top is golden and the center springs back to a gentle touch, your cake is ready. When the buttercream looks smooth and glossy, it is time to frost. From there, sprinkles and red piping turn simple slices into miniature celebrations.
Ingredients You’ll Need
1 1/2 cups all-purpose flour
2 tsp. baking powder
1/2 tsp. salt
1 cup unsalted butter, room temperature
2 cup sugar
4 eggs, room temperature
4 tsp. vanilla
1 cup buttermilk, room temperature
1 cup unsalted butter, room temperature
5 cups confectioner’s sugar
4-5 Tbsp. heavy whipping cream
3 tsp. vanilla extract
1/4 tsp. salt
2 Tbsp. green sugar sprinkles
2-3 drops red gel food dye
Use real butter if you can; it makes every bite worth it. The two measures of unsalted butter are intentional: one for the cake base that lends golden edges and tender crumbs, and one for the buttercream that gives the frosting a buttery, almost melt-in-your-mouth texture. Fresh eggs at room temperature help the batter emulsify and lift. If you prefer, a mild vanilla paste deepens the aroma.
Step-by-Step Directions
- Preheat the oven to 350 degrees F and lightly grease and line a 9″ x 13″ pan with parchment paper with enough hanging over the sides for an easy release later. Set aside.
Make sure the parchment hangs long enough to hold the cake when you lift it out. This small step makes slicing and shaping much easier. - In a medium sized bowl, whisk together the flour, baking powder, and salt. Set aside.
Whisk until the mixture is uniform and free of lumps; this gives your cake a consistent crumb. - In a separate, larger bowl, use an electric mixer to beat the butter and and sugar until it is light and fluffy. Mix for 3-5 minutes or until the mixture has lightened in color and is fluffy.
Scrape the sides of the bowl once or twice. The texture should be airy, almost pale, which traps air for a tender cake. - Add in the eggs one at a time mixing between each addition. Add in the vanilla.
Mix just until combined; each egg should be fully incorporated before the next to keep the batter smooth. - Beginning and ending with the dry ingredients alternate adding in the dry ingredients and buttermilk. Mixing a little bit between each addition.
This gentle folding keeps the batter tender and prevents gluten from developing. Start and finish with the dry mix. - Do not over mix the batter, use a silicone spatula to ensure that everything is combined nice and evenly.
A few streaks of flour gone is enough; overworking makes cakes tough. - Scoop half of the batter into the prepared pan and bake for 12-15 minutes or until golden brown. You will need to use a silicone spatula to evenly distribute and spread the batter in the pan.
Watch the edges for a light golden color and test the center with a toothpick for a few moist crumbs. - Once the first cake is done baking allow it to sit in the pan it baked in for about 5 minutes before picking it up out of the pan and placing it onto a wire rack to cool completely. Repeat the greasing and lining step in the same pan then bake the rest of the batter to make the second cake.
Letting the cake rest allows steam to release and keeps the cake from sticking. - Let the cake sit in the pans for about 5 minutes before flipping them out onto parchment paper. Once you’ve flipped the cakes onto parchment paper, allow them to cool at room temperature and set aside.
Be gentle when flipping. The warm cakes are tender and prone to cracking if handled roughly. - Allow both cakes to cool completely before decorating. To make the cutting and decorating process easier, wrap the cakes in plastic wrap then let chill in the fridge for an hour. You can make the vanilla buttercream in the meantime.
Chilling firms the cake and makes it easier to cut clean lines for the tree shape. - To make the buttercream, use an electric mixer or a stand mixer fit with the paddle attachment to whisk together the butter and confectioner’s sugar on low speed while slowly adding in the heavy cream one tablespoon at a time until the buttercream starts to soften and have a smoother texture. Mix until there are no lumps of butter.
Start slow to keep sugar from puffing into the air. The cream helps the frosting turn glossy and spreadable. - Add in the vanilla and salt to the buttercream. Be sure to scrape down the sides of the bowl to ensure that everything is mixing together evenly.
The salt brings out the buttery notes; taste and adjust as you go. - Once your cakes have fully cooled, cut them out into a christmas tree shape. You can either free hand it or you can measure and draw a christmas tree onto paper then cut that out and use it as a stencil to help guide you in cutting to perfectly even cakes. I recommend using a stencil so your cakes are identical.
Use a sharp knife and steady strokes for clean edges. Save scraps for cake pops or crumbs in milk. - Cut your cakes out into 2 Christmas tree shapes. Save the scraps for another use like cake pops!
Two identical trees give you the sandwich structure that feels right for these little treats. - Place one cake face down onto your serving dish then pipe an even layer of buttercream on top to make the filling. Line the other cake up side to side with the frosted cake then flip it on top.
Use a piping bag for an even fill. The filling should be soft but not runny. - Now that our layers are set up we are going to crumb coat the entire cake. This is just a thin layer of buttercream that traps in all of those little crumbs, hence the name crumb coat so that way in the end we have a nice, even finish.
Keep the coat thin and even. The goal is to trap crumbs, not to hide them. - Once you’ve frosted a crumb coat, allow the cake to set in the fridge for one hour to chill. In the meantime, cover your buttercream with plastic wrap so it doesn’t dry out.
A chilled crumb coat makes the final frosting smooth and predictable. - Once your cake has chilled, frost it again with a thicker layer of icing. I use a silicone spatula and cake scraper to get the job done. You can always lightly wet your silicone spatula with water to help get an evenly smooth finish. The sides of the cake should be frosted as well.
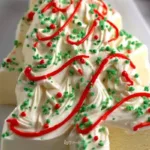
Smooth, buttery ribbons of frosting should cling neatly to the cake, showing no crumbs. - Dye about 1/4 of buttercream red for the designs. Once your cake is frosted you can add on the green sprinkles then pipe on the red lines.
A few tiny red dots or stripes bring each tree to life. The green sugar looks like fresh snow-dusted needles. - Enjoy!
Serve at room temperature so the cake feels buttery-soft and the buttercream is velvety on the tongue.
Storage instructions:
- Store leftover slices in an airtight container in the refrigerator for up to 5 days.
Bring to room temperature before serving for the best texture and flavor. - For longer storage, freeze whole unornamented trees tightly wrapped in plastic and then foil for up to 3 months.
Thaw overnight in the refrigerator, then bring to room temperature before decorating. - If you have leftover frosting, keep it in an airtight container in the fridge for up to a week.
Whisk briefly before using; add a teaspoon of cream if it seems stiff.
How to Serve Copycat Little Debbie Christmas Tree Cake With Love
These petite trees deserve thoughtful moments. Place one tree on a small dessert plate beside a demitasse of strong coffee or a frothy cup of hot chocolate on snowy afternoons. For a small fête, arrange a few on a wooden board with sprigs of rosemary and a scattering of sugared cranberries. The evergreen shape pairs well with winter fruit; a few slices of pear or a handful of pomegranate seeds add fresh acidity that balances the buttery sweetness.
For casual afternoons, a slice alongside a scoop of vanilla ice cream turns simple cake into a gentle treat. If you are serving children, set out a small bowl of extra red icing and let them add their own tiny ornaments. The presentation need not be perfect; these cakes are charming when they are handmade and slightly unique. If you like a more rustic look, dust with a little powdered sugar for a snow-kissed finish.
I sometimes pair a slice with a warm mug and soft music for a quiet night in. It feels indulgent and small, a moment to savor one slice at a time. For inspiration on whimsical holiday desserts, I often browse for themed ideas like a playful Nightmare Before Christmas cake, which pairs well on a holiday table that delights both young and old.
Keeping Copycat Little Debbie Christmas Tree Cake Fresh
Place cakes in a single layer in an airtight container and keep them in the refrigerator for up to five days. The buttercream protects the cake from drying out, but cold is kinder to butter-based frostings. Before serving, let slices sit at room temperature for 20 to 30 minutes so the crumb softens and the frosting regains its silky texture.
To freeze, wrap each whole cake or single slices tightly in plastic wrap and then foil. Label with date and freeze for up to three months. Thaw in the refrigerator overnight, then bring to room temperature. If you plan to freeze undecorated cake layers, flash-freeze them on a tray first so they keep their shape when wrapped.
If you find your buttercream stiff after refrigeration, whisk in 1 teaspoon of warm milk or cream per cup to restore a spreadable consistency. Avoid microwaving; it can separate the fat.
Susan’s Baking Notes
- Use room temperature ingredients for the smoothest batter. Cold eggs or butter make the batter seize and reduce rise.
- Real butter matters. It gives the cake a richer flavor and luxurious mouthfeel. Unsalted butter lets you control the salt balance.
- Chill for clean cuts. A well-chilled cake slices with neater edges, and the crumb stays intact.
- Save scraps. Cake edges and scraps freeze well and make instant cake pops or trifle layers.
- Wet your spatula for a glass-smooth finish. A damp silicone spatula helps the frosting glide without tearing the crumb.
One tip I learned from years of baking is that the cake texture changes with humidity. On humid days, your batter may feel softer and need slightly longer to bake. Watch for golden edges and a springy center rather than strictly following time. For a playful holiday twist, you might like these Nightmare Before Christmas cupcakes for their fun decorations and easy serving.
Flavor Twists & Variations
A small change can make this recipe feel fresh again. Try adding a teaspoon of almond extract with the vanilla for an aromatic twist that complements the buttercream. For a spiced winter version, fold a half teaspoon of ground cinnamon and a quarter teaspoon of nutmeg into the dry mix. The warm spices play beautifully with the vanilla buttercream.
For a fruit-forward variation, add a thin layer of raspberry jam between the cake layers before frosting. The tartness of the fruit cuts through the sweetness and makes each bite lively. You can also swap 1/4 cup of flour for cocoa powder to make a chocolate tree with a rich, deep flavor. If you like citrus, fold a teaspoon of lemon zest into the batter for bright, fresh notes.
For a gluten-free option, replace the flour with a cup-for-cup gluten-free baking blend and allow a touch more resting time before baking so the structure stabilizes. Always test a small pan first to fine-tune timing.
If you enjoy cookies beside your cake, try pairing this with light, buttery Anginetti Italian Christmas cookies for a lovely contrast of textures.
Copycat Little Debbie Christmas Tree Cake
Ingredients
For the Cake
- 1 1/2 cups all-purpose flour
- 2 tsp baking powder
- 1/2 tsp salt
- 1 cup unsalted butter, room temperature Two measures of unsalted butter are used: one for the cake base and one for the buttercream.
- 2 cups sugar
- 4 pieces eggs, room temperature
- 4 tsp vanilla
- 1 cup buttermilk, room temperature
For the Buttercream Frosting
- 1 cup unsalted butter, room temperature Additional butter for the frosting.
- 5 cups confectioner’s sugar
- 4-5 Tbsp heavy whipping cream
- 3 tsp vanilla extract
- 1/4 tsp salt
For Decoration
- 2 Tbsp green sugar sprinkles
- 2-3 drops red gel food dye
Instructions
Preparation
- Preheat the oven to 350 degrees F and lightly grease and line a 9″ x 13″ pan with parchment paper.
- In a medium sized bowl, whisk together the flour, baking powder, and salt. Set aside.
- In a larger bowl, beat the butter and sugar with an electric mixer until light and fluffy.
- Add the eggs one at a time, mixing between each addition, then add vanilla.
- Alternately add the dry mix and buttermilk, mixing between additions.
- Scoop half of the batter into the prepared pan and bake for 12-15 minutes or until golden brown.
- Let the first cake cool for about 5 minutes in the pan before transferring it to a wire rack to cool completely.
- Repeat for the second half of the batter.
Make the Buttercream
- In a mixer, beat butter and confectioner’s sugar on low speed, adding heavy cream until smooth.
- Mix in vanilla and salt, scraping down the sides as needed.
Assemble the Cake
- Once both cakes are cooled, cut them into Christmas tree shapes using a stencil for accuracy.
- Place one tree face down on a serving dish and pipe buttercream on top, then flip the second tree on top.
- Crumb coat the entire cake and chill in the fridge for an hour.
- Frost the cake with a thicker layer of buttercream.
- Mix a small portion of buttercream with red dye for decoration.
- Decorate with green sugar sprinkles and red piping.
Notes
Nutrition
FAQs About Copycat Little Debbie Christmas Tree Cake
Can I make this ahead?
Yes. You can bake the cake layers a day ahead and keep them wrapped in the refrigerator. Wrap layers in plastic to keep moisture in and frost on the day you plan to serve. Buttercream holds well overnight and the flavors often improve after resting.
Can I use a different pan size?
You can convert, but keep an eye on bake times. A 9" x 13" pan creates two thin layers that shape easily into trees. Deeper pans will need more time and can change the texture.
How do I get a smooth buttercream finish?
After a thin crumb coat and a one-hour chill, use a warm, slightly damp offset spatula and a bench scraper. Smooth in one direction with a gentle motion. A quick pass with a blow dryer on low heat, held a few inches away, can also smooth imperfections use sparingly.
Can I use canned frosting?
You can in a pinch, but homemade buttercream gives a fresher, silkier texture and tastes richer. If you must use store-bought, thin it with a small amount of heavy cream to replicate the homemade look.
How do I stop the red gel from bleeding into the white frosting?
Use a firm red icing and pipe small dots or fine lines. Allow piped decorations to set for a few minutes before moving the cake. If bleeding occurs, chill the cake to set the frosting before decorating.
A Final Sweet Note
I hope this Copycat Little Debbie Christmas Tree Cake brings your kitchen the same buttery joy it brings mine. Baking small treats like these is a quiet way to mark ordinary days and special ones too. They fit in a lunchbox, sit politely on a dessert plate, and have a way of making coffee feel like a ceremony. Try one of the variations, or keep it classic and savor each tender, buttery-soft bite.
If you want to compare notes or see another homemade take on the same nostalgic snack, this recipe aligns closely with what I learned from reading a faithful recreation at Copycat Little Debbie Christmas Tree Cakes – The Squeaky Mixer. For step-by-step photos and another well-loved version, I also recommend visiting Homemade Little Debbie Christmas Tree Cake Recipe.
Conclusion
For a complete reference and another perspective on recreating this childhood favorite, see the detailed guide at Copycat Little Debbie Christmas Tree Cakes – The Squeaky Mixer. If you enjoy step-by-step photos and a slightly different technique, this version is charming too: Homemade Little Debbie Christmas Tree Cake Recipe.
Until the next small cake and slow cup of coffee, may your kitchen be warm, your frosting glossy, and your slices shared with people you love.