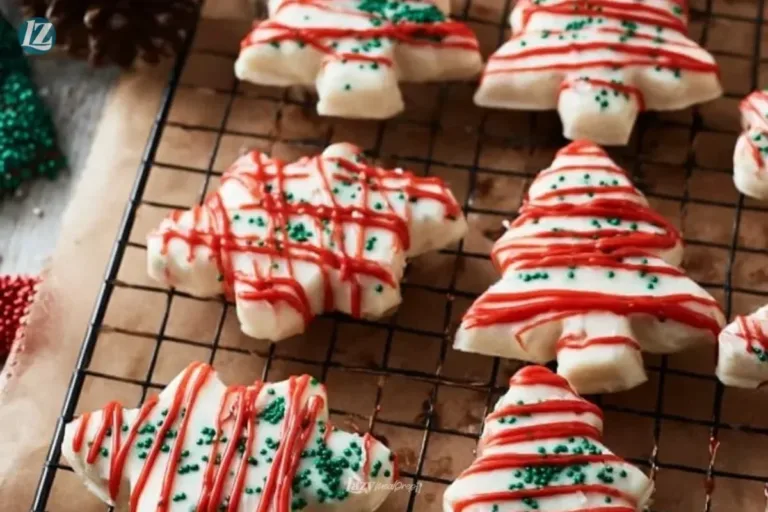
The warm scent of butter, vanilla, and toasted white chocolate fills the kitchen as a tray of Homemade Little Debbies Tree bakes to golden edges and soft centers. I remember making a batch for a small holiday tea, watching the frosting set into a glossy, almost mirror-like glaze while a friend sighed with delight. These little cakes are small everyday luxuries, perfect for a birthday table, a coffee break, or a quiet night in with a good book. For a chocolate lover’s twist, try pairing them with my guide to best homemade chocolate chip cookies for a cookie-and-cake plate that always disappears first.
Why Homemade Little Debbies Tree Feels Like a Small Celebration
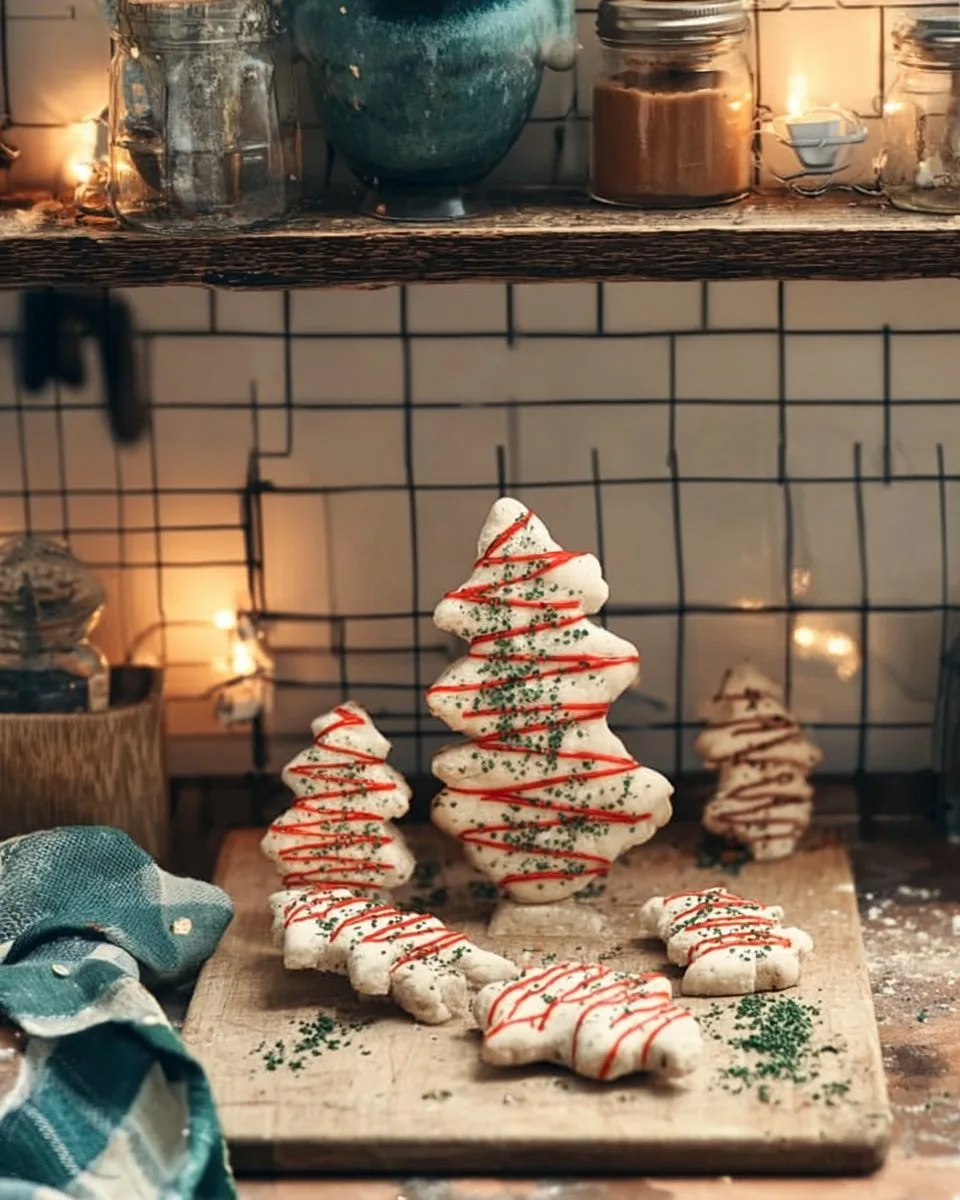
There is something about the shape and the softness that pulls at childhood memories. The tree shape feels festive and special, but the texture is simply homey. These cakes are buttery-soft and melt-in-your-mouth, with a marshmallow center that keeps each bite light and joyful.
My mother used to make small cakes for school parties, and she always said that the look of a dessert makes people lean in before they even taste it. That is the essence of Homemade Little Debbies Tree. It looks like a treat reserved for guests, but it is uncomplicated enough for a regular afternoon tea or a low-key holiday spread.
The real charm comes from the contrast of textures. The cake around the filling bakes to golden edges while the inside stays tender. The marshmallow filling is glossy and smooth, so every bite is pillowy. Covering the cake in white chocolate gives the outside a crisp snap that softens as you bite through it. It is little moments like this, shared over coffee or after a movie, that make baking feel like an act of kindness.
The Baking Process Explained
“When the kitchen smells like vanilla and butter, you know something special’s baking.”
Before you begin, think about the cues the batter and the oven will give you. Look for a pale golden crust around the edges, a slightly domed top that springs back, and a toothpick that comes out clean or with a few tender crumbs. When you melt white chocolate, stir until glossy and smooth. The marshmallow fluff should be airy and spreadable, not runny.
Gathering everything at room temperature helps the batter come together easily and ensures even baking. Preheat the oven to the correct temperature so the cakes rise in a steady way. Once you cut and fill the cakes, chill them briefly so the filling sets and the coating adheres. These small steps make a big difference to the final texture and look.
Ingredients You’ll Need
1 cup unsalted butter room temperature
1¾ cup granulated sugar
2 tablespoons vegetable oil
3 large eggs room temperature
2 large egg whites room temperature
⅓ cup sour cream room temperature
1 Tablespoon pure vanilla extract
3 cups cake flour spoon and leveled
1 Tablespoon baking powder
1 teaspoon salt
1¼ cups buttermilk room temperature
1/2 cup softened unsalted butter
1 cup marshmallow fluff
3 cups powder sugar
1 teaspoon pure vanilla extract
2 tablespoons milk or cream (preferably heavy cream)
1/4 teaspoon salt
24 ounces white chocolate or almond bark
4 tablespoons coconut oil or non flavored oil
Use real butter if you can; it makes every bite worth it. If you are aiming for a slightly denser, more tender crumb, choose a reliable cake flour and spoon it into the measuring cup for accurate weight. The marshmallow fluff should be at room temperature so it spreads smoothly. If you are curious about seasonal snacks that go well with these, see my list of Christmas tree snacks for small pairing ideas.
Step-by-Step Directions
For the Cake
- Preheat your oven to 350°F (175°C). Grease and flour your small tree-shaped pans or line a rectangular pan if making squares.
- Cream the butter and 1¾ cup sugar until pale and light, about 3 minutes. The mixture should feel airy and hold soft peaks.
- Add the vegetable oil, then the whole eggs one at a time, beating briefly after each. Mix in the egg whites until the batter looks glossy.
- Stir in the sour cream and 1 tablespoon vanilla. These add moisture and a tender crumb. Mix until smooth.
- Whisk together cake flour, baking powder, and 1 teaspoon salt. Add to the wet mix in three parts, alternating with the buttermilk. Start and finish with flour.
- Pour batter into prepared pans, filling each about two-thirds full. Tap the pans to remove large air pockets.
- Bake 18 to 22 minutes for small tree pans, or 28 to 32 minutes for a larger sheet, until tops are pale gold and a toothpick comes out with moist crumbs. Take care not to overbake; you want soft, not dry, edges.
- Cool the cakes in pans for 10 minutes, then turn out onto a rack. Allow to cool completely before filling.
For the Marshmallow Filling
- In a medium bowl, soften 1/2 cup butter with a mixer until smooth. Add 1 cup marshmallow fluff and beat until light.
- Add 3 cups powdered sugar gradually, beating on low at first, then medium until smooth and glossy. Scrape the bowl to ensure even texture.
- Stir in 1 teaspoon vanilla, 2 tablespoons milk or cream, and 1/4 teaspoon salt. The filling should be spreadable and pillowy, not runny. If too stiff, add another teaspoon of cream. If too loose, add a bit more powdered sugar.
- Chill the filling briefly if it seems too soft to pipe or spread. A cool but still pliable filling will hold shape and not ooze.
Assembly
- If you baked a sheet, cut the cakes into tree shapes or small rectangles. For tree pans, sandwich two halves around a spoonful of filling.
- Spread or pipe the marshmallow filling in the center, leaving a small margin so the coating can seal. Press the top piece gently to create a neat seam.
- Place assembled cakes on a parchment-lined tray and chill for 20 to 30 minutes to firm the filling. This step makes coating neater.
- Melt 24 ounces white chocolate with 4 tablespoons coconut oil in 30-second bursts, stirring until smooth. The oil thins the chocolate and gives a glossy finish. Be careful not to burn the chocolate.
- Dip each chilled cake into the melted white chocolate or pour the chocolate over the cakes for a more even coat. Use a fork to lift and let excess drip back into the bowl.
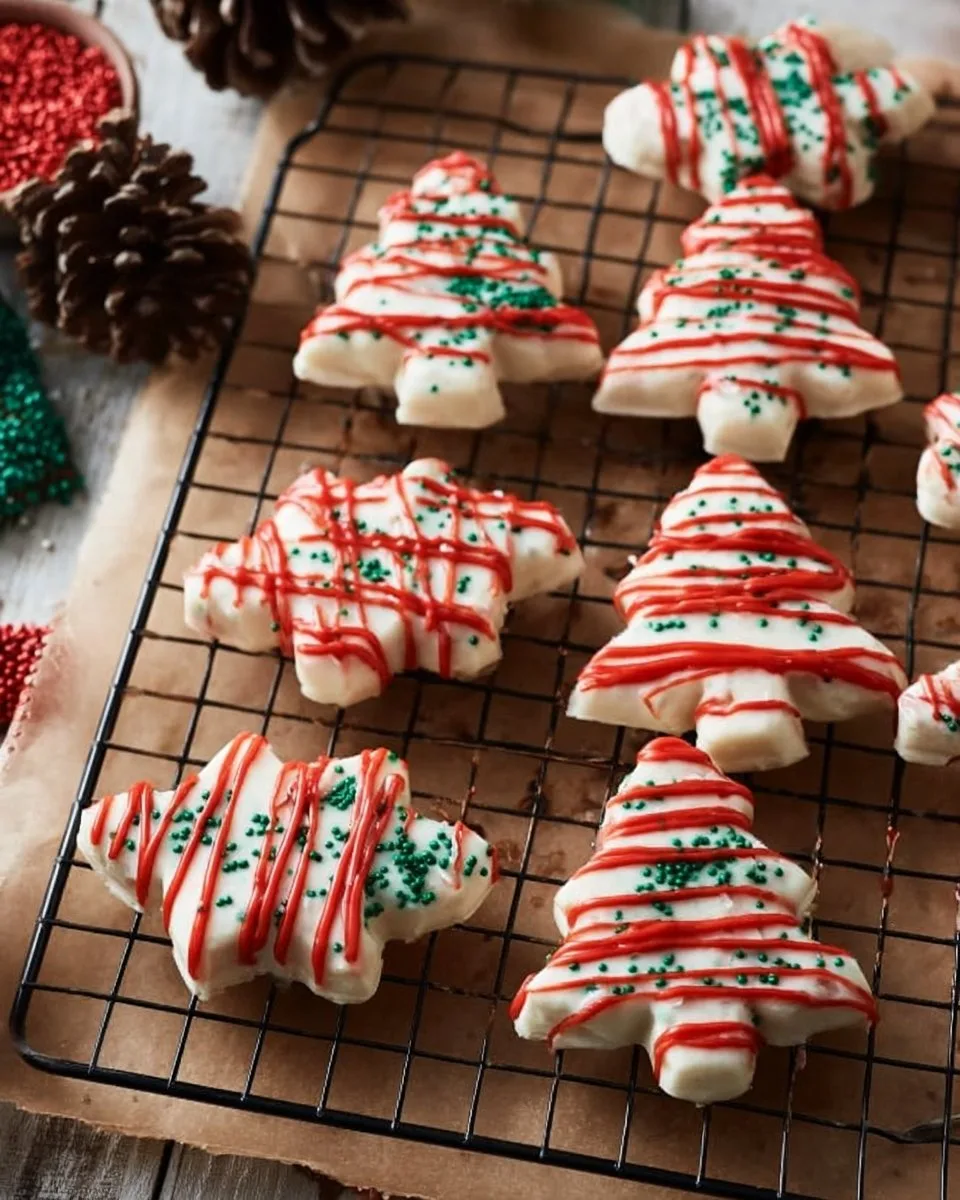
- Set the coated cakes on a rack or parchment. If you like, gently press sprinkles or tiny decorations into the surface before the coating sets.
- Chill briefly to set the chocolate, about 15 minutes, but let them come to room temperature for the best texture when serving.
Serving Homemade Little Debbies Tree With Love
Serve these cakes on a small dessert plate with a delicate coffee or a cup of black tea. The buttery-soft cake and the glossy white coating feel elegant next to a scoop of vanilla ice cream. For a cozy brunch, place a few on a wooden board with fresh berries and a sprig of mint.
Presentation matters but do not fuss. Stack two cakes slightly askew on a vintage plate, and let the filling show at the seams for a homemade look. Tiny edible pearls or a light dusting of powdered sugar makes the trees seem festive without feeling fussy.
For an after-dinner treat, try pairing a tree with a spoonful of warm fruit compote. If you like jam with your desserts, a small pot of apricot jam on the side brightens the plate; I often keep a jar of my homemade apricot jam for exactly this reason. These small touches make the cakes feel like a shared moment of comfort.
Keeping Homemade Little Debbies Tree Fresh
Storing these cakes properly keeps them soft and keeps the filling from drying out. Room temperature is fine for a day if your kitchen is cool. Keep them in a single layer in an airtight container to avoid squashing the coating.
If you need to keep them longer, refrigerate in an airtight container for up to 5 days. Bring to room temperature before serving so the white chocolate softens slightly and the cake tastes buttery-soft again. For longer storage, freeze the uncoated cakes tightly wrapped for up to 2 months. Thaw in the fridge overnight, add the marshmallow filling, then coat and finish as usual.
If the chocolate coating loses its shine in the fridge, let the cakes rest at room temperature for 20 to 30 minutes before serving to restore a better mouthfeel. For reheating, avoid high heat. A few seconds with a warm hand or a brief 10-second low-heat zap in the microwave for an uncoated cake can make the cake feel freshly baked.
I also like to keep a small box of spare cakes in the freezer. A quick thaw gives me a ready treat for unexpected guests or a quiet surprise for someone who needs a little lift. If you want a tutorial for a related buttery cookie to serve alongside, try this recipe for homemade brown butter chocolate chip cookies for a rich pairing.
Susan’s Baking Notes and Small Kitchen Tricks
- Room temperature ingredients help the batter combine quickly and rise evenly. Take eggs and butter out 30 to 60 minutes before you start.
- Use a kitchen scale when possible. Cake flour checks are easier with weight, but spoon-and-level works well when you are careful.
- Chill the assembled cakes before coating. A firm filling keeps the coating clean and prevents soggy seams.
- Melt white chocolate gently. Stir often and use short bursts in the microwave or a double boiler. Overheating causes grainy texture.
- If you have leftover marshmallow filling, spread it between two sheet layers and freeze for quick sandwich cookies later.
Flavor Twists & Variations
Citrus: Add a teaspoon of finely grated lemon or orange zest to the cake batter and the filling for a bright winter twist. The citrus cuts through the sweetness and feels festive.
Mint: Mix 1/2 teaspoon peppermint extract into the melted white chocolate for a cool, holiday flavor. Garnish with crushed candy canes for texture.
Berry: Spread a thin layer of strawberry or raspberry jam inside, under the marshmallow filling, for a tart contrast. If you like strawberry muffins, you will love how jam adds depth. Try my simple easy homemade strawberry muffins for inspiration.
Chocolate shell: Swap white chocolate for milk or dark chocolate for a richer finish. Dark chocolate gives a nice bitterness that balances the sweet filling.
Coconut: Toasted coconut on top adds crunch and a nutty note. Press it lightly into the coating right after dipping.
If you want to make a gluten-free version, use a reliable gluten-free cake flour blend and measure by weight. Expect a slightly different crumb, but the marshmallow center and coating will keep the same cozy feeling.
Homemade Little Debbies Tree
Ingredients
For the Cake
- 1 cup unsalted butter, room temperature Use real butter for the best results.
- 1.75 cup granulated sugar
- 2 tablespoons vegetable oil
- 3 large eggs, room temperature
- 2 large egg whites, room temperature
- 0.33 cup sour cream, room temperature
- 1 tablespoon pure vanilla extract
- 3 cups cake flour, spoon and leveled Choose a reliable cake flour for a tender crumb.
- 1 tablespoon baking powder
- 1 teaspoon salt
- 1.25 cups buttermilk, room temperature
For the Marshmallow Filling
- 0.5 cup unsalted butter, softened
- 1 cup marshmallow fluff Should be at room temperature.
- 3 cups powdered sugar
- 1 teaspoon pure vanilla extract
- 2 tablespoons milk or cream (preferably heavy cream)
- 0.25 teaspoon salt
For the Coating
- 24 ounces white chocolate or almond bark
- 4 tablespoons coconut oil or non-flavored oil
Instructions
For the Cake
- Preheat your oven to 350°F (175°C). Grease and flour your small tree-shaped pans or line a rectangular pan if making squares.
- Cream the butter and 1¾ cup sugar until pale and light, about 3 minutes. The mixture should feel airy and hold soft peaks.
- Add the vegetable oil, then the whole eggs one at a time, beating briefly after each. Mix in the egg whites until the batter looks glossy.
- Stir in the sour cream and 1 tablespoon vanilla. Mix until smooth.
- Whisk together cake flour, baking powder, and 1 teaspoon salt. Add to the wet mix in three parts, alternating with the buttermilk. Start and finish with flour.
- Pour batter into prepared pans, filling each about two-thirds full. Tap the pans to remove large air pockets.
- Bake 18 to 22 minutes for small tree pans, or 28 to 32 minutes for a larger sheet, until tops are pale gold and a toothpick comes out with moist crumbs.
- Cool the cakes in pans for 10 minutes, then turn out onto a rack. Allow to cool completely before filling.
For the Marshmallow Filling
- In a medium bowl, soften 1/2 cup butter with a mixer until smooth. Add 1 cup marshmallow fluff and beat until light.
- Add 3 cups powdered sugar gradually, beating on low at first, then medium until smooth and glossy.
- Stir in 1 teaspoon vanilla, 2 tablespoons milk or cream, and 1/4 teaspoon salt. Chill the filling briefly if it seems too soft.
Assembly
- If you baked a sheet, cut the cakes into tree shapes or small rectangles. For tree pans, sandwich two halves around a spoonful of filling.
- Place assembled cakes on a parchment-lined tray and chill for 20 to 30 minutes to firm the filling.
- Melt white chocolate with coconut oil in 30-second bursts, stirring until smooth.
- Dip each chilled cake into the melted white chocolate or pour the chocolate over the cakes for a more even coat.
- Set the coated cakes on a rack or parchment. Chill briefly to set the chocolate, about 15 minutes.
Notes
Nutrition
FAQs About Homemade Little Debbies Tree
Can I make this ahead of time?
Yes. Assemble the cakes and chill them, then coat on the day you plan to serve. If fully coated, keep them refrigerated for up to 3 days. Many of these flavors benefit from a night in the fridge.
How do I prevent the white chocolate from becoming dull or grainy?
Melt the white chocolate slowly and stir often. Add the coconut oil to smooth and add shine. Never let the chocolate overheat. If a few lumps remain, pass it through a fine mesh or warm it gently over a double boiler while stirring.
Can I freeze these cakes after coating?
You can freeze them, but coating sometimes develops a slight bloom when frozen and then thawed. Wrap each cake individually in plastic and store in an airtight container for up to 2 months. Thaw in the fridge overnight, then bring to room temperature before serving.
What if my marshmallow filling is too runny?
Add a little more powdered sugar, a tablespoon at a time, until it holds shape. If it becomes too firm, add a teaspoon of cream. Chilling briefly helps the filling set.
Are there smaller, bite-size versions I can make?
Yes. Use mini molds or bake in a muffin tin and cut to size. Bake times will be 12 to 15 minutes for mini sizes. Watch for a pale golden edge and set center.
A Final Sweet Note
I hope this Homemade Little Debbies Tree brings your kitchen the same buttery joy it brings mine. Baking these is a gentle way to make small everyday moments feel like a celebration. Share them with a neighbor, tuck one into a lunchbox, or place a single cake on a side plate for someone who needs a soft nudge toward comfort. If you try one of the flavor twists, I would love to hear which one became your new favorite.
Conclusion
For more copycat techniques and visual ideas, you might find the detailed step photos and tips in this Copycat Little Debbie Christmas Tree Cakes guide helpful: Copycat Little Debbie Christmas Tree Cakes – The Squeaky Mixer. If you want another home-tested recipe with clear instructions and a friendly voice, this Homemade Little Debbie Christmas Tree Cakes post is a lovely companion: Homemade Little Debbie Christmas Tree Cakes – Cake by Courtney.
Until next time, may your kitchen smell of butter, and may every small dessert you make feel like a quiet celebration.