
When life gets busy, it’s nice to have sweet, tasty treats ready to go. Imagine walking into the kitchen, catching a whiff of fresh berries, and knowing you’ve got a delightful dessert waiting in the fridge. Homemade Berry Gelatin Squares are just that treat — simple, colorful, and utterly satisfying. They make for a great snack after school, a fun family treat, or even a party dessert that everyone will love. Best of all? They’re super easy to whip up, and you can even let the kids help out in the kitchen.
Why You’ll Love This Homemade Berry Gelatin Squares
These Homemade Berry Gelatin Squares deserve a spot in your weeknight rotation for countless reasons. Firstly, they are super quick to make, allowing you to squeeze them into even the busiest schedules. You’ll appreciate that the cleanup is minimal and that they come together in just a few steps.
They’re family-friendly and can be made with whatever berries you have on hand, meaning you can get creative. Plus, these gelatin squares are great for sneaking in some extra nutrients with the addition of spinach. Yes, you read that right! Your kids won’t even notice the greens when they’re enjoying a treat.
Think of these squares as the perfect remedy for that sweet tooth without all the guilt. They’re colorful, delicious, and just begging to be tried out at your next family gathering or playdate. Why not swap out store-bought snacks with a healthier homemade option that kids (and adults) will love?

How to Make Homemade Berry Gelatin Squares the Easy Way
“If it smells this good halfway through, you know dinner’s gonna be great.”
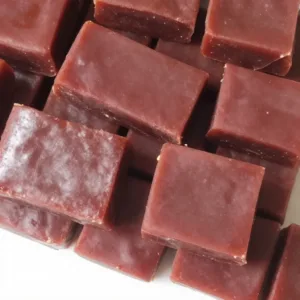
Making these Homemade Berry Gelatin Squares is as simple as it gets. You’ll be blending, straining, and setting those fruity flavors into silky squares. The fresh fruity aroma wafting through your kitchen will have the whole family excited about your creation. You’ll see vibrant colors and feel a bit of kitchen magic happening in no time.
Ready for action? Here’s a quick rundown of what you’ll be doing:
- Blend the fruits and spinach.
- Strain the mixture to get rid of seeds and pulp.
- Stir in the gelatin and let it cool.
- Pour and set in the refrigerator overnight.
Now that you’ve got a taste of the process, let’s gather those ingredients.
Ingredients You’ll Need
- 4 cups fresh apple, grape, or watermelon juice (or a combination of all)
- 3 pints raspberries
- 1 pint blueberries
- 2 handfuls spinach (about 4 cups when slightly pressed down in a measuring cup)
- 7 Tbsp grass-fed gelatin
- 1 tsp vanilla
- 2 Tbsp to ¼ cup honey (depending on how sweet the fruit is)
Feel free to adjust these ingredients based on your family’s preferences. If the berries are on the sour side, you might want to lean toward the higher end of honey for a little extra sweetness. Don’t worry if you can’t find fresh juices; store-bought works just fine, too.
Step-by-Step Directions
Now, let’s roll up our sleeves and dive into the fun part: making those gelatine squares! Follow these simple steps:
Blend Your Base: Place 2 cups of juice, half the berries, and half the spinach into a blender. Blend on medium speed until the fruit and spinach are broken down, about 30 seconds to 1 minute.
Strain It Out: Place a large mesh strainer over a large pot and pour the berry mixture through to strain out the raspberry seeds. Use a rubber spatula to push the liquid through for maximum extraction.
Repeat the Process: Repeat with the remaining liquid, berries, and spinach. If needed, pour some of the strained liquid back into the blender and blend well until no pieces of spinach remain, about 1 minute on high speed.
Gather the Puree: Pour the remaining puree into the strainer over your pot to catch any more seeds.
Add the Gelatin: Slowly sprinkle the gelatin into the pot while continuously stirring with a whisk. This will help incorporate it without creating clumps.
Heat It Up: Place the pot over medium heat and whisk frequently until the gelatin dissolves completely, about 3 minutes (it will not thicken while hot).
Cool It Down: Remove from heat and let sit for about 30 minutes to cool.
Prepare for Pouring: Line a 15 ½ x 10 ½ baking sheet with plastic wrap. Pour the puree into the baking sheet until about 1 inch deep. Let it sit on the counter for another 30 minutes to help it set.
Refrigerate: Put it in the refrigerator to cool for at least 3 hours, but it’s best to let it cool overnight.
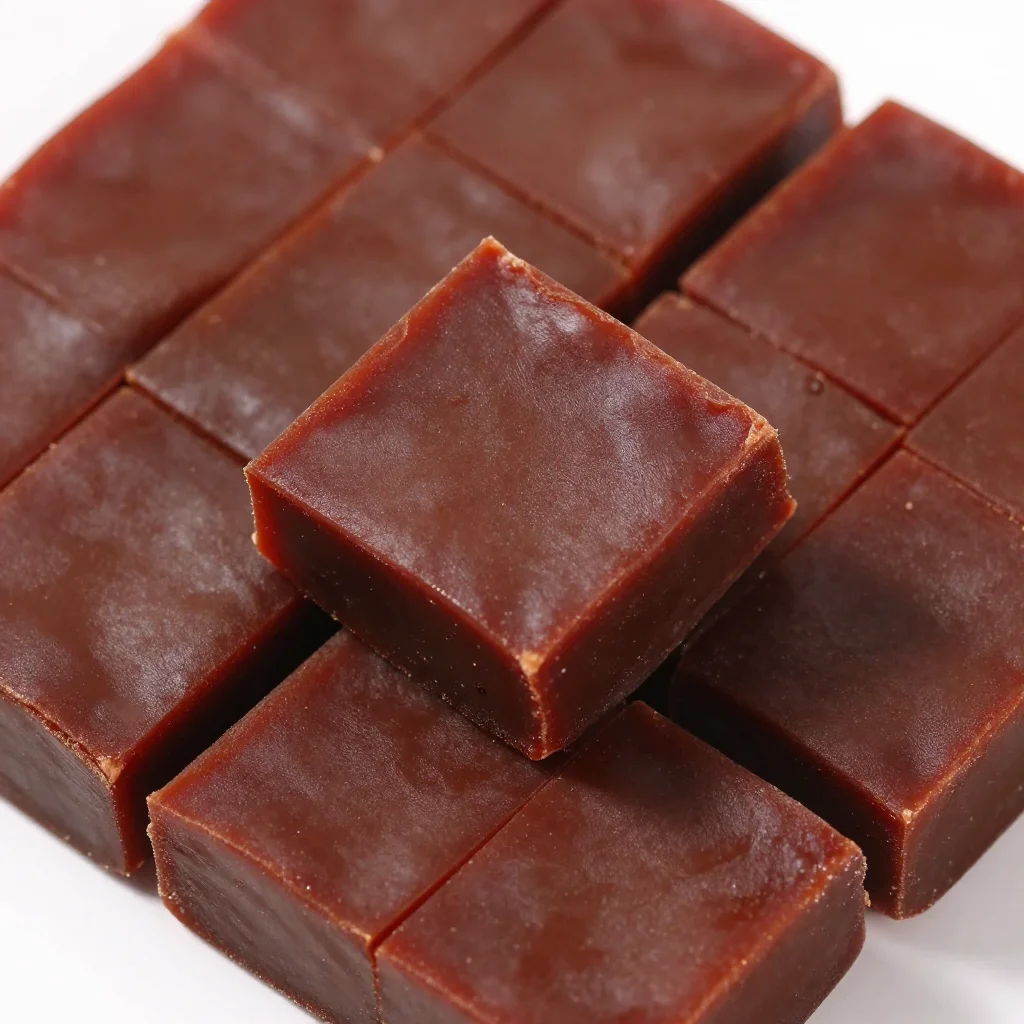
Cut and Store: When ready, place a cutting board over the baking sheet and flip it so the board is on the bottom. The gelatin should easily release from the baking sheet. Peel off the plastic wrap and cut into squares. Store in a tightly lidded container in the fridge for up to a week.
And just like that, you’ve made yourself a batch of colorful Homemade Berry Gelatin Squares. It’s that easy!
Serving Homemade Berry Gelatin Squares at the Table
Serving these Homemade Berry Gelatin Squares can be as casual or fancy as you like. I often just pop them onto a platter and let everyone dig in during a family movie night. If you have little ones, consider cutting them into fun shapes with cookie cutters for added excitement.
You can also layer them with yogurt for a parfait-style treat or serve them alongside fresh whipped cream for an extra special touch. They pair beautifully with a scoop of vanilla ice cream.

For game nights, bring out a large tray decorated with sprigs of mint and some colorful napkins—they’ll look like a million bucks!
Storage & Reheat (No Soggy Leftovers)
To keep your Homemade Berry Gelatin Squares fresh and fun, store them in an airtight container in the fridge. They’ll last up to a week, so you can enjoy them throughout the week. Just be sure to keep them chilled.
Now, you might be wondering if you can freeze these squares. While freezing isn’t the best, you can if you want to extend their life even longer. Just keep in mind that the texture might change slightly. Defrost them in the fridge overnight, and they’ll be ready to go!
Quick Tips & Shortcuts
Here are a few handy tips to smooth your process:
- Blend in Batches: If your blender feels full, don’t stress. Blend in batches and combine later.
- Easy Cleanup: Use a blender bottle to minimize the mess; just shake and pour!
- Add Extra Flavors: Don’t be afraid to add a splash of lemon or lime juice for extra zest.
- Color Variants: Swap in different fruits based on what’s in season or what you have leftovers of.
Variations That Work
My kids have different tastes, so I’ve learned to jazz things up a bit. Here are a few fun twists to try:
- Citrus Boost: Add in orange juice for a tangy flavor.
- Tropical Twist: Pineapple juice can make the squares feel like a tropical escape.
- Mixed Berries: Try using strawberries or blackberries for a different berry profile.
Feel free to experiment — this recipe is all about what fits your family’s taste preferences!
FAQs About Homemade Berry Gelatin Squares
Can I make this ahead?
Absolutely! These squares taste even better the next day when the flavors have a chance to settle.
What if I don’t have gelatin?
You could experiment with agar-agar if you’re looking for a vegetarian option. Just remember that the texture may vary a bit.
Can I use frozen fruit?
Sure thing! Just thaw and drain beforehand. This will maintain the flavor without sacrificing too much texture.
Is it safe to store them?
Yes, these are safe as long as they are stored correctly in the fridge. Just make sure not to leave them out for too long.
Can I double the recipe?
Definitely! Just adjust your equipment size accordingly. More yum, more fun!
Conclusion
Making those Homemade Berry Gelatin Squares is an excellent way to keep things fresh and delicious for your family. You’ll find them to be a delightful addition to your weekly meal prep routine. With their bright colors and fruity flavors, they’re bound to be a hit. If you’d like to explore even more variations, I recommend checking out this link for more ways to play with the ingredients.
For those looking for a more holistic approach, dive into this resource on homemade gelatin options. And if you’re curious about making your gelatin treats, don’t miss out on this insightful guide.
If your family licks the pan clean, don’t say I didn’t warn you. Happy cooking!
Homemade Berry Gelatin Squares
Ingredients
For the gelatin base
- 4 cups fresh apple, grape, or watermelon juice (or a combination of all) Store-bought juice can be used.
- 3 pints raspberries Fresh raspberries are preferred.
- 1 pint blueberries Fresh blueberries are preferred.
- 2 handfuls spinach (about 4 cups when slightly pressed down in a measuring cup) Spinach adds nutrients without altering the taste.
- 7 Tbsp grass-fed gelatin Ensure the gelatin is dissolved fully.
- 1 tsp vanilla Optional for added flavor.
- 2 to 4 Tbsp honey Use more if the berries are sour.
Instructions
Preparation
- Blend Your Base: Place 2 cups of juice, half the berries, and half the spinach into a blender. Blend on medium speed until the fruit and spinach are broken down, about 30 seconds to 1 minute.
- Strain It Out: Place a large mesh strainer over a large pot and pour the berry mixture through to strain out the raspberry seeds. Use a rubber spatula to push the liquid through for maximum extraction.
- Repeat the Process: Repeat with the remaining liquid, berries, and spinach.
- Gather the Puree: Pour the remaining puree into the strainer over your pot to catch any more seeds.
- Add the Gelatin: Slowly sprinkle the gelatin into the pot while continuously stirring with a whisk.
- Heat It Up: Place the pot over medium heat and whisk frequently until the gelatin dissolves completely, about 3 minutes.
- Cool It Down: Remove from heat and let sit for about 30 minutes to cool.
- Prepare for Pouring: Line a 15 ½ x 10 ½ baking sheet with plastic wrap. Pour the puree into the baking sheet until about 1 inch deep. Let it sit on the counter for another 30 minutes.
- Refrigerate: Put it in the refrigerator to cool for at least 3 hours, but it’s best to let it cool overnight.
- Cut and Store: When ready, flip the baking sheet onto a cutting board. Peel off the plastic wrap and cut into squares. Store in a tightly lidded container in the fridge for up to a week.