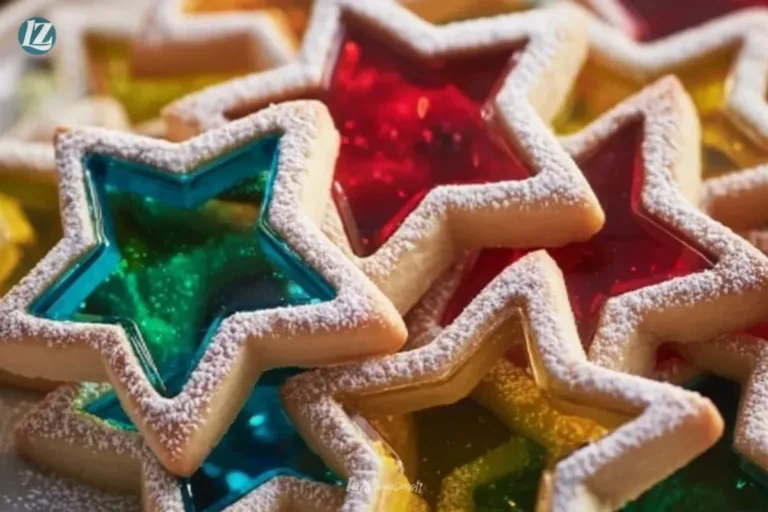
The oven warms the kitchen and the air fills with butter and vanilla, a familiar hug for anyone who loves to bake. I peel back the sheet pan and find glossy windows of color set in thin, golden edges. These are Stained Glass Cookies, small, translucent circles that catch the light and ask to be shared at birthdays, coffee chats, or quiet nights in.
Why You’ll Love These Stained Glass Cookies
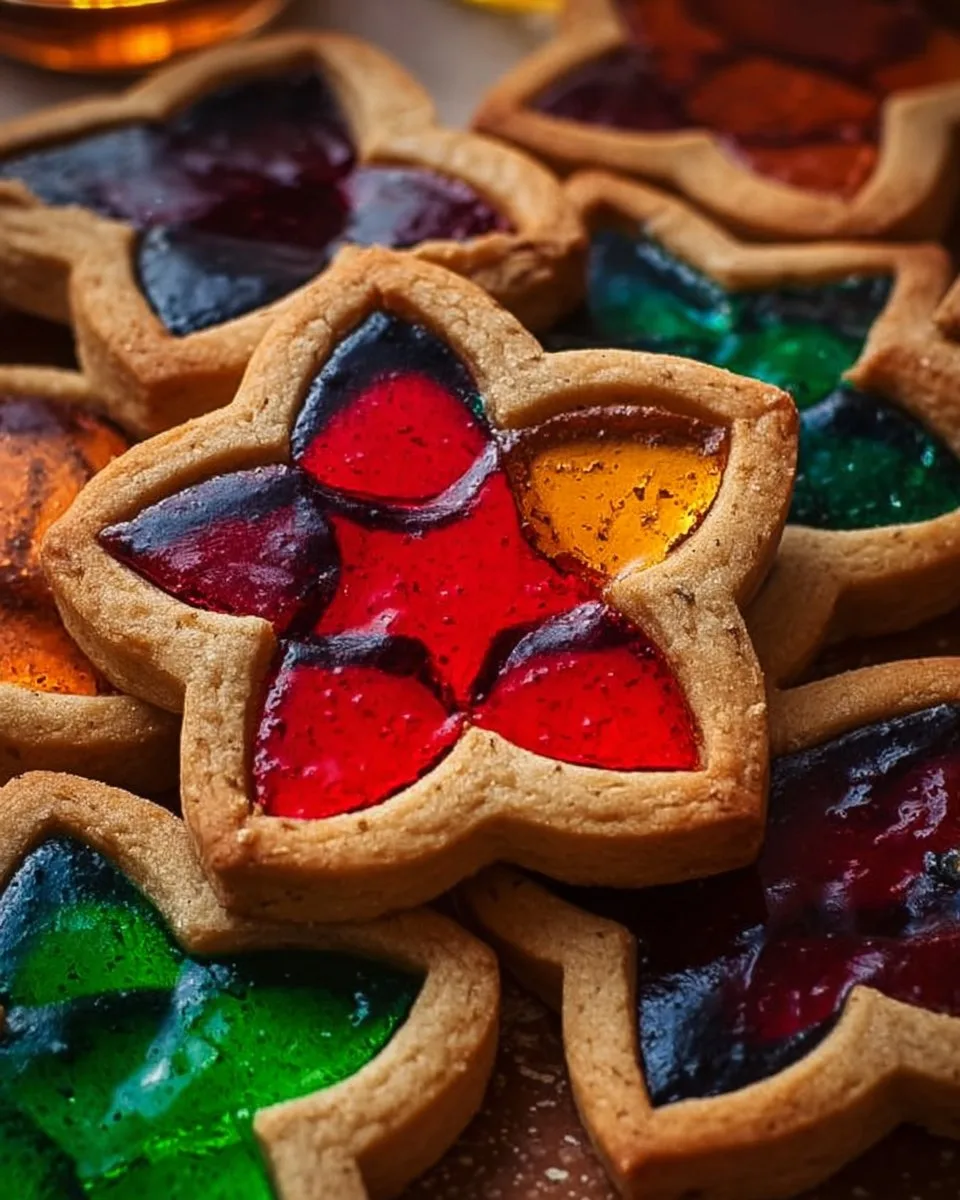
There is something about the way light slips through a cookie that makes each bite feel like a tiny celebration. These cookies look like little jewels, but they are simply made from a buttery dough and crushed candy. They are perfect for when you want to make something pretty without fuss.
I remember making these with my mother on a rainy afternoon. She let me press the smaller cutters and choose the candy colors, and the kitchen smelled like sugar and warm butter. That memory lives in every batch I bake now. If you love classic sugar cookies, you might enjoy comparing notes with this easy sugar cookie base recipe I often return to when I need a quick shape and bake.
These cookies are gentle on the palate, melt-in-your-mouth, and they add a lovely hush of childlike wonder when set on a tea tray. They are surprisingly simple to make, and the final result reads like a bit of everyday luxury. You will find them just right for cookie swaps, holiday platters, or a casual treat with coffee.
How to Make Stained Glass Cookies
“When the kitchen smells like vanilla and butter, you know something special’s baking.”
Before you reach for cutters and candy, know what to watch for: a soft dough that rolls easily, edges that turn lightly golden, and candy centers that melt smooth and glossy. As the cookies bake, the dough should hold its shape and the center candy should flatten into a bright, glassy pane.
Start by chilling the dough for a short time if it feels sticky. Use a well-floured surface and press gently when rolling. When the candy melts, it will bubble slightly and then settle into a glassy shine. Keep an eye on the edges during the last minutes of baking; once they gain a touch of gold, the cookies are done. If you like crisp edges and a soft center, aim for the lower end of the bake time.
If you enjoy experimenting with butter browning for flavor depth, I often try that in other cookies and find it adds a nutty warmth. For a slightly different texture, compare notes with my go-to brown butter chocolate chip inspiration here when I want richer flavor.
Ingredients You’ll Need
- 2 3/4 cups all-purpose flour
- 1 teaspoon baking powder
- 1/2 teaspoon salt
- 1 cup unsalted butter, softened
- 1 1/2 cups granulated sugar
- 1 large egg
- 1 teaspoon vanilla extract
- 1 cup crushed hard candies (various colors)
Use real butter if you can; it makes every bite worth it. The butter carries the flavor and gives the dough a tender, buttery-soft crumb. For the crushed candies, choose hard, clear candies like Jolly Ranchers or transparent hard candies in assorted colors. Avoid chalky candies or those with fillings. Crush them in a zip-top bag with a rolling pin or pulse briefly in a food processor, keeping the pieces fairly small so they melt evenly.
If you need a gluten-free option, try a tested gluten-free blend from a reliable brand and follow the package ratios for substitutions. For inspiration on gluten-free cookie textures, this gluten-free chocolate chip guide has helpful notes that apply to structure and baking time adjustments.
Step-by-Step Directions
- Preheat your oven to 350°F (175°C).
Preheating ensures the oven is hot and ready so the cookies bake evenly.
A steady oven temperature gives you even golden edges and glossy candy centers. - In a bowl, whisk together flour, baking powder, and salt; set aside.
Whisking distributes the leavening and salt for even texture.
Sift if you prefer a lighter, airier dough feel. - In a large bowl, cream together butter and sugar until light and fluffy.
Beat for about 2 to 3 minutes until the mixture is pale and holds soft peaks.
The creamed mixture should look glossy and feel airy to the touch. - Beat in the egg and vanilla.
Add the egg and vanilla slowly, beating until the mixture is smooth.
Scrape the bowl so all the butter is incorporated and the dough is even. - Gradually add the flour mixture, mixing until just combined.
Stop as soon as the dough comes together to keep cookies tender.
Overmixing develops gluten and may make the cookies tough. - Roll out the dough on a floured surface to about 1/4 inch thick.
Work gently and turn the dough as you roll for even thickness.
If the dough gets warm, chill for 10 minutes to firm up. - Cut out shapes using cookie cutters, removing the centers with a smaller cutter to create window shapes.
Press firmly to get clean edges and use a thin spatula to lift shapes to the sheet.
Keep the center hole pieces for baking as small cookies or decorations. - Place cookies on a baking sheet and fill the centers with crushed hard candies.
Fill just to the top of the cookie ring without overfilling to avoid spills.
Use a small spoon or funnel to guide candy into the window space. - Bake for 8-10 minutes or until the edges are lightly golden.
Watch closely in the last two minutes as candy centers go glossy and edges brown.
Remove when centers are melted and edges show a pale golden hue. - Allow cookies to cool completely before removing from the baking sheet. Enjoy your beautiful stained glass cookies!
Cooling lets the candy set into a stable, glassy pane and prevents breakage.
Once cooled, lift carefully and admire the light passing through each joyful window.
Serving Stained Glass Cookies With Love
Serve these cookies warm enough to be slightly tender or fully cooled for crisp bite. They pair beautifully with a mug of rich coffee, a cup of tea, or a scoop of vanilla ice cream for an indulgent dessert plate. For a birthday or special tray, arrange them with sprigs of fresh mint or thin sliced citrus for color contrast.
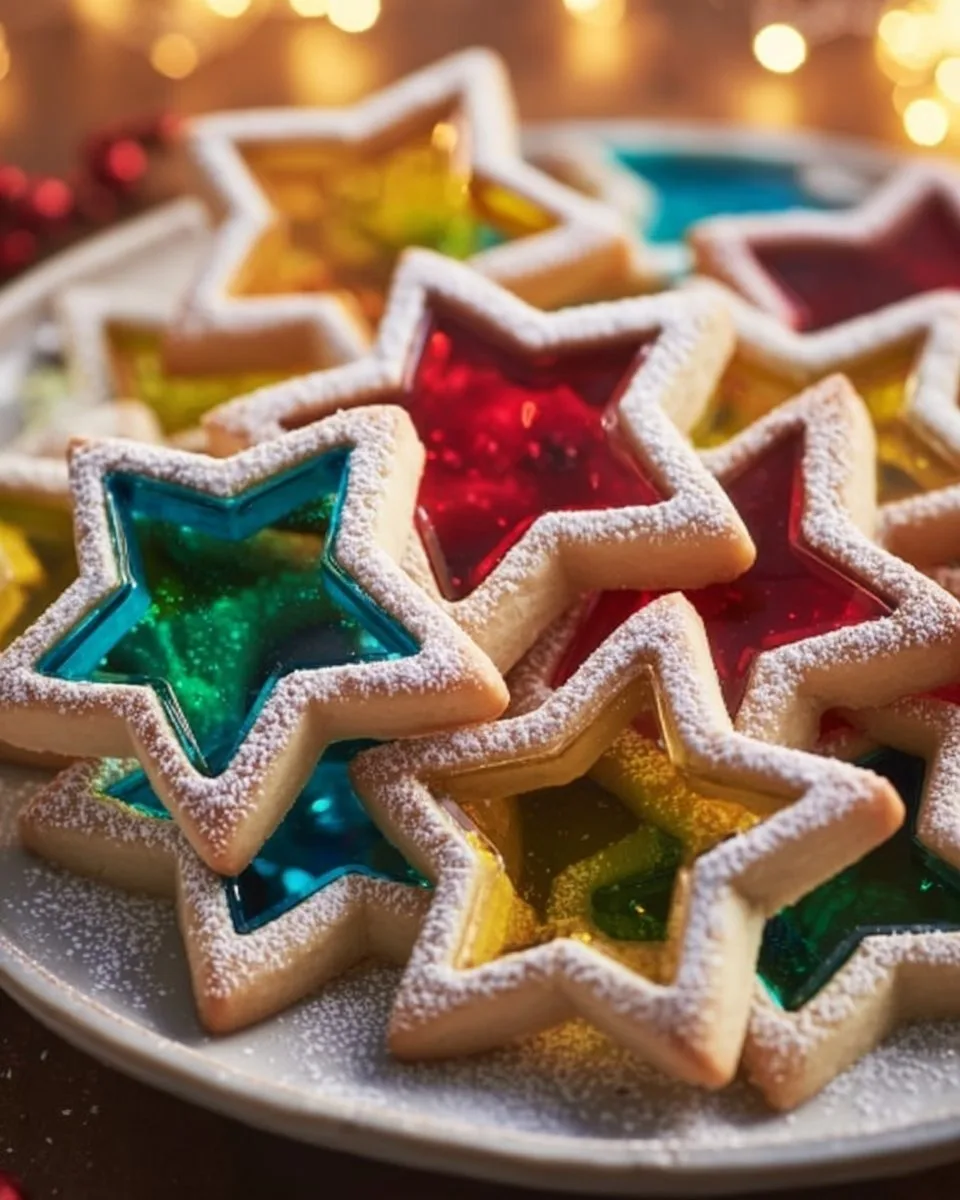
For a laid-back coffee chat, tuck a few into a linen napkin and bring them to the table on a wooden board. If you plan a holiday platter, alternate colors and shapes so the tray reads like stained glass set in winter light. Small details, like a dusting of powdered sugar or a ribbon-tied stack, make them feel precious without much fuss.
When serving with ice cream, place one cookie at the rim of the bowl so the light plays through the glass as you scoop. For a child’s party, arrange them on paper doilies to create a whimsical display. These cookies become more than something sweet; they make an ordinary afternoon feel a little ceremonial.
Storage & Reheat Tips
Keep cookies fresh by storing them in an airtight container at room temperature for up to five days. Layer sheets of parchment between them to protect the candy windows from sticking or chipping. If you like them crisp, store at room temperature; for a slightly softer bite, add a slice of apple or a damp paper towel between layers for a few hours.
For longer storage, freeze the unfilled cookie cutouts wrapped tightly, or freeze baked cookies in a single layer on a tray until firm and then transfer to a container. When freezing baked cookies, place parchment between layers and thaw at room temperature before serving. Avoid microwaving the candy center directly; to soften frozen cookies, let them come to room temperature gradually for the candy to relax.
If you prefer warm cookies with glossy centers, reheat gently in a 300°F oven for 3 to 4 minutes. Watch carefully so the centers do not remelt too much. For a cozy treat, warm a cookie and serve alongside a small scoop of lightly salted caramel ice cream.
Sweet Tips & Tricks
- Chill briefly for clean cuts: If your dough feels soft, chill it for 15 to 20 minutes before rolling. Cooler dough cuts cleaner and holds the window shapes without sagging.
- Candy size matters: Crush the hard candies to roughly pea-sized pieces. Too fine and the candy can burn; too large and it may not melt flat. Small uniform pieces give the most even glassy finish.
- Test bake one: Bake one test cookie to check oven timing and candy melting. Adjust the time by a minute if you want a firmer center or more golden edges.
- Use silicone mats: Bake on silicone-lined pans for even heat and easier release. If you only have metal pans, line them with parchment.
- Keep cutters sharp: For crisp edges, press straight down with the cutter and avoid twisting. For intricate shapes, a quick chill after cutting helps them transfer to the tray without losing detail.
I often keep a small box of clear hard candies on hand in my pantry for these cookies. They store well and make the assembly almost meditative. A little planning and these tips will give you glossy centers and tender, melt-in-your-mouth dough every time.
Flavor Twists & Variations
There are many gentle twists that keep these cookies interesting. Add a teaspoon of lemon or almond extract for a subtle lift in the dough. For a spiced version, fold in one teaspoon of ground ginger or a pinch of cinnamon for warmth that complements the sweet candy center.
Try colored sugar on the dough edge before baking for a sparkling rim. If you prefer a citrus glaze, brush a thin lemon glaze on the cooled dough ring only, avoiding the candy center. For a winter take, use red and green candies and press a few crushed peppermint candies into the dough ring before baking.
If you want a more adult flavor, swap half the vanilla for orange liqueur in the dough and pair with dark berry preserves on the side. For a gluten-free approach, choose a reliable flour blend and keep the baking time similar, but test one cookie so you can fine-tune texture.
If you enjoy texture contrasts, sandwich a thin spread of jam between two windowed cookies to create a jewel-like sandwich. The jam peeking through adds both color and a soft chew that pairs well with the crisp candy.
Stained Glass Cookies
Ingredients
Cookie Dough Ingredients
- 2 3/4 cups all-purpose flour
- 1 teaspoon baking powder
- 1/2 teaspoon salt
- 1 cup unsalted butter, softened Use real butter for best flavor.
- 1 1/2 cups granulated sugar
- 1 large egg
- 1 teaspoon vanilla extract
Candy Filling
- 1 cup crushed hard candies (various colors) Use clear hard candies like Jolly Ranchers.
Instructions
Preparation
- Preheat your oven to 350°F (175°C).
- In a bowl, whisk together flour, baking powder, and salt; set aside.
- In a large bowl, cream together butter and sugar until light and fluffy, about 2 to 3 minutes.
- Beat in the egg and vanilla until the mixture is smooth.
- Gradually add the flour mixture, mixing until just combined.
- Roll out the dough on a floured surface to about 1/4 inch thick.
- Cut out shapes using cookie cutters and remove the centers with a smaller cutter.
- Fill the centers with crushed hard candies.
Baking
- Place cookies on a baking sheet and bake for 8-10 minutes until the edges are lightly golden.
- Allow cookies to cool completely before removing from the baking sheet.
Notes
Nutrition
FAQs About Stained Glass Cookies
Can I make this ahead?
Yes. You can prepare dough and cut shapes a day ahead. Store the cut, unbaked cookies flat between sheets of parchment in the fridge and bake the next day for fresher results.
What candies work best?
Clear hard candies like Jolly Ranchers or clear fruit candies melt best. Avoid chalky or filled candies, as they can melt unevenly or cloud the window.
How can I keep the candy from pooling over the cookie edges?
Use crushed candy that is not too fine, and fill only to the top of the ring. Bake on a flat sheet and avoid overfilling. A shallow pan or a well-centered tray helps candy melt evenly.
Do I need to adjust baking time at high altitude?
Yes. At higher altitudes, reduce sugar a little and increase temperature slightly or shorten the time. Test one tray to be sure, and aim for lightly golden edges.
Can I make them gluten-free?
You can. Use a tested, cup-for-cup gluten-free flour blend and follow the blend directions. Watch texture and consider a short chill to help the dough hold its shape.
A Final Sweet Note
Baking Stained Glass Cookies gives you a chance to make something small and lovely that brightens a morning or a tea. They look made for light and conversation, and they taste like a gentle celebration in the mouth. I hope this recipe brings your kitchen the same buttery joy it brings mine, whether you are making them for a quiet night in or a table full of friends.
Conclusion
For more inspiration and step-by-step photos, I often look to other bakers who love these cookies as much as I do. Sally’s clear, photo-rich method for Stained Glass Window Cookies – Sally’s Baking is a helpful visual guide. For another take with festive shapes and ideas, see Stained Glass Cookies – Festive & Impressive – That Skinny Chick Can Bake.
Thank you for sharing a few minutes with me in the kitchen. If you try these, tuck one aside for yourself with a warm cup of coffee and notice the way light and sugar come together. And if you love learning small tricks for cookies and sweet things, you might enjoy a few other favorites I reference sometimes in my baking notes, like this soft maple brown sugar cookie idea I return to on cool mornings.