There’s something soulful about the aroma of beef sizzling in a skillet, onions and peppers mingling in the warmth of the kitchen. I remember these moments from my childhood, standing on tiptoe to sneak a peek as my mom prepared her famous sandwiches. The air was thick with spices, laughter, and memories waiting to be created. Each bite of her ground beef Philly cheesesteaks filled our home with that special kind of comfort, a taste that felt like a warm hug on a busy day. Now, as I prepare to share this incredible ultimate recipe, I can only hope it brings you the same warmth and joy in your own kitchen.
The Story Behind Our Favorite Ground Beef Philly Cheesesteaks
This recipe is more than just a collection of ingredients and steps. It weaves together my family’s stories and traditions, capturing the hearty gatherings where we would celebrate life’s little moments. As modest as it may seem, each cheesesteak tells a tale of togetherness, love, and sustenance.

Growing up, my family often hosted friends for cozy dinners. On those days, my mom would whip up a batch of her cheesesteaks, creating a feast that filled the air with anticipation. The way she effortlessly brought together the ground beef, vegetables, and bubbling cheese was an art in itself. I admired how she blended flavors, creating a dish that soothed the soul and satisfied the tummy all at once.
As I embarked on my own cooking journey, it became clear that this recipe was meant to be passed down. The cheesesteaks truly shine when shared with loved ones. Whether for a holiday gathering or a simple weeknight dinner, they celebrate togetherness and connection in every bite.
Creating the Amazing Ground Beef Philly Cheesesteaks Process:
“Every time I stir this pot, it smells just like Sunday at home.”
Gathering for cheesesteaks is as much about the experience as it is about the taste. Picture the sizzling sound of beef cooking, the aroma wafting through the home, making everyone anticipate the feast. Each bite promises a journey of flavors with every ingredient carefully layered. Let us get started with what you’ll need to create these comforting sandwiches.
Ingredients You’ll Need
To enjoy these delightful Ground Beef Philly cheesesteaks, you will need:
- 1 pound ground beef
- 1 medium onion, thinly sliced
- 1 medium green bell pepper, thinly sliced
- 1 cup mushrooms, sliced (optional, but highly recommended)
- 1 teaspoon garlic powder
- 1 teaspoon Worcestershire sauce
- Salt, to taste
- Black pepper, to taste
- 4 slices provolone cheese (or any cheese of your preference)
- 4 hoagie rolls
- Olive oil, for cooking
A sprinkle of salt here and a dash of pepper there can make all the difference, adding warmth and flavor to your creation. If you’re feeling adventurous, don’t hesitate to toss in a dash of something special that suits your palate. Fresh butter enhances richness, while a bit of crushed red pepper can provide a pleasant kick.
Step-by-Step Directions
- Heat the Skillet: In a large skillet, add a drizzle of olive oil and heat over medium-high. Feel that comforting warmth radiate as you prepare to create magic.
- Cook Vegetables: Add the sliced onions and bell peppers. Sauté for about 3-5 minutes until they become tender, their colors brightening. If you’re using mushrooms, add them next and cook for an additional 3 minutes, stirring occasionally to keep things even.
- Brown the Beef: Push the softened veggies to the side of the skillet, making room for the ground beef. Add the meat and break it apart with a spatula. Cook until no longer pink, which should take about 5-7 minutes. Listen closely as the beef sizzles and swirls. That’s your cue it’s getting cozy.
- Season: It’s time to stir in the garlic powder, Worcestershire sauce, salt, and pepper. Mix everything thoroughly for about 2 minutes. The flavors will marry beautifully, bringing a smile to your face.
- Melt the Cheese: Reduce the heat to low and place a slice of cheese over the beef mixture. Cover the skillet with a lid and allow the cheese to melt, about 2-3 minutes. The melted cheese is like a warm blanket over the hearty goodness.
- Prepare the Rolls: While the cheese is melting, take your hoagie rolls and slice them lengthwise, being careful not to cut all the way through. This little pocket is where all the magic will reside.
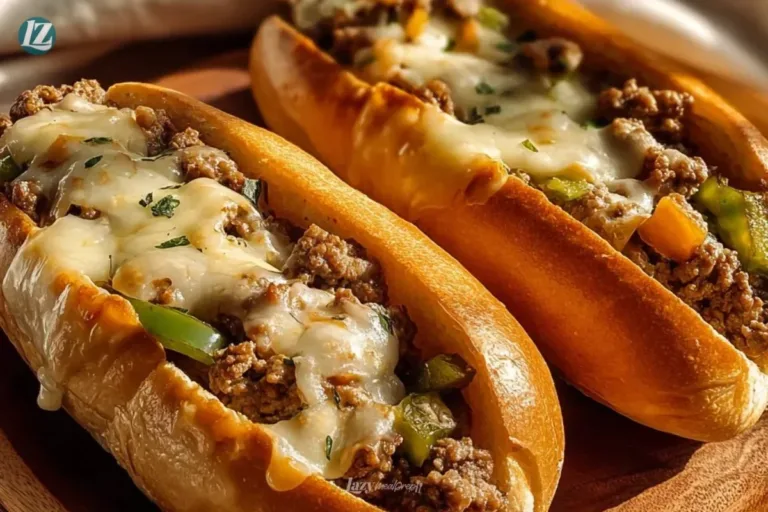
- Assemble the Sandwiches: Once the cheese has melted, gently spoon the beef and vegetable mixture into each roll. Watch as the colors meld together, creating a feast for both the eyes and the taste buds.
- Serve Hot: For added texture, consider toasting the rolls lightly before assembling. There’s nothing like a little crunch against the soft filling to elevate your experience.
Every step winds together to create the ultimate Ground Beef Philly cheesesteaks filled with rich flavors and satisfying textures. As you work through each task, you can almost hear the laughter around the dinner table.
Bringing Ground Beef Philly Cheesesteaks to the Table
There’s a warmth that envelops the room when you serve your Ground Beef Philly cheesesteaks. Setting the table, I always add a fresh salad and perhaps a side of crispy fries, allowing everyone to dive into a little indulgence. As my loved ones gather, we relish in shared laughter, swapping stories over the delightful bites glistening with cheese.
The first bite is always a revelation; the perfect harmony of flavors comes together as you chew. The soft, textured rolls cradle the mouth-watering beef and sweet vegetables, creating a satisfying crunch and tenderness all at once. We often enjoy our sandwiches with a simple homemade dipping sauce on the side, sometimes creamy, sometimes spicy, depending on the mood of the evening.
Storing Ground Beef Philly Cheesesteaks for Tomorrow
If you happen to have leftovers, don’t worry. They’re just as comforting the next day. To keep your Ground Beef Philly cheesesteaks fresh:
- Cool: Allow the sandwiches to cool to room temperature before storage.
- Wrap: Place them in airtight containers or wrap them snugly in aluminum foil.
- Refrigerate: Storing them in the refrigerator will keep them for about 2-3 days. When you’re ready, simply reheat in the skillet over medium heat until warmed through. The flavors deepen, and the joy returns as you savor every bite.
Opening the fridge to see those cheesesteaks, the memories of the previous meal flood back. Each reheated slice brings a hint of nostalgia and warmth, like a comforting blanket on a chilly evening.
Linda’s Tried-and-True Tips
- Substitutions: If ground beef isn’t your preference, turkey or chicken work beautifully in this recipe. They offer a lighter twist while still being hearty.
- Prep Shortcuts: To save time on busy nights, you can chop your vegetables a day ahead. Store them in the fridge in airtight containers, ready to throw into the pan.
- Texture Advice: The sweetness from cooked onions and bell peppers shines through if you let them caramelize slightly. A few extra minutes can transform them beautifully.
- Cleanup: To make cleanup easier, line your baking sheets with parchment paper when toasting your rolls. The mess is minimized, and you can focus on what really matters.
- Extra Cheese, Please: If you’re a cheese lover, feel free to mix and match cheeses. A blend of provolone and mozzarella can take the flavor to new heights.
How We’ve Made It Our Own
In our family, we’ve always enjoyed infusing our favorites into the traditional Ground Beef Philly cheesesteak recipe. For instance, my sister loves adding jalapeños for an extra kick; a pinch of smoked paprika brings warmth and depth. Sometimes we toss in roasted garlic, swapping the fresh for a deeper, more savory flavor.
It’s these little family variations that keep our cheesesteaks exciting and reflect our unique tastes. During summer gatherings, we’ve even swapped grilled vegetables for the classic sautéed ones, drawing on seasonal produce that brightens the dish.
Snack Cravings, Served the Sweet & Savory Way
Hey there, snack lover glad you’re here. Around this part of the kitchen, we keep things easy, cozy, and full of flavor. Lazy Bites Recipes is my go-to spot for those “I just need something tasty” moments whether it’s a cheesy pull-apart bite or a sugar-sprinkled treat fresh from the oven. These little recipes don’t ask for much time, but they always hit the spot. Take a minute, browse around, and find your next quick snack fix you’ll be glad you did.

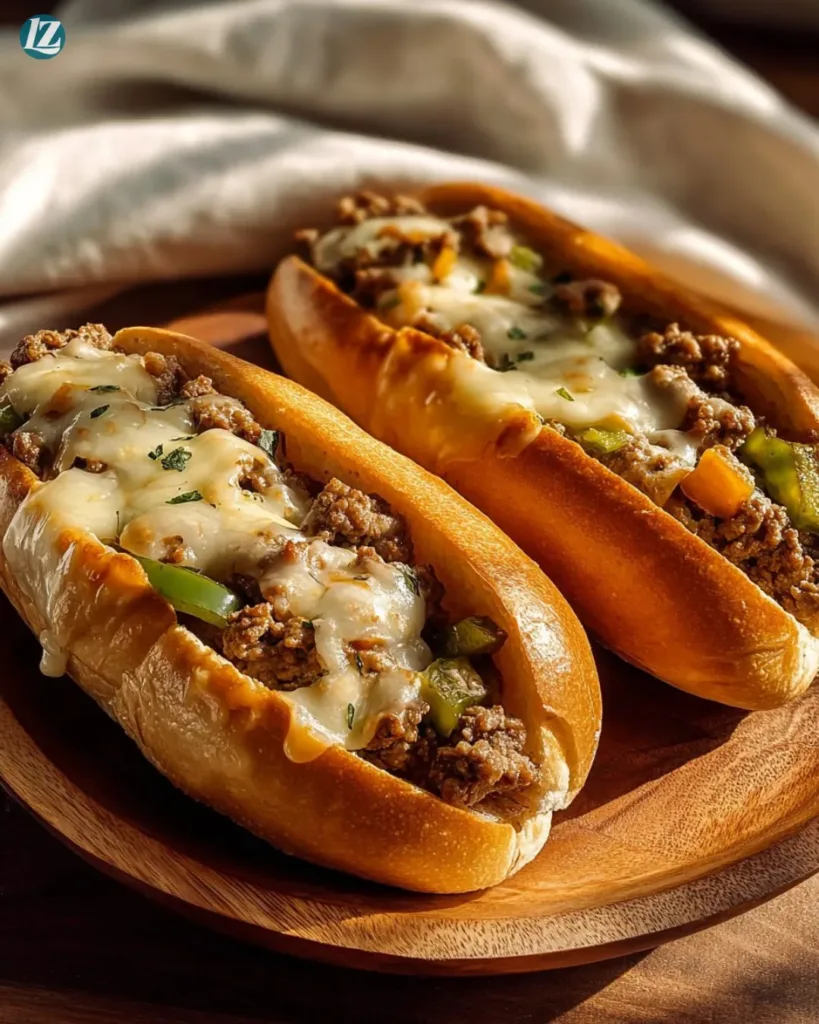
Ground Beef Philly Cheesesteaks
Ingredients
Main Ingredients
- 1 pound ground beef
- 1 medium onion, thinly sliced
- 1 medium green bell pepper, thinly sliced
- 1 cup mushrooms, sliced (optional) Highly recommended
- 1 teaspoon garlic powder
- 1 teaspoon Worcestershire sauce
- Salt, to taste
- Black pepper, to taste
- 4 slices provolone cheese (or any cheese of your preference)
- Olive oil, for cooking
Instructions
Preparation
- In a large skillet, add a drizzle of olive oil and heat over medium-high.
- Add the sliced onions and bell peppers. Sauté for about 3-5 minutes until they become tender.
- If using mushrooms, add them next and cook for an additional 3 minutes.
- Push the softened veggies to the side of the skillet, add the ground beef, and cook until no longer pink, about 5-7 minutes.
- Stir in the garlic powder, Worcestershire sauce, salt, and pepper. Mix thoroughly for about 2 minutes.
- Reduce the heat to low, place a slice of cheese over the beef mixture, and cover the skillet. Allow the cheese to melt, about 2-3 minutes.
- Slice the hoagie rolls lengthwise without cutting all the way through.
- Once the cheese has melted, spoon the beef and vegetable mixture into each roll.
- Consider toasting the rolls lightly before assembling for added texture.
Notes
Nutrition
FAQs About Ground Beef Philly Cheesesteaks
Can I make these ahead of time?
Absolutely! You can prepare everything and store it separately until you’re ready to assemble the sandwiches. They actually taste better after the flavors mingle together for a short while.
What if I don’t have provolone cheese?
That’s perfectly alright! Use whatever cheese you have on hand. American, Swiss, or even a sharp cheddar can complement the fillings nicely.
Can I freeze the filling?
Yes, the cheesesteak filling freezes well. Simply cool it completely before transferring to an airtight container. It will keep in the freezer for up to three months.
How do I reheat the filling?
To reheat frozen filling, thaw it in the refrigerator overnight. When ready, warm it gently in a skillet until heated thoroughly. Add fresh cheese in the last few minutes for that melty goodness.
Can I add other vegetables?
Definitely! Feel free to mix in your favorites. Spinach, zucchini, or even sliced jalapeños can add new dimensions to your cheesesteaks.
A Warm Note From My Kitchen
As I reflect on my journey with ground beef Philly cheesesteaks, I hope this incredible ultimate recipe transforms your kitchen into a hub of warmth and love, much like mine has always been. Cooking is a beautiful way to share our hearts and memories with those we cherish. I hope this recipe brings your family closer, filling your home with laughter and good food.
May these Ground Beef Philly cheesesteaks inspire you to create, gather, and enjoy. They are so much more than just a meal; they are a collection of love shared around a table. Thank you for allowing me to share this cherished recipe with you.
What’s Sweet in Your Kitchen?
Baked this recipe with your own twist? Don’t keep it to yourself! Share a quick snapshot and tag us on Instagram , or drop a note below. Dessert magic gets even better when we trade ideas.
Your creation could be the next Lazy Meal Prep delight!
Join our little circle of sweet-toothed friends. Follow Lazy Meal Prep where you like to hang out most:
- Instagram – for behind-the-scenes bakes and weekday cravings
- Facebook – to swap recipes, tips, and drool over each other’s treats
- Pinterest – to save your favorites and plan the next cozy bake
Let’s keep sharing joy one delicious bite at a time.