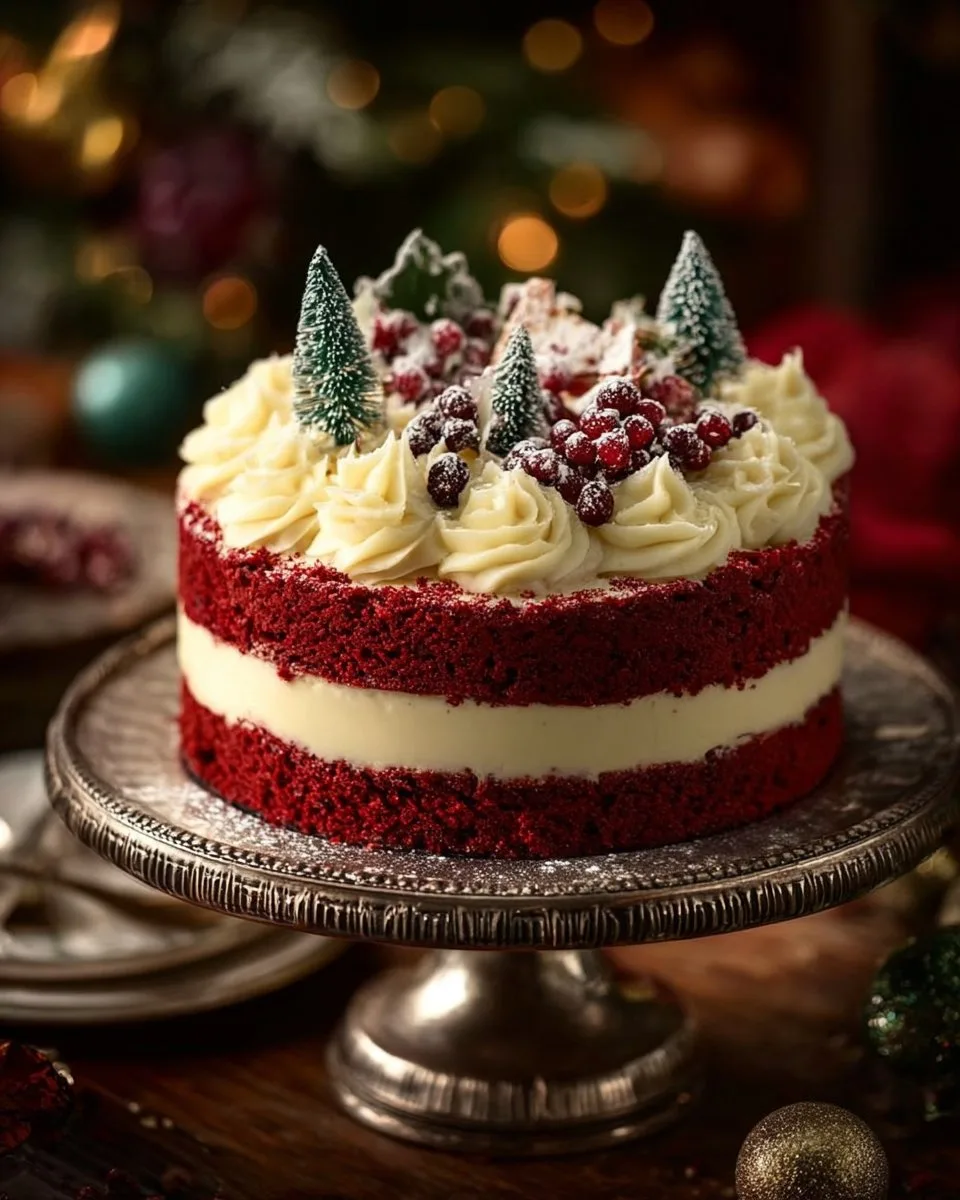
The warm scent of vanilla and a faint trace of cocoa fills the kitchen as I pull a ruby-red layer from the oven. Snow falls softly outside the window, and the light catches the glossy cheesecake top as if it were a small, wrapped gift. This is the kind of dessert that turns a simple evening into a holiday moment, the sort you slice slowly and share with someone you love.
Why You’ll Love This Christmas Red Velvet Cheesecake Recipe
There is something about red velvet that reads like celebration, and when it meets creamy cheesecake, the result feels like a small, everyday luxury. The color brings a festive cheer without needing extra decorations. The cream cheese bite adds a gentle tang that cuts the cake’s sweetness and keeps each forkful from feeling heavy.
I think of my first attempt with this pairing, a quiet December night when I tested textures until the cheesecake was silky and the cake layers stayed tender. That care shows in the crumb, the melt-in-your-mouth center, and the buttery-soft edges that brown just enough. A slice tastes like a cozy coffee chat, a birthday shared at the holidays, or a quiet night in with a good movie.
This dessert holds its own at a party and yet feels like something made for two. Serve it plainly, and guests notice the careful baking. Dress it with a small dusting of cocoa or a spoonful of salted caramel, and it becomes an occasion. For more small holiday bites that pair perfectly with desserts, I like to have simple cookies on hand like these Anginetti Italian Christmas Cookies and easy savory starters too.
How to Make Christmas Red Velvet Cheesecake Recipe
“When the kitchen smells like vanilla and butter, you know something special’s baking.”
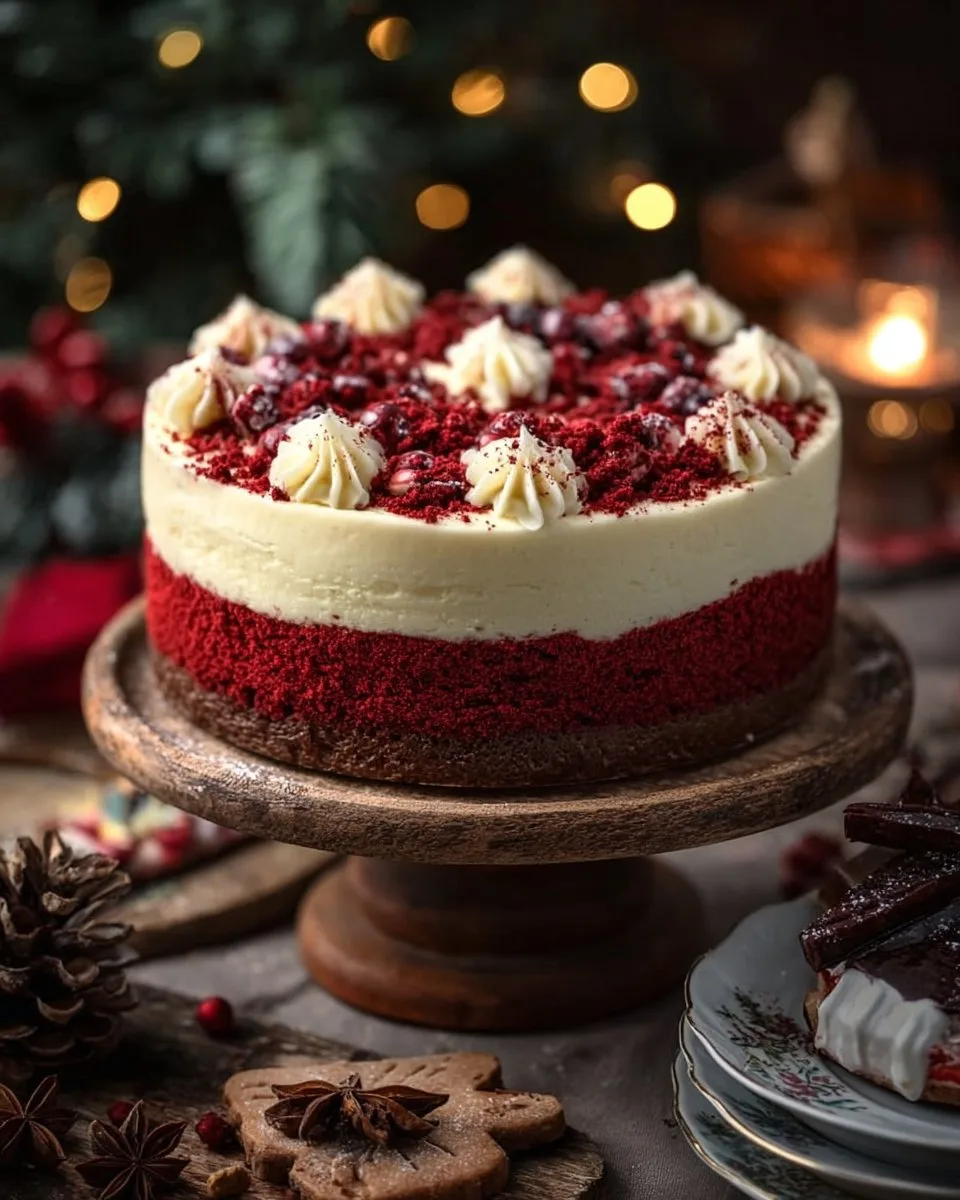
Before you begin, picture the layers: two tender red velvet cake rounds snugly holding a glossy cheesecake layer, all wrapped in a pillow of cream cheese frosting. The crust is not complicated here; the focus is on textures and timing.
Look for visual cues while baking. The cheesecake top should wobble like gelatin in the center but not look liquid. The red velvet layers should pull slightly from the pan edges and show golden edges. The aroma is a warm mix of cocoa, butter, and vanilla. Once cooled, the flavors settle and the layers marry into something richer and more complete.
Ingredients You’ll Need
List each ingredient clearly per line so you can set them out before baking. Use real butter if you can it makes every bite worth it.
2 1/2 cups all-purpose flour
2 tbsp unsweetened cocoa powder
1 tsp baking powder
1 tsp baking soda
1/2 tsp salt
1 3/4 cups granulated sugar
3/4 cup vegetable oil
1 cup buttermilk
2 large eggs
1–2 tbsp red food coloring
1 tsp vanilla extract
1 tsp white vinegar
16 oz cream cheese
1/2 cup granulated sugar
1/2 cup sour cream
2 large eggs
1 tsp vanilla extract
8 oz cream cheese
1/2 cup unsalted butter
3 cups powdered sugar
1 tsp vanilla extract
A few notes on ingredients. Use full-fat cream cheese and bring it to room temperature for the smoothest filling. If you can, opt for real butter in the frosting. The red food coloring is what gives the cake that storybook hue, but a balance of cocoa keeps the flavor honest. If you prefer a more natural color, beet powder adds color, though it can shift the flavor slightly.
Step-by-Step Directions
- Preheat your ovens. Set one to 325°F for the cheesecake layer and another to 350°F for the red velvet cake layers. Gather pans and line them to keep things calm.
Let your cream cheese sit at room temperature while you prep dry ingredients. - Make the red velvet batter. Whisk 2 1/2 cups flour, 2 tbsp cocoa powder, 1 tsp baking powder, 1 tsp baking soda, and 1/2 tsp salt. Mix separately 1 3/4 cups sugar, 3/4 cup oil, 1 cup buttermilk, 2 eggs, 1–2 tbsp red coloring, 1 tsp vanilla, and 1 tsp white vinegar.
Combine wet and dry until just mixed, like soft batter, then pour into prepared pans. - Prepare the cheesecake filling. Beat 16 oz cream cheese until smooth, add 1/2 cup sugar, 1/2 cup sour cream, 2 eggs, and 1 tsp vanilla extract. Whisk until glossy and smooth, with no lumps.
Scrape the bowl to make sure everything is completely mixed and the texture is silky. - Bake the cheesecake layer at 325°F for 40–45 minutes. Bake until the edges are set and the center still has a slight jiggle. Cool on a wire rack for an hour, then chill in the fridge to set.
Once cooled fully, the cheesecake will be creamy and hold a clean slice. - Prepare red velvet cake layers at 350°F for 25–30 minutes. Bake until a toothpick comes out clean and edges are lightly golden. Cool completely on a rack before handling.
Cool fully to avoid melting the frosting when you assemble. - Make cream cheese frosting by beating 8 oz cream cheese with 1/2 cup unsalted butter until smooth. Add 3 cups powdered sugar and 1 tsp vanilla extract and beat until airy and spreadable.
If frosting seems too soft, chill it briefly; if too stiff, beat in a teaspoon of milk. - Assemble the cake by layering red velvet, cheesecake, and frosting. Place one red velvet layer, then the chilled cheesecake disk, then the second red velvet cake. Cover with frosting and smooth or swirl for a rustic look.
Handle with care to keep edges neat and use an offset spatula for a clean finish. - Chill for 1 hour before serving. This step helps the layers settle and makes slicing neat.
For best flavor, let it rest longer in the fridge; overnight is a quiet treat.
Texture and timing tips. When you bake the cheesecake layer, a slight wobble in the center means it is still tender. The cake layers should have springy tops. For a clean release, line pans with parchment and dust lightly with flour. Room temperature eggs and cream cheese mix more smoothly and help avoid overbeating.
Serving Christmas Red Velvet Cheesecake Recipe With Love
Serving this dessert is part of the charm. A thin slice pairs beautifully with a small cup of coffee in the morning, or with a dollop of whipped cream and a few fresh berries for an after-dinner treat. For a cozy holiday brunch, plate a slice beside a small salad with citrus slices or a scoop of vanilla ice cream for a contrast of hot and cold.
For small gatherings, cut the cake into narrow wedges and arrange them on a simple white platter. Sprinkle a few cocoa flakes or a light dusting of powdered sugar to echo the dessert’s cocoa notes. I often put a tiny sprig of mint or a cranberry on the side for color and a festive touch.
If you need a quick savory pairing at a gathering, this cake plays well after a bright salad or a warm pasta dish. Try serving it as a finish to a meal that includes a crisp green salad, like this citrus-forward Christmas Salad. The tang and crunch keep the whole meal in balance.
Storage & Reheat Tips
Store the cake in the fridge, covered with plastic wrap or in an airtight container. This keeps the frosting soft and the cheesecake creamy. Refrigerated, the cake stays best for up to 4 days. Each day the flavors deepen; I find the second day tastes even more joined.
To freeze, wrap individual slices in plastic and then in foil, or use an airtight container. Freeze for up to 2 months. Thaw in the refrigerator overnight before serving. Avoid freezing with fresh berries or whipped toppings; add those after thawing for the best texture.
If you want to serve slightly warmer slices, bring them to room temperature for 20 to 30 minutes. Never reheat in the oven; that changes the texture of the cheesecake. For a softening touch, a quick 10-second zap in the microwave on low can bring a slice to a more forgiving temperature, but watch closely so the cream cheese does not melt.
If you are prepping this dessert for a party, you can bake everything a day ahead. Chill as directed, then frost and decorate the day of the event. For a longer plan, freeze the cake layers separately and assemble the day before. For a balanced seasonal spread, I sometimes pair the cake with simple bites like these Christmas Cranberry Meatballs, which guests enjoy before dessert.
Sweet Tips & Tricks
- Bring dairy to room temperature. Warm cream cheese and eggs mix smoother and create a velvety filling. It cuts down on lumps and reduces beat time.
- Use an oven thermometer. Oven temps vary; accurate heat helps the cheesecake set without cracking and gives cake layers the right rise.
- Water bath for cheesecake. For an ultra-silky top, bake the cheesecake in a water bath. It keeps the edges from cooking too quickly and reduces cracks. Wrap the springform pan in foil to prevent leaks.
- Chill between layers. Let the cheesecake cool thoroughly before adding cake layers. It keeps frosting from slipping and ensures clean slices when cutting.
- Clean knife between cuts. Wipe the knife with warm water for smooth slices and prettier serving.
If you are hosting a mix of sweet and savory, think about timing. Make the cake the day before so you can focus on fresh salad and warm mains on the day of. For an added touch, warm some spiced cider or coffee for a pairing that feels very seasonal and calming.
Flavor Twists & Variations
If you love experimenting, there are gentle ways to change the profile without losing that festive spirit.
- Chocolate lovers should add a thin chocolate ganache layer between cake and cheesecake for a glossy finish. The deep chocolate rounds out the cocoa notes from the cake.
- For a nutty twist, use a toasted pecan crumb around the base. It adds crunch and pairs nicely with the tang of cream cheese.
- Add orange zest to the frosting for a citrus lift. It brightens the cake and pairs with red velvet’s cocoa.
- Swap sour cream in the cheesecake for full-fat Greek yogurt for a subtle tang and a slightly lighter texture.
- Make mini versions in a muffin pan for party bites. Use cupcake liners, layer cake, and a small cheesecake dollop for delightful single-serve treats.
If you want to try a playful crust, combine crushed chocolate cookies with melted butter for an Oreo-style base. It adds drama and a pleasant crunch under the silky cheesecake. You can also fold a spoonful of cranberry jam into the filling for a ribbon of tartness that echoes holiday flavors.
Christmas Red Velvet Cheesecake
Ingredients
For the red velvet cake
- 2.5 cups all-purpose flour
- 2 tbsp unsweetened cocoa powder
- 1 tsp baking powder
- 1 tsp baking soda
- 0.5 tsp salt
- 1.75 cups granulated sugar
- 0.75 cups vegetable oil
- 1 cup buttermilk
- 2 large eggs
- 1-2 tbsp red food coloring
- 1 tsp vanilla extract
- 1 tsp white vinegar
For the cheesecake filling
- 16 oz cream cheese
- 0.5 cups granulated sugar
- 0.5 cups sour cream
- 2 large eggs
- 1 tsp vanilla extract
For the cream cheese frosting
- 8 oz cream cheese
- 0.5 cups unsalted butter
- 3 cups powdered sugar
- 1 tsp vanilla extract
Instructions
Preparation
- Preheat one oven to 325°F for the cheesecake layer and another to 350°F for the red velvet cake layers.
- Let the cream cheese sit at room temperature while you prep the dry ingredients.
Make the Red Velvet Batter
- Whisk together the flour, cocoa powder, baking powder, baking soda, and salt.
- In a separate bowl, mix the sugar, oil, buttermilk, eggs, red food coloring, vanilla, and vinegar.
- Combine wet and dry ingredients until just mixed, then pour into prepared pans.
Prepare the Cheesecake Filling
- Beat the cream cheese until smooth, then add sugar, sour cream, eggs, and vanilla extract.
- Whisk until the mixture is glossy and smooth with no lumps.
Bake the Cheesecake Layer
- Bake the cheesecake layer at 325°F for 40-45 minutes, until the edges are set and the center has a slight jiggle.
- Cool on a wire rack for an hour, then chill in the fridge to set.
Bake the Red Velvet Cake Layers
- Bake the red velvet cake layers at 350°F for 25-30 minutes until a toothpick comes out clean.
- Cool completely on a rack before handling.
Make the Cream Cheese Frosting
- Beat the cream cheese with unsalted butter until smooth.
- Add powdered sugar and vanilla extract, and beat until airy and spreadable.
Assemble the Cake
- Layer the red velvet cake, cheesecake, and frosting, smoothing the frosting or swirling for a rustic look.
- Chill for 1 hour before serving for neat slices.
Notes
Nutrition
FAQs About Christmas Red Velvet Cheesecake Recipe
Can I make this ahead?
Yes. Most desserts taste even better after resting overnight when the flavors meld perfectly. Bake the layers a day ahead, chill, then assemble and frost on the day you serve for the freshest look.
Can I skip the frosting?
You can. The cake and cheesecake layers are lovely on their own, especially with a dusting of cocoa or a spoon of whipped cream. The frosting adds richness and a polished finish.
How do I avoid cracks in the cheesecake?
Avoid overbeating the filling and bake it in a water bath for gentle, even heat. Cool the cheesecake slowly with the oven door slightly ajar for 20 minutes after baking, then move it to a wire rack. Quick temperature changes often cause cracks.
Can I use natural food coloring alternatives?
Yes. Beet powder gives a natural red tone. Start small, as it can add a faint earthy note. For the most vivid red, liquid food coloring is the most reliable.
What is the best way to slice neat pieces?
Chill thoroughly for at least an hour, then use a hot, clean knife. Wipe the knife between cuts and reheat it under hot water if needed for the cleanest edges.
Lessons From My Kitchen
I have baked this cake many times, testing tiny changes to timing and temperature. Two lessons keep returning to the top. First, patience matters: chilling and gentle cooling make a huge difference. Second, simple quality ingredients show up in small ways. A butter that tastes good, a fresh-tasting cream cheese, and real vanilla make every bite worth savoring.
When I teach friends to bake this, I focus on small, repeatable habits. Measure flour carefully, use room-temperature ingredients, and trust the visual cues. A glossy cheesecake top, slightly golden cake edges, and a firm but not dry crumb are the signs of a job well done.
If you are thinking of pairing this with other dishes for a holiday table, balance is key. Bright salads and simple mains allow this dessert to shine. For a full menu that mixes savory and sweet, I sometimes plan a meal that includes small hot dishes and a cool salad like these cranberry pinwheels and meatball starters. Try these Christmas Cranberry Pinwheels for a playful bite before dessert.
A Final Sweet Note
I hope when you bake this Christmas Red Velvet Cheesecake Recipe, your kitchen fills with the same buttery, vanilla warmth mine does. It is a dessert for small celebrations, for quiet nights in, and for the bright gatherings that crease the corners of our year with good talk and soft laughter. Every slice should feel like a little gift, something you made with care and shared without hurry.
Thank you for letting me share this recipe. If you try it, bring a plate to a friend, pour a warm drink, and let the simple luxury of a homemade dessert make the moment sweeter.
Conclusion
For further inspiration and a few variations on the red velvet cheesecake theme, you might enjoy this detailed take on Red Velvet Cheesecake from Kitchen Fun With My 3 Sons: Red Velvet Cheesecake | kitchenfunwithmy3sons.com.
If you like the idea of a richer base, there is an excellent version with an Oreo crust that shows another delicious way to present this dessert: Red Velvet Cheesecake (with Oreo Crust) – Live Well Bake Often.
For more easy recipes that pair well with a holiday dessert table, explore warm mains and simple sides to keep your meal balanced and inviting. And when you bake this cake, give yourself permission to slow down and enjoy the small, buttery moments it brings.