I can still close my eyes and smell it: warm peanut butter, the sweet snap of chocolate, and the bright crunch of Butterfinger hiding in tiny rounds on my grandmother’s lace-covered table. Those small rounds were always a quiet celebration, food that felt like a hug and a secret at once. Making Butterfinger Bliss Balls brings me back to that slow kitchen light, the sound of kids laughing, and the simple joy of feeding people I love.
Why Butterfinger Bliss Balls Still Feels Like Home
There is a reason this recipe holds space on our family table. It mixes textures and simple pleasures in a way that feels like a story handed down. The first time I made these, my son came in from the yard, grass on his knees, and asked for “just one” and left with two. He still tells friends that my Bliss Balls are better than store candy.
What makes them special is not only the Butterfinger pieces, but how the peanut butter warms and softens everything. The chocolate shell gives a small snap, and inside there is that sweet, light crunch that makes you want to close your eyes and remember a slow afternoon. These treats are about warmth, comfort, and the kind of small ritual that ties us together.
How to Make Butterfinger Bliss Balls
“Every time I stir this pot, it smells just like Sunday at home.”
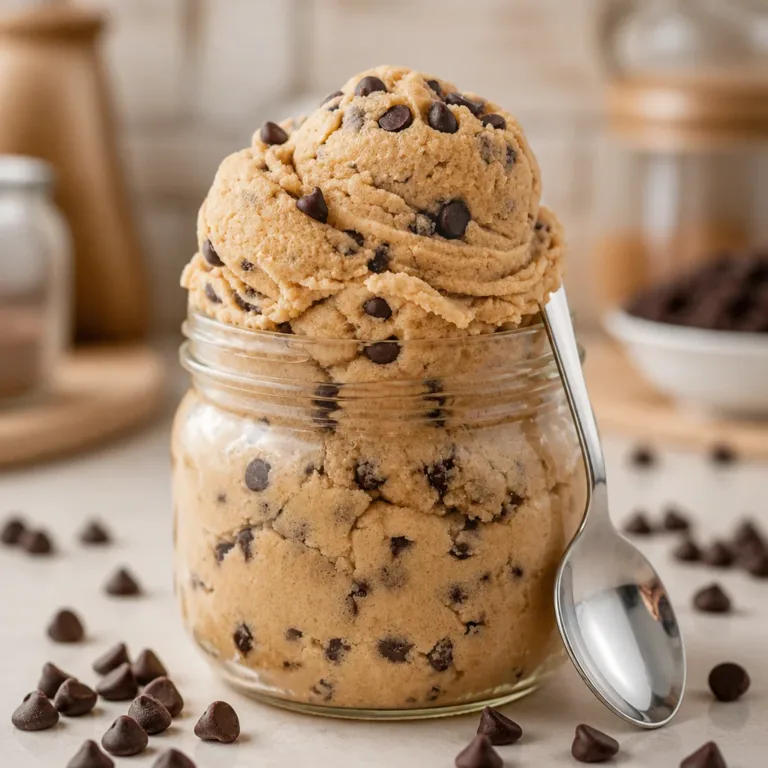
Before we list the ingredients, let me give you a soft overview. This recipe is gentle and quick. You mix the peanut butter and graham crackers, fold in the Butterfinger pieces, and add vanilla to bring the flavors together. Then you roll, coat in chocolate, and chill. You will hear a small mix of sounds in the bowl: the slap of a spoon, the soft crumble of crackers, and then the gentle clink when a Butterfinger piece hits the side.
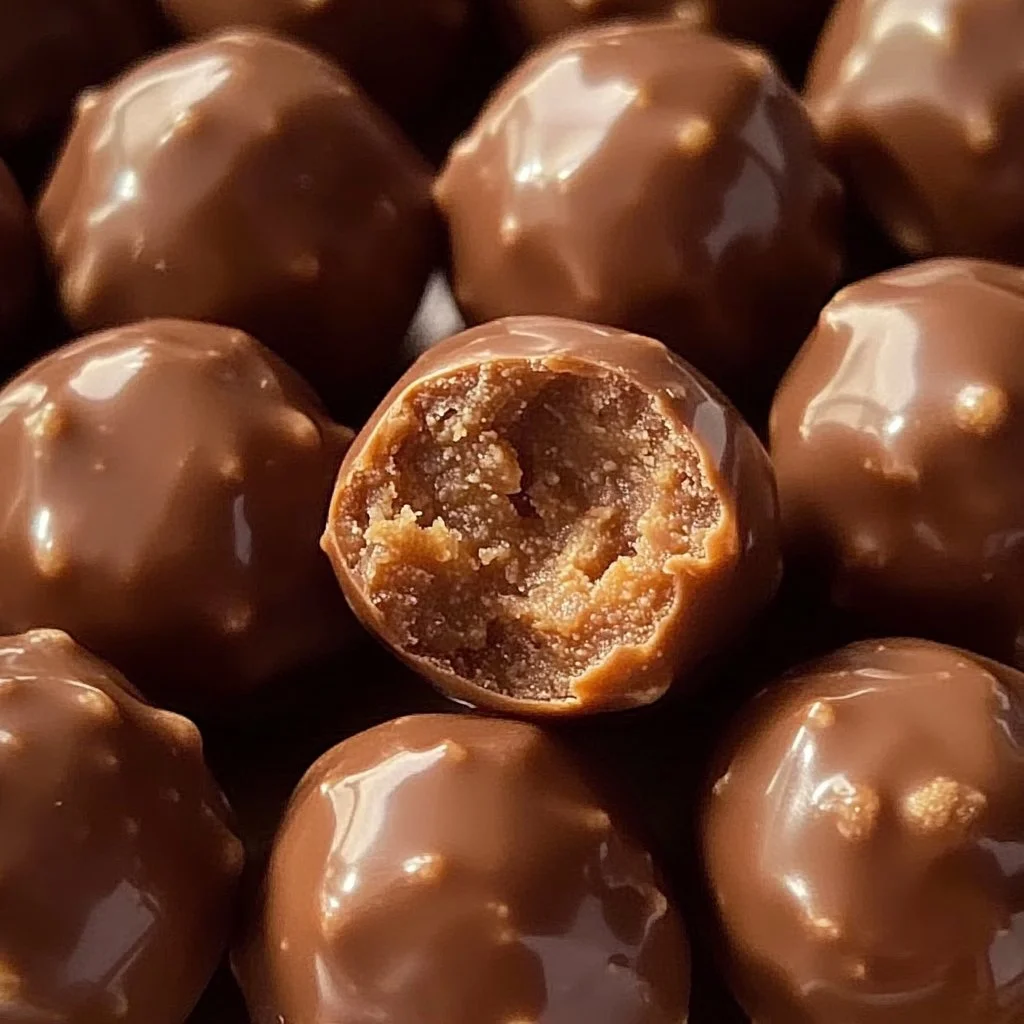
Watch for color and texture. The mixture should look slightly glossy from the peanut butter and hold together when you press it between your fingers. The graham crackers give a warm tan color, and the Butterfinger offers tiny golden flecks that peek through. When the chocolate sets, you will hear a light, satisfying snap.
Craving Something Quick and Crave-Worthy?
Lazy Bites is my go-to spot for those snack cravings that hit out of nowhere. Cheesy pulls, sweet bites, and sides that come together fast no fuss, no fancy prep. Whether it’s a lazy Saturday, a game night spread, or just a quick fix before dinner, these recipes are made to hit the spot without stealing your time. Grab a bite now and keep it easy.
Ingredients You’ll Need
1 cup creamy peanut butter
1 cup crushed graham crackers
1 cup chopped Butterfinger candy bars
1 cup chocolate chips
1 teaspoon vanilla extract
A warm side note: if you love cozy spice, add a dash more cinnamon. Use fresh peanut butter. It makes all the difference in texture and taste. If your Butterfinger bars are extra thick, chop them a little smaller so each ball has an even crunch.
Step-by-Step Directions
- In a mixing bowl, combine the creamy peanut butter, crushed graham crackers, chopped Butterfinger candy bars, and vanilla extract. Mix until well combined.
Stir gently but firmly. Scrape the sides so everything blends. You want the mixture to be firm enough to hold shape, yet soft enough to roll. - Roll the mixture into small balls, about 1 inch in diameter.
Press and roll with warm palms. If it sticks, wet your hands slightly or chill the bowl for 10 minutes. Aim for even sizes so they set at the same pace. - Melt the chocolate chips in a microwave-safe bowl in 30-second intervals, stirring until smooth.
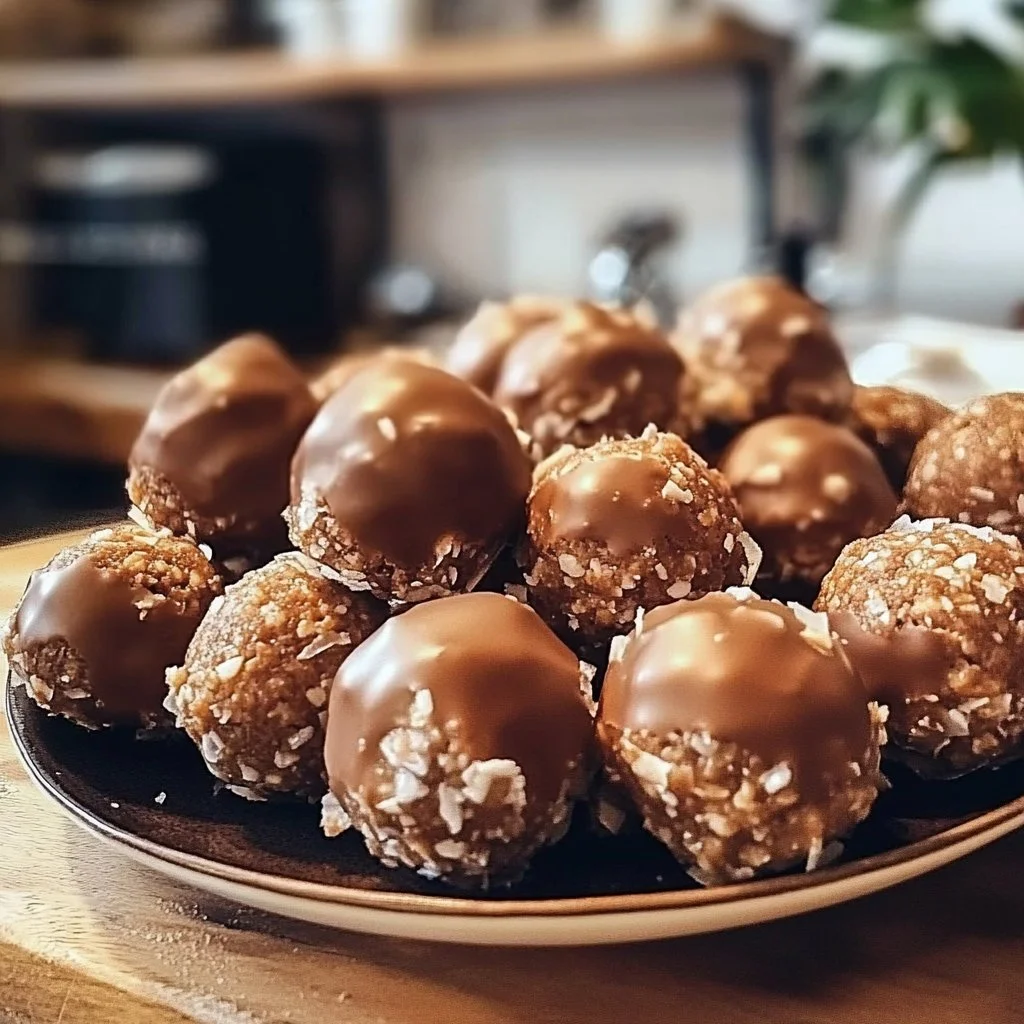
Stir after each interval. Watch for a glossy shine. Avoid overheating; the chocolate should glide, not smoke. - Dip each ball into the melted chocolate, ensuring it is well coated, and place on a parchment-lined baking sheet.
Use two forks or a dipping tool for less mess. Tap gently to remove extra chocolate. The shell should look smooth and reflect the light. - Refrigerate the Bliss Balls for at least 30 minutes or until the chocolate has hardened.
Place the tray on a steady shelf so nothing slides. Once chilled, the chocolate will give a clean snap when you bite in. - Serve chilled and enjoy!
Bring them to the table on a simple plate. Let them sit five minutes at room temperature if your home is cold so the texture relaxes. Watch the smiles.
Serving Butterfinger Bliss Balls With Family Warmth
I like to put these out on a small platter near the tea pot. Often I add a few paper doilies because my mother loved them, and she believed a little paper lace made food feel like an event. Serve them with hot cocoa, a pot of strong coffee, or a small bowl of sliced fruit if you want a balance.
When guests arrive, I set a small stack of napkins and let people take as many or as few as they like. Children tend to gather around the tray and compare the smallest crumb of Butterfinger in their bites. Adults close their eyes for a second and tell me they remember their own childhood versions of nutty, chocolate-covered bites.
A small tip: sprinkle a few extra chopped Butterfinger pieces over the top while the chocolate is still wet. It makes the plate look homey and invites conversation. Or, if you have a tea party, arrange them beside petite sandwiches for a contrast of sweet and savory.
Storing Butterfinger Bliss Balls for Tomorrow
Keep them cool and steady. Store the Bliss Balls in an airtight container in the refrigerator for up to ten days. If you need them to last longer, they freeze beautifully. Place a layer of parchment between rows so they do not stick, then seal tightly.
When you want to serve from the freezer, take them out twenty minutes before guests arrive. This allows the chocolate to soften a touch and the interior to come to a good eating temperature. Overnight in the fridge helps the flavors settle and deepens the peanut butter and Butterfinger notes.
If your kitchen is warm, do not leave them on the counter for long. The chocolate might soften and gather fingerprints. For travel, pack them in a small cooler with an ice pack. They keep their shape and taste better than you might guess.
Little Kitchen Notes
- Use room temperature peanut butter for easier mixing.
Room temperature peanut butter blends smoothly with the graham crackers and vanilla. Cold peanut butter can make the mixture tough to mix and harder to roll. - Crush your graham crackers by putting them in a sealed bag and using a rolling pin.
This keeps your kitchen tidy and gives you control over the crunch. If you like a slightly chewier texture, leave a few larger crumbs. - For neater dipping, use a fork and a shallow bowl for the chocolate.
Let excess chocolate drip back into the bowl before placing the ball on parchment. It saves on cleanup and gives a smooth finish. - If you need to make these ahead, freeze before dipping in chocolate.
Freeze the rolled balls on a tray until firm, then dip. This keeps the centers cooler and reduces the chance of melting the Butterfinger pieces while you coat them. - Use good quality chocolate chips for the best snap.
The candy shell is a part of the experience. Better chocolate will give you that satisfying little crisp when you bite.
Family Variations on Butterfinger Bliss Balls
Our family has a few small changes we make for different seasons. In autumn, I add a pinch of ground ginger along with cinnamon. It smells like walking into a warm kitchen after a leaf-raked morning.
If guests prefer a lighter sweetness, swap half the chocolate chips for dark chocolate. The bitterness balances the Butterfinger sweet and makes each mouthful feel more grown-up.
For a summer twist, fold in a few toasted coconut flakes. The coconut offers a chewy surprise and brightens the flavor. When I bring these to a picnic, I often press a small toasted almond on top of each ball for a classic look.
Sometimes we add a tablespoon of honey if the peanut butter is thick. It helps the mixture bind and gives a soft glaze to the cookie crumbs. My youngest likes a tiny pinch of sea salt on top. He says it wakes the flavors up. I let him sprinkle it, and he beams like he’s uncovered a small treasure.
FAQs About Butterfinger Bliss Balls
Can I bake this a day ahead?
Yes, and honestly, it tastes even better the next day when the flavors settle together. Keep them chilled and bring them out a bit before serving.
Are there nut-free options?
You can try a sunflower seed butter instead of peanut butter. The texture will change slightly, and you may need a touch more graham cracker to firm the mix.
Can I make them larger?
You can form them into two-inch rounds, but remember to adjust the chilling time. Larger balls take longer to set and can be a bit harder to coat smoothly.
How do I prevent the chocolate from cracking when stored?
Store in a cool, stable place. Rapid temperature changes cause chocolate to bloom and crack. A steady refrigerator or a cool pantry will keep them smooth.
What if my mixture is too sticky?
Add a little more crushed graham cracker, a tablespoon at a time, until it behaves. If it becomes too dry, a teaspoon of peanut butter will bring it back.
A Final Thought
I have kept this recipe through many small wrinkled notebooks and a few faded index cards. It is easy and forgiving. It is the kind of dish you can make when company is half expected and half surprise. Each step calms me, from the first stir to the last chill in the fridge.
When I hand these out on a small plate, I feel like I am passing along a tiny bit of home. The Butterfinger pieces are a joyful contrast to the soft peanut butter. The chocolate makes it an event. In the quiet after the meal, I hear crumbs on the table and small satisfied sighs. That is the point of this little recipe.
Conclusion
I hope these Butterfinger Bliss Balls bring your kitchen the same quiet joy they bring mine. If you want a slightly different presentation, try making them as bite-size truffles or press them into a bar and chill before slicing. For more ideas and inspiration, you might enjoy the classic take on Butterfinger balls at Butterfinger Balls – To Simply Inspire which has a familiar, old-fashioned charm. If you like a recipe that plays with textures and shows a few extra tips for dipping and decorating, this version at Butterfinger Balls – Sugar and Soul is full of friendly ideas.
May this recipe warm your table and give you a few quiet, sweet moments with the people you love.

Butterfinger Bliss Balls
Ingredients
Base Ingredients
- 1 cup creamy peanut butter Use room temperature for easier mixing.
- 1 cup crushed graham crackers Crushed in a sealed bag for less mess.
- 1 cup chopped Butterfinger candy bars Chop smaller if they are thick for even crunch.
- 1 cup chocolate chips Use good quality chocolate for the best snap.
- 1 teaspoon vanilla extract Enhances the overall flavor.
Instructions
Preparation
- In a mixing bowl, combine the creamy peanut butter, crushed graham crackers, chopped Butterfinger candy bars, and vanilla extract. Mix until well combined.
- Stir gently but firmly, scraping the sides to blend the mixture, which should hold its shape yet remain soft enough to roll.
Forming the Balls
- Roll the mixture into small balls, about 1 inch in diameter, using warm palms. If the mixture sticks, wet your hands or chill the bowl for 10 minutes.
Coating with Chocolate
- Melt the chocolate chips in a microwave-safe bowl in 30-second intervals, stirring until smooth and glossy.
- Dip each ball into the melted chocolate, ensuring it is well coated, and place on a parchment-lined baking sheet.
- Refrigerate the Bliss Balls for at least 30 minutes or until the chocolate has hardened.
Serving
- Serve chilled and enjoy! Let them sit for 5 minutes at room temperature if your home is cold to relax the texture.