Start with the smell of warm butter and vanilla pulling you into the kitchen. Someone is hovering near the counter, asking if they can help. You hand them a little piece of dough and the room gets quieter. That is the kind of moment Braided Easter Bread creates: simple, comforting, and worth the extra minute it takes to braid. If you want a bread that feels festive without being fussy, this is it. If you like easy breads, you might also enjoy a different quick loaf like my banana bread without baking soda for another low-effort winner.
Why Braided Easter Bread Deserves a Spot in Your Weeknight Rotation
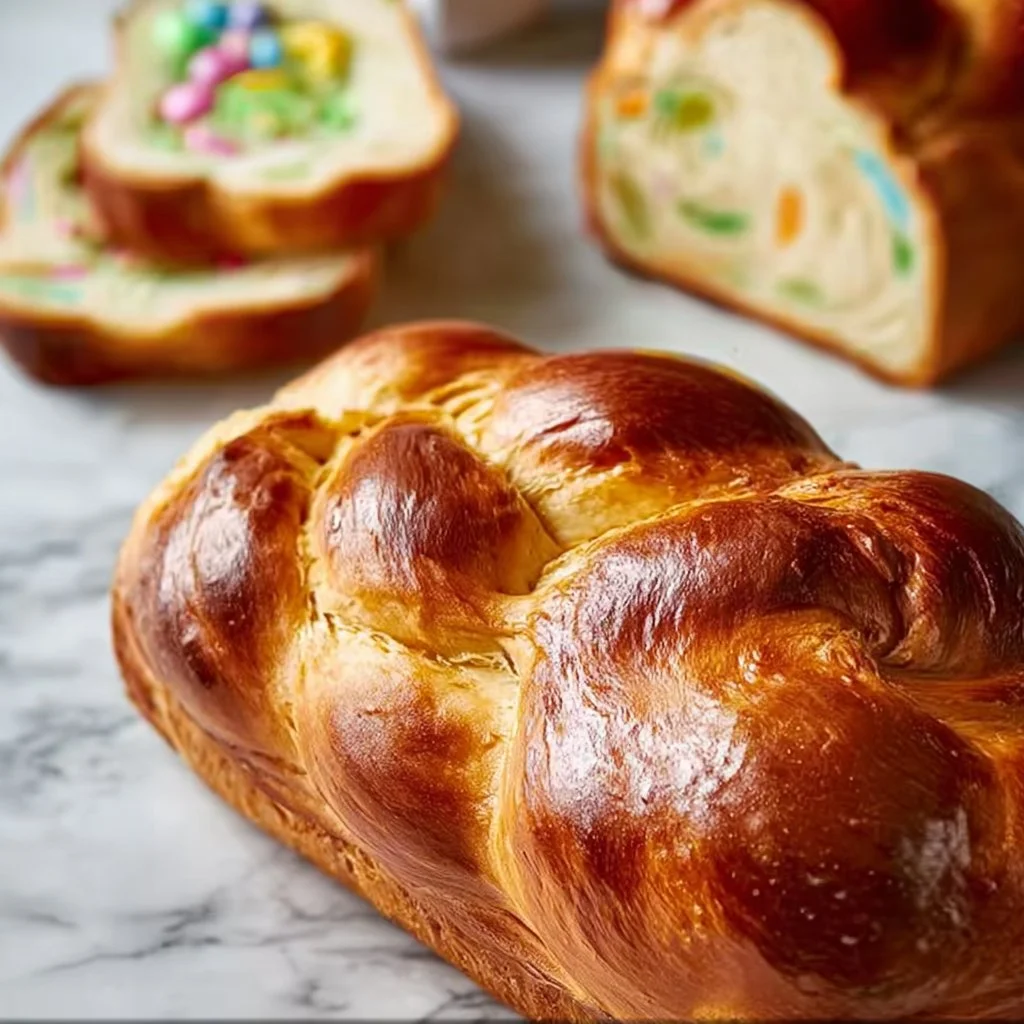
Braided Easter Bread is one of those recipes that looks impressive and tastes like heirloom comfort, but does not require a day in the kitchen. It comes together with pantry staples, some gentle kneading, and a little patience during the rises. This makes it a great choice when you want something special but you do not have hours to fuss.
It feeds a crowd without fussy plating and pairs well with morning coffee, an easy family dinner, or a holiday table. The braid keeps the crumb light and the crust evenly bronzed. It also saves time because you can shape it, tuck in a dyed egg, and go. No frosting, no complex fillings. Just bread that looks like you tried and tastes like you cared.
How to Make Braided Easter Bread the Easy Way
“If it smells this good halfway through, you know dinner’s gonna be great.”
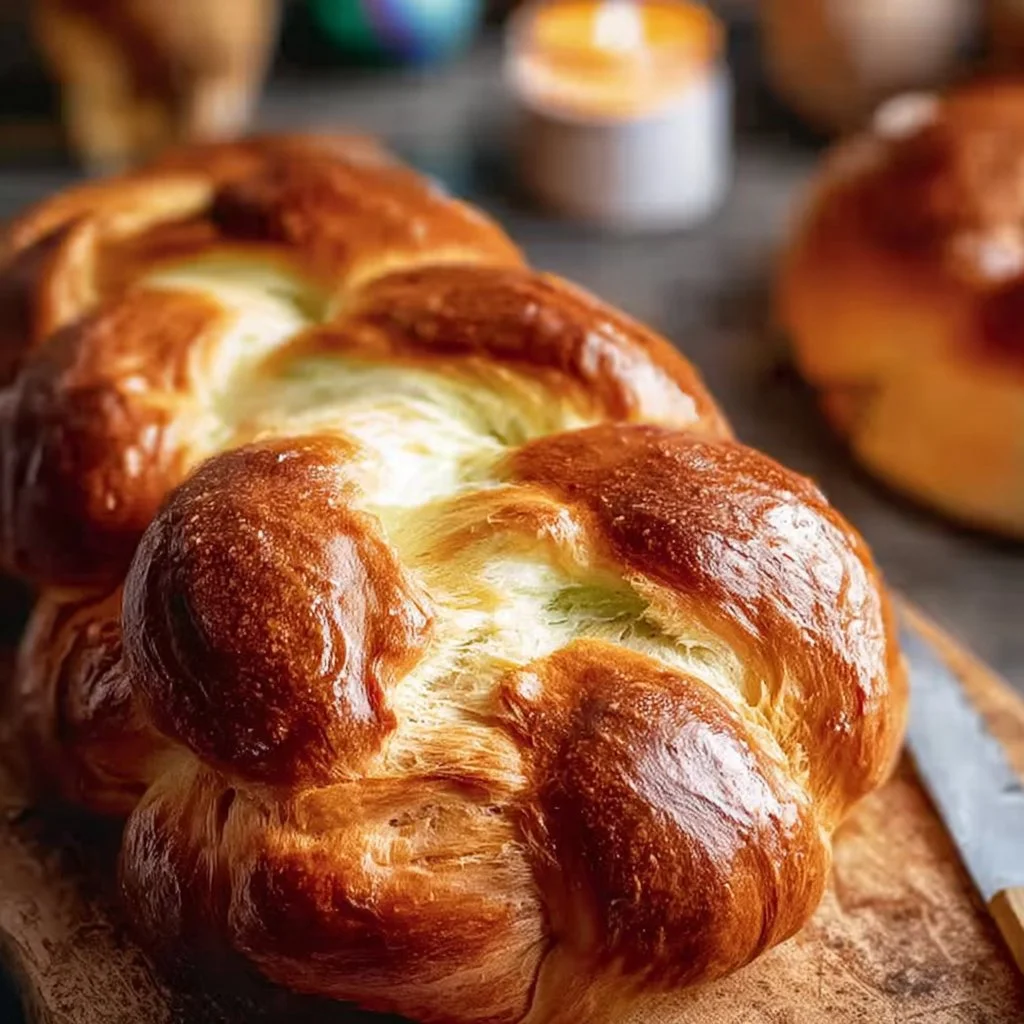
Here is a quick overview before we dive into the ingredients and steps. You mix dry ingredients, whisk wet ingredients, combine, and knead until smooth. Let it rise until doubled, braid three ropes, nestle in dyed eggs, proof briefly, and bake until golden. The finished loaf should be glossy, slightly browned on top, and springy when you press it gently.
Look for a soft, slightly shiny crust and an internal temperature around 190 to 200°F if you want a foolproof check. Aroma is a great cue too: when your kitchen smells like butter and vanilla, that bread is done making friends.
Ingredients You’ll Need
4 cups all-purpose flour
1/4 cup sugar
1 packet (2 1/4 tsp) instant yeast
1 tsp salt
1/2 cup milk, warmed
1/2 cup unsalted butter, melted
3 large eggs
1 tsp vanilla extract
Dyed eggs (for decoration)
Friendly note: You do not need fancy ingredients. Use regular milk and store-bought butter. If you only have active dry yeast, just dissolve it in the warm milk first and give it 5 to 10 minutes to bloom. Also, if you are unsure about dyed eggs, use hard-cooked eggs or decorative faux eggs for serving.
I often keep the pantry basics together, the way I do for my classic banana bread. It keeps prep fast and my kitchen less chaotic when dinner is calling.
Step-by-Step Directions
- In a large bowl, mix flour, sugar, yeast, and salt.
In another bowl, combine warm milk, melted butter, eggs, and vanilla.
Tip: Warm the milk until it feels like a hot bath, not boiling. - Gradually add the wet ingredients to the dry, mixing until a dough forms.
Knead for about 10 minutes until smooth.
Keep kneading until the dough pulls away from the sides and looks elastic. - Place the dough in a greased bowl, cover, and let rise in a warm place for about 1 hour or until doubled in size.
Find a draft-free spot or warm oven with the light on.
A doubled dough leaves an indentation when poked lightly. - Punch down the dough and divide into three equal parts.
Roll each part into a rope, braid them together, and shape into a circle.
Don’t worry about perfection. Even loose braids look beautiful on the table. - Place the braided dough on a baking sheet lined with parchment paper.
Nestle dyed eggs in the center.
Use a little egg wash on the reeds to help the eggs sit in place. - Cover and let rise for another 30 minutes.
This second rise tightens the braid and restores spring.
If the room is cool, give it an extra 10 to 15 minutes. - Preheat oven to 350°F (175°C). Bake for 25-30 minutes or until golden brown.
Rotate the pan halfway through if your oven runs hot.
A little browning is good; it adds that toasted flavor. - Allow to cool before serving.
Cool on a wire rack to keep the bottom from getting soggy.
If you can, wait at least 20 minutes before slicing.
Each numbered step is short and direct so you do not have to hunt for what to do next. Remember: a little flour on your hands is fine. You can do the dough in a stand mixer to save time and elbow grease. If you want a shinier top, brush with an egg wash before baking.
The Cooking Process Explained
Making Braided Easter Bread is as much about simple technique as it is about timing. First rise develops flavor and strength in the gluten. Kneading builds that structure so the loaf holds its braid and puffs up in the oven. Second rise relaxes the dough so the braid looks full and not tight.
If the dough feels sticky after mixing, add flour a tablespoon at a time until it becomes tacky but not dry. Under-kneaded dough will spread instead of rise, so aim for elasticity. You can test by stretching a small piece; if it forms a thin membrane without tearing easily, you are in good shape.
Bake time depends on size and oven heat. If your top browns before the inside is done, tent with foil and finish baking. The smell of warm vanilla and butter is a reliable signal that you are close to a perfect finish.
Serving Braided Easter Bread at the Table
Serve this bread family-style in the middle of the table and let everyone pull off a piece. It pairs well with soft cheeses, honey, and fresh fruit for brunch. For dinner, try it alongside a simple green salad, roasted vegetables, or a small board of cured meats. Slice it warm with butter and a sprinkle of flaky salt for instant happiness.
If you want to stretch the meal, make sandwiches from slices for packed lunches or picnic snacks the next day. You can also tear off smaller pieces and serve with bowls of jam or whipped cream for a dessert-style sharing platter.
For a game night or potluck, place the bread on a board and surround it with small bowls of spreads so guests can customize every slice.
I often pair the bread with an easy lemon ricotta spread for a clean, bright contrast. It keeps the meal feeling both special and relaxed.
Storage & Reheat (No Soggy Leftovers)
Store leftover Braided Easter Bread at room temperature in a paper bag or loosely wrapped in a towel for up to 48 hours. For longer keeping, slice and freeze in airtight bags for up to 3 months. Thaw overnight in the fridge or on the counter.
To reheat, the oven is your friend. Wrap a slice in foil and warm at 300°F for 10 minutes. This brings the crust back to life and keeps the crumb tender. The microwave works in a pinch, but it can make the bread chewy. If you do microwave, heat in 10 to 15 second bursts to avoid overcooking.
If you have slices in the freezer, toast them gently for a quick breakfast. A little butter on warm toast tastes like care, even when you are short on time. That bread keeps well and still tastes homemade when reheated right.
Quick Tips & Shortcuts
- Use a stand mixer with a dough hook to save time and arm work.
- Swap half the flour for whole wheat for a nuttier flavor; reduce milk by a tablespoon if the dough feels too slack.
- Make the dough the night before and refrigerate after the first rise. Punch down, cover, and chill. Shape and braid in the morning, then proof and bake. You get freshness with less morning rush.
- Want a shiny top fast? Brush with an egg wash before baking. For a softer finish, brush with melted butter right after the bread comes out.
- If you are short on time, roll into smaller loaves and reduce baking time by 5 to 10 minutes.
A few of these tricks come from years of learning how to keep flavor while cutting corners. The idea is to preserve the good stuff and skip the busywork.
You might find other quick recipes I test in the weeknight toolkit like my banana nut bread which follows the same logic: keep the steps focused and the result comforting.
Variations That Work
Braided Easter Bread is flexible. Here are family-friendly changes that still keep the spirit of the recipe.
- Sweet twist: Fold in 1/2 cup raisins or chopped dried apricots into the dough. Add a light drizzle of icing after baking for extra sweetness.
- Savory version: Skip the sugar and add 1 tsp dried herbs plus 1/4 cup grated Parmesan. Serve with soup.
- Citrus lift: Add the grated zest of one orange to the dough for a bright, floral note.
- Mini loaves: Divide dough into smaller braids and bake as individual rings for party servings or lunchbox treats. These heat faster and look charming.
- Enriched loaf: Brush with melted honey and sprinkle sliced almonds on top before baking for a bakery-style finish.
For a kid-friendly twist, tuck miniature chocolate eggs between the braid loops after it cools. If you try the mini approach, you can follow a scaled pattern like the one I used when making small celebration breads in a hurry and it worked great. Another playful idea is to make a basic braid and use the recipe to practice braiding with the kids before breakfast.
If you want a themed activity, try dyeing eggs together before baking. Let the kids help place eggs in the braid. It becomes part of the ritual, not just dessert.
Ethan’s Notes From the Kitchen
I know cooking for the family often happens in the cracks of a busy day. That is why this recipe is practical and forgiving. I have made this many times with varying degrees of sleep and still ended up with a golden loaf.
A couple of real-world notes: my oven runs a touch hot, so I check to see if the top is too brown around minute 20. If it is, I tent and keep baking. I also let the dough rest a little longer if my kitchen is cold. The dough always tells you what it needs. If it is slow, give it time. If the dough doubles faster than expected, move on to shaping.
If you have a stand mixer, use it. If you do not, kneading by hand is fine. Keep the counter clear and flour sparingly. Clean as you go and you cut down on cleanup later.
I keep a small notepad of these little changes by the recipe so the next time I bake, I remember the tweaks that worked.
FAQs About Braided Easter Bread
Can I make this ahead?
Yes. Make the dough and do the first rise the night before. Chill it covered in the fridge. In the morning, punch down, shape, proof, and bake. It saves morning chaos.
What if I do not have instant yeast?
Use active dry yeast. Dissolve it in the warm milk and wait 5 to 10 minutes for it to foam before adding to the flour. The rise will behave the same after that.
Can I use colored raw eggs?
Yes, but make sure they are hard-cooked first. Some people use hard-boiled dyed eggs so they are safe to eat. For display only, decorative eggs work too.
My dough will not rise. What went wrong?
Check the temperature of the milk. If the liquid is too hot it can kill yeast. Also check the expiration of the yeast. Find a warm spot for proofing, and give it extra time.
How do I get a glossy top?
Brush with an egg wash before baking. For a softer sheen, brush with melted butter as soon as the bread comes out of the oven.
A Final Bite
If this bread brings people to the table, you have done something right. It is a simple recipe that rewards a little attention and gives back a lot of comfort. The braid looks like effort, but it is mostly about patience and gentle hands. You do not need perfect braids to get perfect smiles.
If you find the family fighting over the last slice, that is a good problem to have. And if someone asks you to make it the next time, write the date on the recipe. That is how traditions start.
Conclusion
If you want a classic family-style loaf that still fits into a busy schedule, this Braided Easter Bread checks every box. For more inspiration on holiday breads and variations, I like to compare family takes like That Skinny Chick’s Braided Easter Bread and try smaller versions like this Mini Braided Easter Bread Recipe. Give it a go, and remember: don’t overthink it. You’ve got this.

Braided Easter Bread
Ingredients
Dough Ingredients
- 4 cups all-purpose flour You can substitute half the flour for whole wheat for a nuttier flavor.
- 1/4 cup sugar Skip for a savory version.
- 1 packet instant yeast (2 1/4 tsp) Active dry yeast can be used; dissolve in warm milk first.
- 1 tsp salt Essential for flavor.
- 1/2 cup milk, warmed Warm but not boiling; 110°F is ideal.
- 1/2 cup unsalted butter, melted Regular butter works fine.
- 3 large eggs Room temperature eggs yield better results.
- 1 tsp vanilla extract Enhances flavor.
- Dyed eggs For decoration; ensure they are hard-cooked.
Instructions
Preparation
- In a large bowl, mix flour, sugar, yeast, and salt.
- In another bowl, combine warm milk, melted butter, eggs, and vanilla.
- Gradually add the wet ingredients to the dry, mixing until a dough forms.
- Knead for about 10 minutes until smooth and elastic.
- Place the dough in a greased bowl, cover, and let rise in a warm place for about 1 hour or until doubled in size.
Shaping and Baking
- Punch down the dough and divide it into three equal parts.
- Roll each part into a rope, braid them together, and shape into a circle.
- Place the braided dough on a baking sheet lined with parchment paper.
- Nestle dyed eggs in the center and brush the braid with egg wash.
- Cover and let rise for another 30 minutes.
- Preheat the oven to 350°F (175°C). Bake for 25-30 minutes or until golden brown.
- Allow to cool before serving on a wire rack.