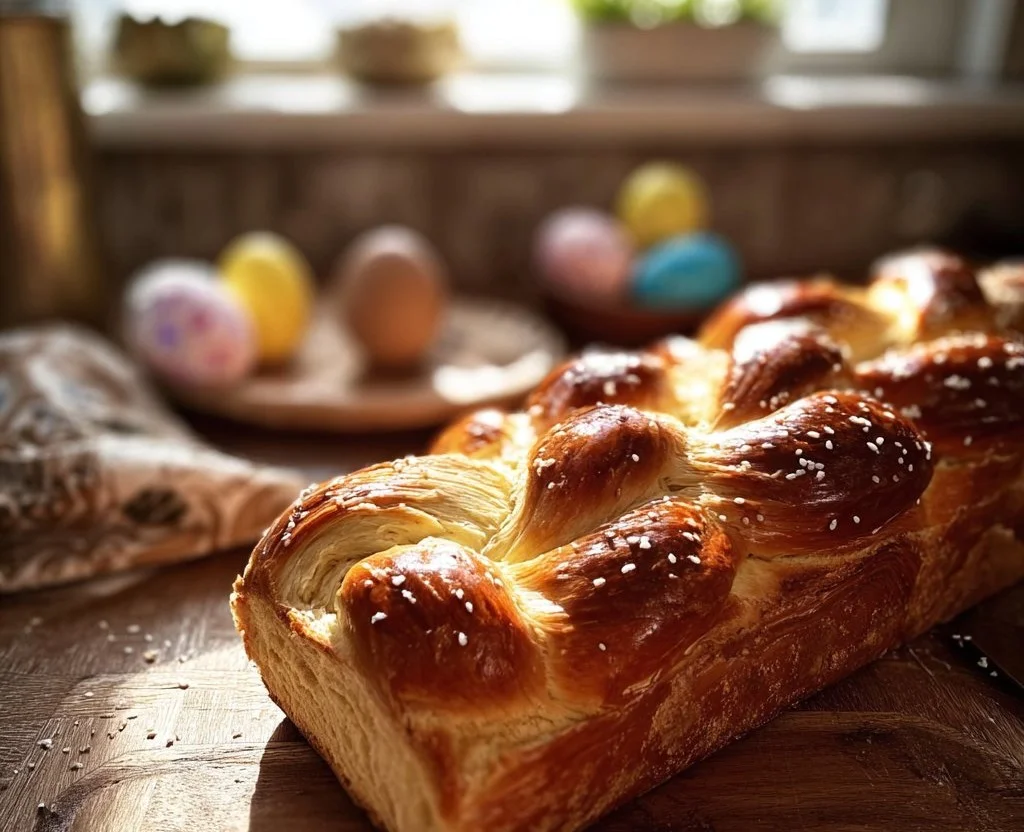
A warm braid of bread sits in the middle of the table, the house smelling like butter and orange zest. The kids press their noses to the glass of the oven like it is the best show in town. That is my favorite kind of quiet chaos: food that makes people gather without fuss. If you want something that fills the room and your belly, Traditional Italian Easter Bread does that with a little patience and a lot of heart. Check my banana bread guide if you want a quick loaf to practice your braiding and timing while you wait for this one to rise: banana bread guide.
Why You’ll Love This Traditional Italian Easter Bread
This bread gives you that classic holiday moment any night of the week. It looks fancy, but the steps are simple. You can make it with basic pantry staples and a little time, and you’ll end up with a soft, slightly sweet loaf that is great for morning toast or an after-dinner treat.
It is forgiving. If your first rise runs a little long because life happens, it is fine. The braid makes it feel special without adding real drama. It keeps well, so you can bake early and serve later. That means less stress on the day you want everyone around the table.
How to Make Traditional Italian Easter Bread the Easy Way
“If it smells this good halfway through, you know dinner’s gonna be great.”
Start by reading through the steps. This bread wants patience but no perfection. Warm milk, proof the yeast, add eggs and butter, knead, rise, braid, and bake. The dough should feel soft and springy, not sticky like pancake batter and not dry like a rock.
Watch for visual cues. The yeast mixture should be foamy on top when it is ready. When the dough has doubled, it will look smooth and slightly puffed. The finished loaf should be golden on top and sound hollow when you tap the bottom.
For a few more texture ideas while you work, check out my notes on how to keep crumb soft and even from another recipe: banana bread without baking soda tips.
Ingredients You’ll Need
4 cups all-purpose flour
1/4 cup sugar
1 packet (2 1/4 tsp) active dry yeast
1/2 teaspoon salt
3/4 cup warm milk
1/4 cup unsalted butter, melted
3 large eggs
1 teaspoon vanilla extract
Colored egg or decorated egg for garnish (optional)
Simple things, nothing fancy. I like to use room-temperature eggs to help the dough come together smoothly. If you do not have unsalted butter, use what you have and reduce the added salt a touch. No fancy mixers required; your hands will do the work if you want to keep dishes low.
A friendly side note: use what’s in your fridge. If you want to add a citrus twist, a teaspoon of orange or lemon zest plays nicely with the vanilla. Don’t overthink it. This bread is all about the warm, comforting flavor.
Step-by-Step Directions
- In a large bowl, combine warm milk and sugar; sprinkle yeast on top. Let it sit until foamy, about 5-10 minutes.
Keep the milk warm, not hot, so you do not kill the yeast. A fingertip test is fine; it should feel like warm bath water.
If the yeast does not foam after 10 minutes, start over with new yeast and slightly warmer milk. - In another bowl, whisk together flour and salt.
Mix these dry ingredients well so the salt does not sit in one spot and the dough comes together evenly.
If you want a lighter crumb, sift the flour first, but it is not required. - Add melted butter, eggs, vanilla extract, and the yeast mixture into the flour. Mix until a dough forms.
Use a wooden spoon or a mixer with a dough hook to bring the dough together. It will be shaggy at first.
Keep mixing until it forms a rough ball. If it feels too dry, add a teaspoon of milk at a time. - Knead the dough on a floured surface until smooth, about 5-10 minutes.
Turn the dough onto a lightly floured counter and fold it, push it, and rotate it as you knead.
You are looking for a smooth, slightly elastic texture. The dough should bounce back slowly when poked. - Place the dough in a greased bowl, cover, and let it rise in a warm place until doubled, about 1-2 hours.
A warm spot is important but not hot. I use the oven with just the light on or a sunny windowsill.
Cover with plastic wrap or a damp towel to stop the surface from drying out. - Preheat the oven to 350°F (175°C).
Do this once the dough is near ready so the oven is at temperature when you finish the final steps.
If you bake at a slightly higher temp for a shorter time, watch closely so the top does not burn. - Punch down the dough and divide it into three equal parts. Roll each part into a long rope and braid them together.
Keep the ropes the same thickness so the braid bakes evenly. A ruler helps if you like precision, but eyeballing works fine.
Tuck the ends under so the braid looks neat and holds its shape while baking. - Transfer the braided dough to a greased baking sheet. If using, place colored eggs in the center of the braid.
Use parchment paper to save cleanup time and prevent sticking. Wet the colored eggs slightly so they nestle in the dough.
Press the eggs in gently so they sit snugly as the dough rises and expands. - Cover and let rise again for about 30 minutes.
This gives the braid a final puff and keeps the crumb light. Do not rush this step.
If your kitchen is cool, pop the baking sheet back into the oven with the light on for a warm proofing spot. - Bake for 25-30 minutes or until golden brown.
Rotate the pan halfway if your oven has hot spots. The loaf should sound slightly hollow when tapped underneath.
If the top browns too quickly, tent with foil for the last 10 minutes. - Let it cool before serving.
Cooling makes slicing easier and keeps crumbs from getting gummy. Twenty to thirty minutes is usually enough.
If you glaze or dust with sugar, wait until it cools a bit so the topping does not melt away.
A few quick tips as you go: keep your work surface lightly floured to avoid sticking. A little browning on the crust adds flavor, so do not panic if the top gets nicely golden. You have this.
Serving Traditional Italian Easter Bread at the Table
Serve it warm and simple. Tear it apart for kids and grown-ups the same way. A little butter and a sprinkling of sugar go a long way.

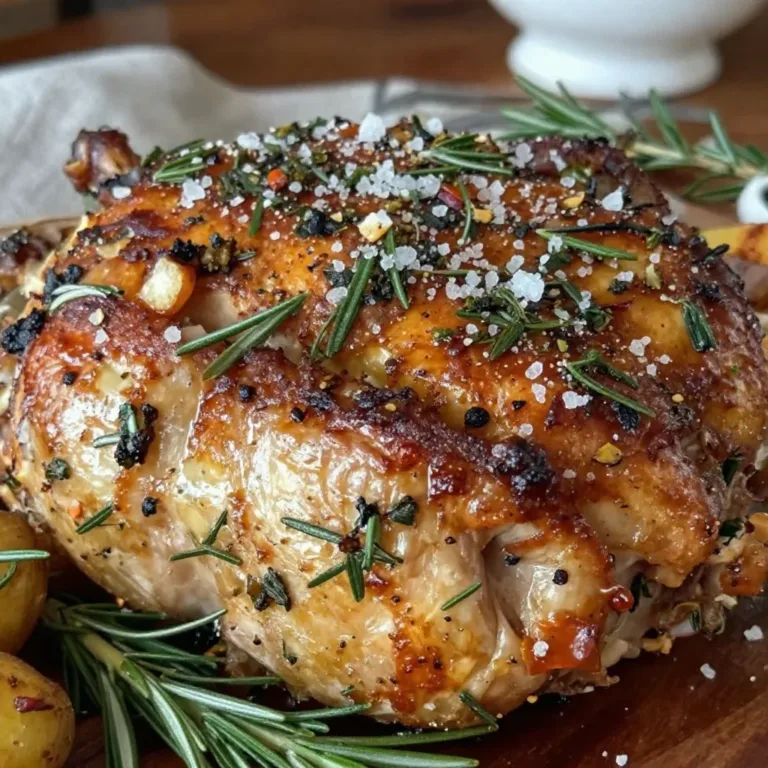
This bread is perfect for brunch with jam and ricotta, or alongside a pot of coffee. For dinner, slice it and serve with a bowl of stew or roast chicken. It also makes excellent French toast the next morning. Place it on a board and let people help themselves for a relaxed family meal.
If you are taking it to a potluck, slice it before you go and arrange the pieces in a loose spiral on a platter. That way, it is easy to grab and the bread still looks special. I like to tuck a small knife and napkins next to the platter so folks do not need to hunt for tools.
Storage & Reheat (No Soggy Leftovers)
Store leftover bread at room temperature in an airtight container for 2 days. For longer storage, wrap it tightly in plastic and freeze for up to 3 months.
To reheat, take it from the freezer and let it come to room temperature. Then warm it in a 325°F oven for 10 to 15 minutes to refresh the crust. The microwave works in a pinch, but you will lose some of the crust’s texture. The oven brings back that just-baked feel.
If you slice before freezing, separate the slices with parchment paper. That makes it easy to pull out just what you need without thawing the whole loaf. Leftovers make great sandwiches, too. Try them with salty meats and tangy cheese for a quick weeknight dinner.
Quick Tips & Shortcuts
- Use a stand mixer to save elbow grease. The dough only needs about 5-7 minutes in a mixer to get to the right texture. Cleanup will be faster if you line the bowl with a little nonstick spray first.
- No time for two rises? Do one longer rise in the fridge overnight. Shape and braid in the morning, then let it come to room temperature before the final rise. This gives flavor and frees up your evening.
- Want a richer loaf? Swap one tablespoon of milk for heavy cream. You will notice a softer crumb and a more buttery bite.
- If you like nuts, fold in 1/2 cup chopped walnuts or almonds before the first rise. For more nutty ideas, see my take on a nutty loaf at this banana nut bread recipe.
These tips save time and reduce mess while keeping flavor high. Little changes can have a big impact on your weeknight cooking.
Variations That Work
You can tweak this bread a dozen different ways depending on what your family likes. Add citrus zest for brightness, swap vanilla for almond extract for a nutty aroma, or fold in a handful of raisins or dried cranberries for chew and sweetness.
For a savory twist, omit the sugar and add grated Parmesan, chopped herbs, and a pinch of cracked pepper. That turns this into a dinner-worthy loaf that pairs with soups and salads.
If you want to make it a gluten-free version, try a 1-to-1 gluten-free flour blend and add a tablespoon of xanthan gum if it is not already included. Texture will change, but the flavor can still be excellent with the right adjustments.
I have also baked smaller rolls with the same dough. Divide into six or eight pieces, braid smaller strands, and bake for about 15-18 minutes. They are great for individual servings and save on slicing drama.
FAQs About Traditional Italian Easter Bread
Can I make this ahead?
Yep. You can do the first rise and refrigerate overnight. Shape and bake the next day. The flavor often improves with a slow rise.
Do I have to use a colored egg?
No, it is optional. The egg is traditional and pretty, but the bread is delicious without it.
My yeast did not foam. What now?
Start over with fresh yeast. Make sure the milk is warm, not hot. If your kitchen is cold, warm the milk slightly more to help the yeast wake up.
Can I freeze the baked bread?
Yes. Wrap it tightly and freeze up to 3 months. Thaw at room temperature and warm in the oven to refresh the crust.
How do I get a shiny finish?
Brush with a little beaten egg or egg wash before baking for a glossy top. If you want a softer finish, skip the wash and dust with sugar after cooling.
A Final Bite
If the kitchen fills with the smell of baking and someone says, “Wow, did you make that?” you did your job. This bread is not about perfection. It is about eating together and making a small tradition out of ordinary nights. If your family licks the plate clean, don’t say I didn’t warn you.
Conclusion
If you want another classic take on the same idea, I like the clear instructions in An Italian in My Kitchen’s Easter Bread recipe for an authentic feel and extra tips. For a slightly different twist and a visual step-by-step guide, check out this version at Sprinkle Bakes Italian Easter Bread.
Thanks for baking with me. Keep it simple, enjoy the rise, and remember: the best recipes are the ones that get you to the table.

Traditional Italian Easter Bread
Ingredients
For the Dough
- 4 cups all-purpose flour Sifted for lighter texture if desired.
- 1/4 cup sugar
- 1 packet active dry yeast (2 1/4 tsp) Ensure yeast is fresh for proper rising.
- 1/2 teaspoon salt Reduce if using salted butter.
- 3/4 cup warm milk Warm but not hot to activate yeast.
- 1/4 cup unsalted butter, melted Substitute with any butter if unsalted is not available.
- 3 large eggs Use room temperature eggs for best results.
- 1 teaspoon vanilla extract Optional: substitute with almond extract for variation.
For Garnish
- 1 colored egg colored egg or decorated egg for garnish (optional) Optional but traditional.
Instructions
Preparation of Dough
- In a large bowl, combine warm milk and sugar; sprinkle yeast on top. Let it sit until foamy, about 5-10 minutes.
- In another bowl, whisk together flour and salt.
- Add melted butter, eggs, vanilla extract, and the yeast mixture into the flour. Mix until a dough forms.
- Knead the dough on a floured surface until smooth, about 5-10 minutes.
- Place the dough in a greased bowl, cover, and let it rise in a warm place until doubled, about 1-2 hours.
Baking
- Preheat the oven to 350°F (175°C).
- Punch down the dough and divide it into three equal parts. Roll each part into a long rope and braid them together.
- Transfer the braided dough to a greased baking sheet. If using, place colored eggs in the center of the braid.
- Cover and let rise again for about 30 minutes.
- Bake for 25-30 minutes or until golden brown.
- Let it cool before serving.