Start with the family gathered at the table, the kids nudging each other because they smell chocolate, and you carrying a clear bowl that shows every layer like a little celebration. Chocolate Toffee Trifle does that: it looks fancy, but it is one of those honest recipes that comes together fast and cleans up easy. I make this when I want dessert to feel special without turning the kitchen into a war zone. If you like make-ahead sweets and want ideas for simple extras, I also keep a list of reliable treats like these brown butter chocolate chip cookies that pair well with a trifle.
Why Chocolate Toffee Trifle Deserves a Spot in Your Weeknight Rotation

This is the dessert that gives you big payoff with small work. You get layers of soft cake, creamy pudding, light whipped topping, and crunchy toffee in one bowl. That contrast of textures makes every spoonful interesting, and the toffee bits add a grown-up touch without any extra fuss.
It matters because it is flexible. Use store-bought components or homemade if you have the time. Meanwhile, the trifle can be prepped a few hours ahead or the night before, so it frees up your evening for games, homework, or just conversation.
It also saves dishes. You can build the trifle in one single glass bowl and serve from it. From there, leftovers store in the same bowl with a lid or plastic wrap. That kind of simplicity is why this recipe works for busy nights and last-minute guests alike.
How to Make Chocolate Toffee Trifle the Easy Way
“If it smells this good halfway through, you know dinner’s gonna be great.”
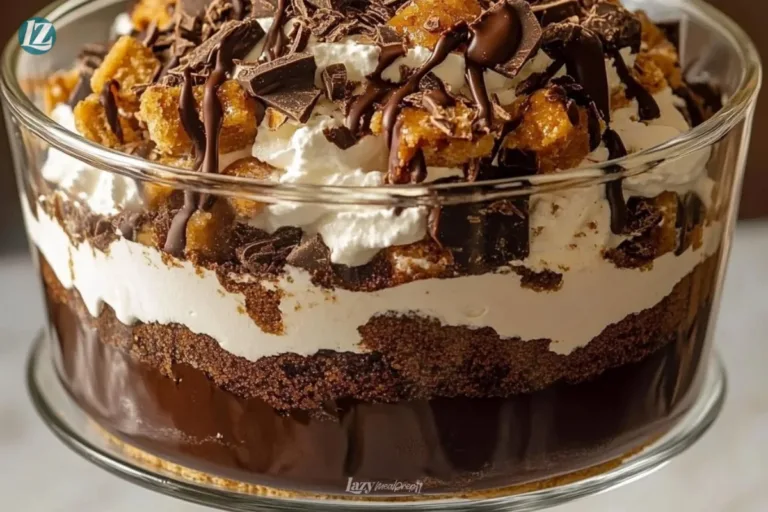
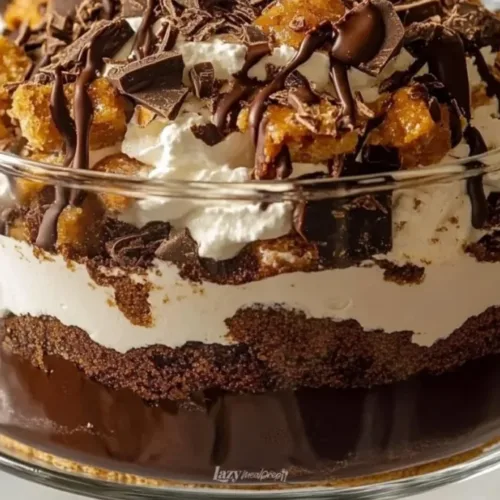
Think of the trifle as a simple repeat pattern: cake, pudding, whipped topping, and toffee bits. You bake or buy a chocolate cake, whip up instant pudding, fold in cool whipped topping, and stack. The colors should read dark chocolate, creamy brown, and snowy white, with pieces of toffee glinting like little treasures.
Aroma cues help. When you cut the cake and it gives off that deep chocolate smell, you know the base is ready. Once you whisk the pudding and it thickens to a glossy sheen, you are in business. When the whipped topping spreads smooth, you are close to the finish line.
Before we get into the ingredient list and steps, a quick note: you can substitute many parts to suit taste or diet. Later sections cover swaps and variations.
Ingredients You’ll Need
For the Layers:
1 box (15.25 oz / 430 g) chocolate cake mix (plus ingredients listed on the box eggs, oil, water)
1 package (3.9 oz / 110 g) instant chocolate pudding mix
2 cups (480 ml) cold milk
1 tub (8 oz / 225 g) whipped topping, thawed (like Cool Whip)
1 ½ cups (about 5 oz / 140 g) crushed chocolate-covered toffee bars (such as Heath or Skor)
Optional Garnish:
Shaved chocolate or extra toffee bits on top
Friendly notes:
- Don’t stress over the brand of cake mix. Use what’s on sale or what you already have in the pantry.
- If you want a deeper chocolate flavor, pick a fudgy cake mix. If kids like it sweeter, a regular chocolate will do.
- Crushed toffee bars bring both flavor and crunch. If you must, use plain toffee pieces or even chopped chocolate chips for a similar effect.
Step-by-Step Directions
- Bake the Cake:
Preheat your oven and prepare the chocolate cake mix according to the package directions using the eggs, oil, and water listed.
Bake the cake in a 9×13-inch (23×33 cm) pan until a toothpick comes out clean.
Let it cool completely on a wire rack so it does not fall apart when you cube it. - Cut into Cubes:
Once cooled, use a serrated knife to cut the cake into roughly 1-inch cubes.
Don’t worry about perfect squares; uneven pieces look homemade and rustic.
If the cake crumbles a bit, that is okay it will absorb pudding and stay moist. - Make the Pudding:
In a medium bowl, whisk the chocolate pudding mix with cold milk for 2 minutes until thickened.
You want the pudding glossy and scoopable but not rock-solid.
Set it aside in the fridge to chill slightly while you prep the whipped topping. - Lighten with Whipped Topping:
Fold about half of the whipped topping into the pudding if you want a lighter cream layer; otherwise, use the pudding as-is.
Gently fold to keep air in the mixture; don’t overwork it or it will get dense.
Keep the remaining whipped topping chilled until assembly. - Layer the Trifle:
In a large trifle bowl or glass dish, layer half of the cake cubes in an even layer across the bottom.
Spoon half of the pudding over the cake, smoothing gently with the back of a spoon.
Add half of the whipped topping and spread it, then sprinkle with half of the crushed toffee bits. - Repeat the Layers:
Repeat layers with the remaining cake cubes, pudding, whipped topping, and toffee.
Press lightly to settle the layers but avoid squishing everything into a pile.
The visual layers should be distinct: dark cake, chocolate pudding, white topping, and toffee speckles. - Chill & Serve:
Cover the trifle bowl and refrigerate for at least 1 hour or up to 24 hours before serving to let flavors blend.
Just before serving, garnish with extra toffee bits or chocolate curls for show.
Scoop with a large serving spoon into individual bowls, getting all layers in each portion.
Quick tips in the steps:
- When whisking pudding, scrape the sides so no dry powder remains.
- Cool cake completely or the pudding will melt and the whipped topping will deflate.
- If you need to speed things up, use store-bought chocolate cupcakes instead of baking and cubing a cake.
The Cooking Process Explained
If you are the kind of cook who likes to understand why things work, here it is in plain terms. The cake soaks up some moisture from the pudding and whipped topping, which keeps the trifle from feeling dry. Meanwhile, the pudding and whipped topping act as a creamy binder that gives structure when chilled.
Texture balance is important. The cake should be soft enough to melt in your mouth but not so soggy that the whole bowl collapses. The toffee adds crunch and a hint of salty caramel that wakes up the chocolate. If you leave this overnight, the cake will soften more and the flavors will marry; check the texture and adjust timing based on whether you prefer a firmer bite or a spoon-scooped cream.
From a timing perspective, the pudding only needs a few minutes to thicken. The longest part is the bake and the chill. If you are short on time, assemble with cooled store-bought cake and pop into the fridge to set for an hour.
Serving Chocolate Toffee Trifle at the Table

I like to serve this family-style in the trifle bowl so everyone can see the layers and feel a bit fancy. Place a stack of small bowls beside the trifle with a spoon for self-serve. For parties, you can spoon the trifle into coupe glasses or small jars for individual desserts.
For a casual weeknight, pair the trifle with simple coffee or a light dessert wine. If kids are eating, try chocolate milk or sparkling water with a splash of fruit syrup. Meanwhile, if you want a slightly more indulgent presentation, warm some hot fudge and drizzle a little on individual portions.
If you plan to transport this to a potluck, build the base layers at home and bring the whipped topping and toffee separately to add right before serving. This keeps the top from getting squished in transit. And because the trifle is already portion-friendly, it is great for grab-and-go meal prep containers when you want a weekend treat ready in the fridge.
Storage & Reheat (No Soggy Leftovers)
Refrigerator:
Store the trifle covered in the refrigerator for up to 3 days.
Keep the top layer of toffee separate if you want it crunchier when served the second day.
If left too long, the toffee will absorb moisture and soften, which is not a disaster, but you lose the contrast.
Freezer:
I do not recommend freezing the fully assembled trifle. The whipped topping and pudding separate when frozen and thawed.
If you must freeze, store cake cubes in a freezer bag and pudding in an airtight container separately. Thaw in the fridge and assemble within a day.
Quick reheating tips:
This dessert does not need reheating. Serve chilled. If you want a slightly warm variation, warm a spoonful of chocolate ganache and pour it over cold trifle just before serving; the contrast of warm ganache and cold cream is delightful.
Honest note:
Leftovers are best eaten within two days. After that, the texture changes and the cake can become overly soft. If your goal is to keep the crunch, save a handful of toffee bits and sprinkle on each serving.
Quick Tips & Shortcuts
- Use store-bought cake: A pre-made chocolate sheet cake or even chocolate cupcakes trimmed and layered saves a ton of time.
- Keep crunch: Save 1/3 cup of the crushed toffee for last-minute topping to keep it crisp.
- No whisk? Use a fork: If you do not own a whisk, beat the pudding powder and milk with a sturdy fork, then let it sit to thicken.
- Clean-up hack: Line your trifle bowl with plastic wrap before layering for no-mess transfers and easy bowl washing.
- Gluten-free or vegan ideas: Swap out the cake mix or use dairy-free pudding as needed. If you want inspiration for substitutes, these gluten-free cookie options and techniques have ideas that apply to cakes too.
Ethan’s Notes From the Kitchen
I have a few small habits that make the trifle better every time. First, I always taste the pudding before I layer it; if it feels flat, a pinch of salt brightens the chocolate. Second, I use a serrated knife to cut cake it gives cleaner edges without squashing the crumb.
When guests are coming, I assemble most of the trifle ahead and tuck it into the fridge. Then I garnish just before serving so it looks fresh. My kids always ask for extra toffee, so I keep a small bowl of crushed bars nearby and let them sprinkle to their hearts’ content.
One more kitchen trick: if the whipped topping looks separated, give it a quick gentle stir and it usually comes back. Don’t overbeat or it becomes grainy.
Variations That Work
- Salted Caramel Twist:
Drizzle salted caramel over the pudding layer before adding whipped topping. The salt brings out the chocolate and complements the toffee. - Peanut Butter Crunch:
Fold a few spoonfuls of smooth peanut butter into the pudding for a nutty version. Top with chopped peanuts and toffee bits. - Espresso Boost:
Add one teaspoon of instant espresso to the pudding mix for a mocha touch. It lifts the chocolate without making it taste like coffee. - Berry Finish:
Add a thin layer of raspberries between cake and pudding for brightness. The tartness cuts through the richness and looks beautiful. - Lighter Version:
Use low-fat milk and lite whipped topping, and reduce the toffee. It is still indulgent but with fewer calories.
If you want to make diet-specific swaps, there are plenty of resources for gluten-free baking and vegan options. For example, if you need to replace cookies or crackers in a similar dessert, try these gluten-free variations for ideas on texture and binding. Each swap changes the final texture a bit, so test small batches first if you are making this for a big event.
FAQs About Chocolate Toffee Trifle
Can I make this ahead of time?
Yep. It benefits from a few hours in the fridge so the layers settle. I sometimes make it the night before for a weekend brunch.
Can I use homemade pudding?
Absolutely. If you make stovetop chocolate pudding, let it cool completely before layering. Homemade pudding is richer and tastes great, but it takes longer to prepare.
Are there substitutions for the toffee bars?
Yes. Chopped chocolate-covered toffee is traditional, but chopped chocolate chips, crushed cookies, or even chopped shortbread add a nice crunch. Keep an eye on sugar levels, as some substitutions are sweeter.
Will the cake get soggy?
It will soften, but that is part of the appeal. If you want firmer texture, assemble shortly before serving. Also, avoid soaking the cake in extra liquid; the pudding alone is usually enough.
How do I transport it to a party?
Build the base layers and keep whipped topping and garnish separate. Transport in a shallow cooler and finish assembly at the host’s kitchen for the best presentation.
A Final Bite
If you want a dessert that sends everyone to the table with a smile, this Chocolate Toffee Trifle is a reliable winner. It looks impressive and tastes like you spent hours, even when you used a boxed cake and instant pudding. Keep some toffee in the pantry and a tub of whipped topping in the freezer, and you have a dessert ready for most any last-minute invite.
If your family licks the serving spoon clean, don’t say I didn’t warn you. You’ve got this simple, fast, and crowd-pleasing. For more ideas on small batch cookies or treats that pair well with trifles, I often reference my favorite vegan cookie swaps found here vegan cookie recipes.
Conclusion
If you want another version of the recipe or a slightly different take, check this classic write-up at Chocolate Toffee Trifle – Dinner in 321 for comparison and serving ideas. And for a step-by-step tutorial with photos and alternative tips, have a look at this guide: Easy Chocolate Toffee Trifle Dessert – Style Among Friends.
Happy cooking. Keep it simple, keep it tasty, and make room for seconds.
Chocolate Toffee Trifle
Ingredients
For the Layers
- 1 box chocolate cake mix (15.25 oz / 430 g) plus ingredients listed on the box (eggs, oil, water) You can use any chocolate cake mix that you prefer.
- 1 package instant chocolate pudding mix (3.9 oz / 110 g)
- 2 cups cold milk (480 ml) Use whatever type of milk you prefer.
- 1 tub whipped topping, thawed (8 oz / 225 g) Such as Cool Whip.
- 1.5 cups crushed chocolate-covered toffee bars (about 5 oz / 140 g) Such as Heath or Skor.
Optional Garnish
- to taste Shaved chocolate or extra toffee bits on top For added decoration.
Instructions
Bake the Cake
- Preheat your oven and prepare the chocolate cake mix according to the package directions using the eggs, oil, and water listed.
- Bake the cake in a 9×13-inch (23×33 cm) pan until a toothpick comes out clean.
- Let it cool completely on a wire rack.
Cut into Cubes
- Once cooled, use a serrated knife to cut the cake into roughly 1-inch cubes.
- Don’t worry about perfect squares; uneven pieces look homemade.
Make the Pudding
- In a medium bowl, whisk the chocolate pudding mix with cold milk for 2 minutes until thickened.
- Set it aside in the fridge to chill slightly.
Lighten with Whipped Topping
- Fold about half of the whipped topping into the pudding for a lighter cream layer; otherwise, use the pudding as-is.
- Keep the remaining whipped topping chilled until assembly.
Layer the Trifle
- In a large trifle bowl or glass dish, layer half of the cake cubes in an even layer across the bottom.
- Spoon half of the pudding over the cake, smoothing gently.
- Add half of the whipped topping and spread it, then sprinkle with half of the crushed toffee bits.
Repeat the Layers
- Repeat layers with the remaining cake cubes, pudding, whipped topping, and toffee.
- Press lightly to settle the layers.
Chill & Serve
- Cover the trifle bowl and refrigerate for at least 1 hour or up to 24 hours before serving.
- Garnish with extra toffee bits or chocolate curls before serving.