The steam rising from a small pot, the faint scent of cocoa rounding the room, and the soft clink of a wooden spoon against porcelain. I picture a quiet evening, a favorite chair, and a mug that warms both hands and mood. Homemade Dairy-Free Hot Cocoa Mix sits like a little comfort in a jar, ready to offer buttery-soft warmth and a melt-in-your-mouth hug whenever you need it.
Why You’ll Love This Homemade Dairy-Free Hot Cocoa Mix

There is something about making a mix at home that feels like a small ceremony. It is the kind of ritual that asks for nothing complicated and returns so much. A jar of Homemade Dairy-Free Hot Cocoa Mix on your shelf means you can create moments that feel like birthdays, coffee chats, or quiet nights in without fuss.
This mix is more than convenience. It carries the memory of stirring by low light, tasting for just the right note of sweetness, and sharing a cup with someone who needs a little calm. The texture is important here. I like the velvet hush of cocoa and powdered sugar meeting warmly with non-dairy milk powder so the drink comes out glossy and smooth, not chalky.
You will appreciate how simple ingredients transform into something indulgent and generous. Prepared in minutes, this mix offers a rich, chocolate-forward sip that pairs beautifully with a crisp cookie or a lightly spiced muffin. For a cozy treat, try it with a warm batch of cookies from my kitchen notes, or keep it on a shelf as a go-to for friends who drop by unannounced. For a cookie suggestion, try a favorite pairing like best homemade chocolate chip cookies for an easy, classic match.
How to Make Homemade Dairy-Free Hot Cocoa Mix
“When the kitchen smells like vanilla and butter, you know something special’s baking.”
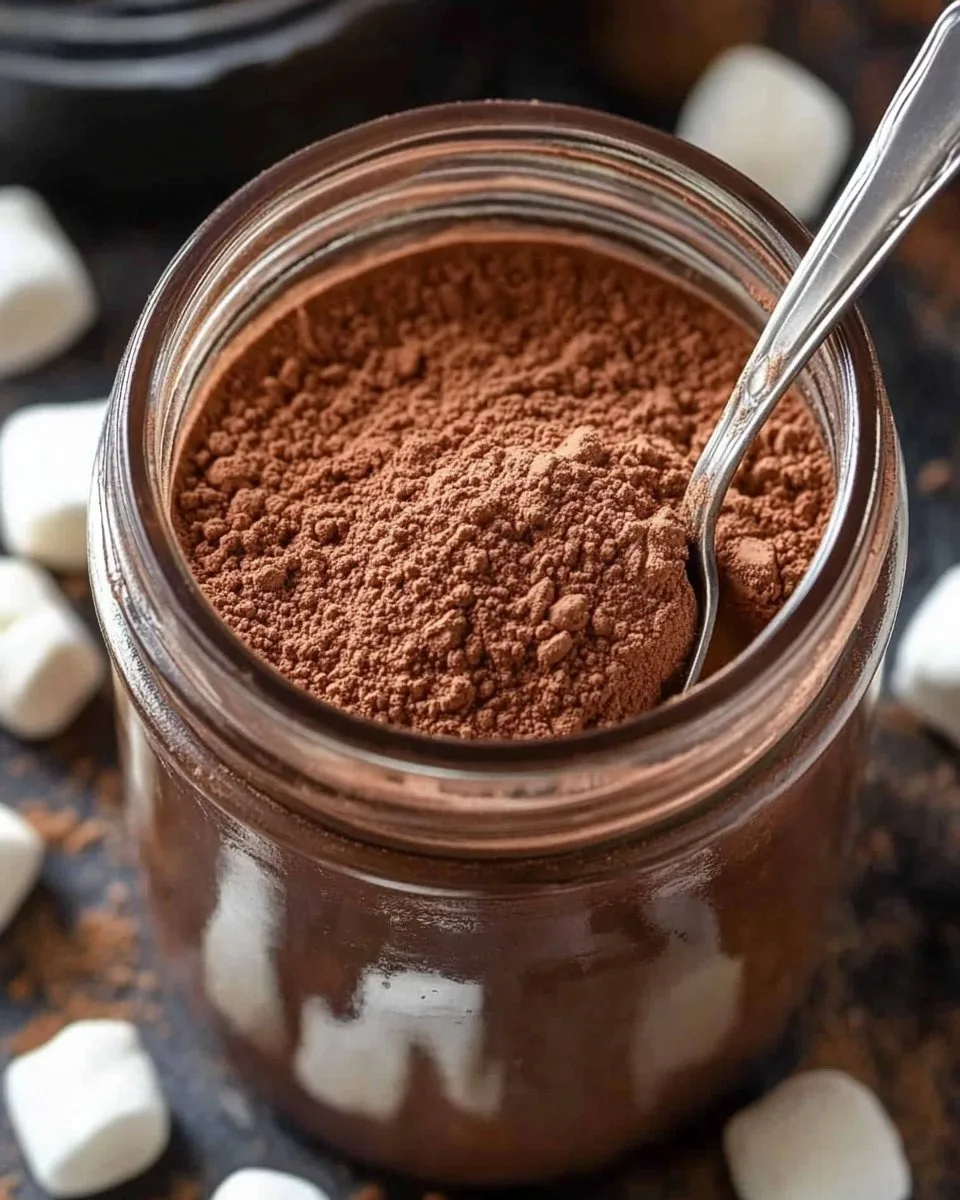
Before you mix, take a moment to notice the color and scent of your cocoa powder. Choose a cocoa with a deep chocolate color for a richer drink. Once blended, the mix will look glossy and even. When heated with water or plant milk, it should bloom into a warm, velvety cup that carries the scent of roasted cocoa and a quiet hint of vanilla.
This is a forgiving recipe. You can make a small batch in five minutes or double it to fill a jar for gifts. If you want a sweeter profile, increase the powdered sugar a touch. If you prefer bitterness, opt for an unsweetened cocoa with more depth. For a fun handful of ideas and small snack pairings, consider a bright contrast like the sweet and salty bite found in creative mixes such as this trail blend I enjoy for snack time, which adds contrast to a mug of cocoa: candy corn trail mix recipe.
Ingredients You’ll Need
1 cup unsweetened cocoa powder
1 cup powdered sugar
1 cup non-dairy milk powder
A short indulgent note: if you are not strictly dairy-free and want an extra silk, use real butter when you make a cocoa-based treat or spread alongside a cookie. If you are keeping this mix dairy-free, choose a good quality vegan butter for spreading and enjoy the same indulgent feeling. The non-dairy milk powder is the key to creamy texture without adding liquid in storage. It lets the mix bloom instantly when it meets hot water or any plant milk.
Choose a fine powdered sugar so the mix dissolves quickly. If your cocoa is grainy, sift it first. Small adjustments here make a big difference in the final mouthfeel. A dash of vanilla or a pinch of salt can also make the chocolate sing without changing the structure of the mix.
Step-by-Step Directions
- In a large bowl, combine the cocoa powder, powdered sugar, and non-dairy milk powder.
Stir gently with a whisk so the powders meet evenly.
Work through any little clumps so the mix looks smooth and even. - Whisk the ingredients together until well blended.
Keep whisking for about a minute until the mix looks uniform.
You will see the cocoa darken the sugar and the powder will take on a soft, even tone. - Store the mix in an airtight container.
A glass jar with a tight lid preserves the aroma and keeps the mix fresh.
Keep it in a cool, dry place away from direct light for up to three months. - To prepare hot cocoa, mix 2-3 tablespoons of the cocoa mix with hot water or your choice of non-dairy milk.
Stir until dissolved and enjoy!
For a richer cup, whisk it in a small saucepan over low heat until glossy and steaming, or froth with a hand frother for an extra silky finish.
A few texture and timing tips as you make this. Whisk until glossy and smooth when you prepare the drink. Heat only to steaming so the color stays deep and the flavors stay bright. If you warm plant milk in a small saucepan, watch it closely; many plant milks can expand and foam quickly. A gentle simmer is all you need.
Serving Homemade Dairy-Free Hot Cocoa Mix With Love
Serve a cup with a small spoonful of coconut whipped cream or a swirl of thick almond milk for a gentle crown on top. I like to dust a little extra cocoa on the foam to remind guests of what’s inside. Small touches matter: a sprig of mint, a cinnamon stick, or a few toasted nuts on the side make the moment feel deliberate.
Pair this cocoa with soft muffins or a crisp, lightly salted treat for contrast. If you want a savory-sweet pairing, try it alongside a crunchy snack that brings out the chocolate, perhaps something like a creative savory mix for nibbling as you sip: dill pickle Chex mix. For a simple dessert plate, add a slice of cake or a few fresh berries to brighten the cup. When I present cocoa, I think of small moments a phone call with a friend, a quiet pause before bed, a slow morning that begins with warmth.
Think of presentation as gentle, not fussy. Use a small tray, a favorite mug, and a cloth napkin. A handwritten tag on a jar makes a mix feel like a gift even if it sits on your counter for a week. When you pour, watch the drink bloom into a glossy, inviting surface. That sight is part of the pleasure.
Storage & Reheat Tips
Store your mix in a cool, dry place in an airtight jar to keep it tasting fresh. I prefer glass jars with wide mouths because they make scooping easy. Label the jar with the date so you know when you made it.
If you want to keep it longer than three months, you can freeze the mix in a freezer-safe bag. Press out excess air first. Frozen, the mix will keep well for up to six months. Thaw at room temperature before opening to avoid condensation in the jar.
To reheat prepared cocoa, warm slowly in a small saucepan. Use low heat and stir often until steaming. If you want froth, whisk briskly or use a small electric frother just after warming. For an extra silky cup, heat the non-dairy milk to just under a simmer and then whisk in the mix until glossy. If the drink tastes a bit flat after storage, a pinch of salt or a splash of vanilla extract will lift the flavor.
If you make a large batch and gift small jars, add a note with the best-by date and simple instructions. People trust clear, kind directions. My little jars always come with a short note: two tablespoons per cup, hot water or plant milk, and a heart.
Sweet Tips & Tricks
- Use a fine sieve to remove any lumps from cocoa and powdered sugar.
This keeps the mix silky and effortless to dissolve.
A quick sift makes a big difference in texture. - Swap non-dairy milk powders to change flavor.
Coconut milk powder adds a gentle, tropical richness.
Soy milk powder offers a neutral, creamy profile. - Clean up spills with a dry cloth first so you do not smear cocoa across the counter.
A quick brush into the trash before wiping keeps surfaces tidy.
I always keep a small brush near my mixing bowl for this. - For gift jars, add a small wooden scoop and a handwritten label.
People notice little details and they make the mix feel special.
Include instructions and a suggested pairing to help them enjoy it right away. - For a thicker cup, use warmed canned full-fat coconut milk in place of water.
This creates a melt-in-your-mouth texture that feels indulgent but still dairy-free.
If you prefer a lighter cup, use hot water with a splash of oat milk.
A little note on measurements: I find 2 tablespoons per 8 ounces to be a good starting point. If you like it richer, use 3. If you love a lighter hint, stay at 1 1/2. Taste is the compass here, and it is fine to adjust.
For seasonal gifts or small gatherings, pair with a light pastry such as a tender muffin. These soft companions bring balance to the deep chocolate notes. Try a fruit-focused morning treat like these easy strawberry muffins for a bright counterpoint when serving cocoa at brunch: easy homemade strawberry muffins.
Flavor Twists & Variations
There are so many simple ways to change mood and season with this mix. Add one spoon of instant espresso powder to the mix for a mocha twist. Include 1/2 teaspoon of ground cinnamon per cup for a snug fall right in your mug.
For a holiday lift, fold in powdered peppermint or crushed candy canes to the jar. Keep the candy separate for a topping if you want to make the mix more versatile. A pinch of cayenne or ground chili gives the cocoa a warm, subtle heat that highlights the cocoa’s natural fruit notes.
Try a salted caramel version by adding a tablespoon of brown sugar and a pinch of sea salt to the jar. If you bring this blend to a party, offer a small bowl of garnishes: coconut whipped cream, toasted coconut flakes, mini marshmallows for those who can have them, or chocolate shavings.
For a lighter, more breakfast friendly cup, stir the mix into hot oat milk and top with a few slices of banana. The natural sweetness pairs beautifully with the deep chocolate flavor. If you keep the mix on your shelf for a child’s snack, make a milky cup with a little extra non-dairy milk for a gentler flavor.
If you like experimenting, create small jars with different profiles. Label one “Peppermint Night” and another “Spiced Evening.” Guests love sampling. For a playful savory-sweet mix, consider a small plate that echoes contrasts such as a savory nibble that balances the cocoa, like the pickle-sour crispness in this crunchy mix I often use for parties: dill pickle Chex mix. It sounds unusual, but unexpected partners give the chocolate something to play against.
FAQs About Homemade Dairy-Free Hot Cocoa Mix
Can I make this ahead?
Yes. This mix is one of those treats that waits patiently and keeps well. Store in an airtight jar for up to three months at room temperature or up to six months in the freezer. Label with the date so you know when it was made.
Can I use this with cold milk for iced cocoa?
You can. For the smoothest result, make a paste with a small amount of hot water first so the powders dissolve. Then pour cold plant milk over the paste and stir well. For a frosty version, blend the paste with cold milk and ice for a creamy iced cocoa.
What non-dairy milks work best?
Full-fat coconut milk gives the richest flavor. Oat milk and soy milk offer a neutral, creamy feel. Almond milk is light and delicate. If you want a milk-like mouthfeel, choose oat or soy. If you want indulgence, warm full-fat coconut milk and whisk.
Can I sweeten with honey or maple instead of powdered sugar?
For dry mix storage, powdered sugar is essential because it keeps the mix dry. If you prefer maple or honey, add them when preparing the drink. Stir a bit into the hot cup for a fresh, aromatic sweetness.
How many servings does this recipe make?
This base recipe makes about a dozen servings when you use 2 tablespoons per cup. If you host often, double or triple the batch. For gifts, small jars with about three to four servings fit nicely.
A Final Sweet Note
I hope this Homemade Dairy-Free Hot Cocoa Mix brings your kitchen the same buttery joy it brings mine. There is a quiet kind of comfort in stirring a cup and watching the steam rise, and a small jar of mix on the shelf is like keeping a friend close. When I make this for company, I think of light conversation and slow moments, and I always set out a small bowl of toppings so each person can make their cup their own.
This mix is a gentle reminder that small rituals matter. Whether you hand a jar to a neighbor or simply keep one for yourself, it is an easy way to make everyday moments feel a little more special. Warm cups, shared smiles, and the simple pleasure of chocolate are what I hope you find in every scoop.
Conclusion
If you would like more variations and ideas for dairy-free hot chocolate mixes, I recommend this thoughtful recipe called Dairy Free Hot Chocolate Mix – Courtney’s Sweets which offers flavor ideas and packaging tips. For another home-style approach with clear steps and warm photos, see dairy free hot cocoa mix – Sarah Bakes Gluten Free which I find helpful when planning gifts and seasonal blends.
Homemade Dairy-Free Hot Cocoa Mix
Ingredients
Main Ingredients
- 1 cup unsweetened cocoa powder Choose a cocoa with a deep chocolate color for a richer drink.
- 1 cup powdered sugar Use a fine powdered sugar so the mix dissolves quickly.
- 1 cup non-dairy milk powder This ingredient gives the mix a creamy texture without adding liquid.
Instructions
Mixing the Ingredients
- In a large bowl, combine the cocoa powder, powdered sugar, and non-dairy milk powder.
- Stir gently with a whisk to ensure the powders meet evenly.
- Work through any clumps until the mix looks smooth and even.
Storing the Mix
- Store the mix in an airtight container, preferably a glass jar with a tight lid to preserve the aroma.
- Keep it in a cool, dry place away from direct light for up to three months.
Preparing Hot Cocoa
- To prepare hot cocoa, mix 2-3 tablespoons of the cocoa mix with hot water or your choice of non-dairy milk.
- Stir until dissolved and enjoy!
- For a richer cup, whisk it in a small saucepan over low heat until glossy and steaming.