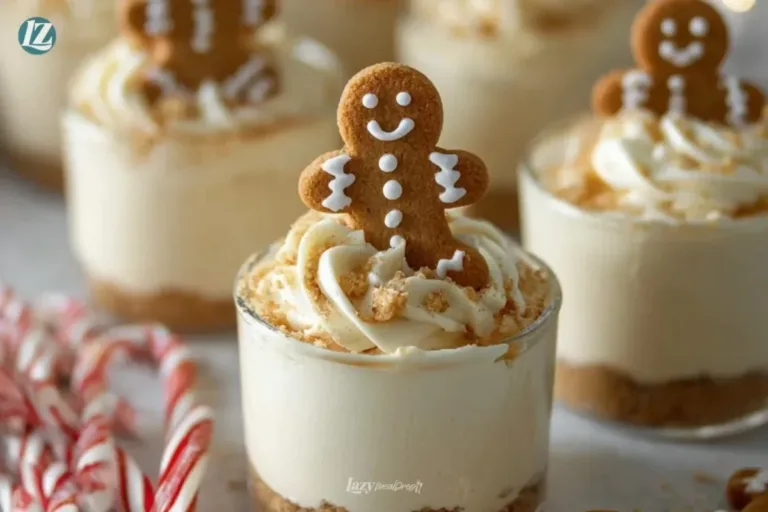
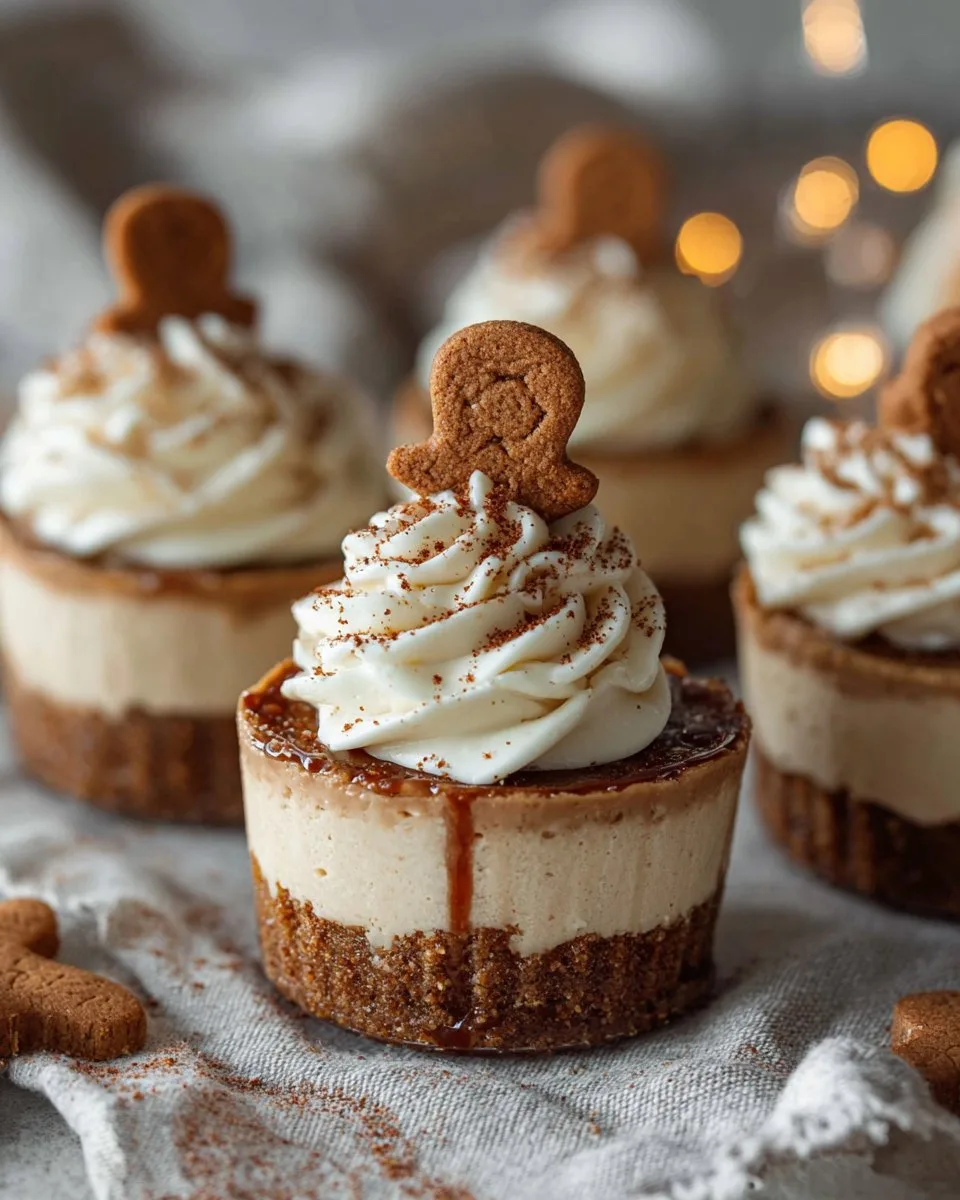
The gentle scent of warm ginger and brown sugar fills the kitchen as I press buttery cookie crumbs into small glass cups. The mood is quiet and cozy, like a morning when the sun is soft and a pot of coffee is waiting. These No-Bake Gingerbread Cheesecake Cups are tiny moments of comfort that feel dressed up for a special day, yet simple enough for any weekday coffee chat. If you love the idea of a sweet that is elegant but easy, you might also enjoy a rich, spiced twist I use sometimes in my other treats like the Biscoff cheesecake that sits on a lazy afternoon table.
The Sweet Story Behind No-Bake Gingerbread Cheesecake Cups
There is a small pleasure in making a dessert that asks for little heat but gives plenty of warmth in flavor. These cups grew from a long love of gingerbread cookies and late-night cheesecake cravings. I remember a quiet December when I wanted a sweet that felt like a hug without turning on a big oven. That night I mashed up leftover gingerbread cookies, stirred cream cheese until it was silky, and found a dessert that brought smiles from everyone who tried it.
This recipe is about comfort, memory, and little celebrations. Serve it for a birthday brunch, a slow weekend treat, or a calm night at home. The ginger and cinnamon remind you of holiday baking, while the silky cream cheese filling keeps each spoonful melt-in-your-mouth. The cookie crust gives a buttery-soft base with a fine, crisp bite that pairs beautifully with the cool, smooth filling.
There is a reason I return to this recipe when friends stop by. It feels beautiful to serve, and it travels well. You can make these hours ahead and keep them chilled until company arrives. The balance of spice, sweetness, and creamy texture is reliable, so once you make them, you will find excuses to make them again.
How to Make No-Bake Gingerbread Cheesecake Cups
“When the kitchen smells like vanilla and butter, you know something special’s baking.”
Start with a short overview. The process is quick and gentle: make a crumb crust, whip the cheesecake filling until glossy and smooth, then chill to set. Watch for a few visual signals. The crust should hold together when pressed, like wet sand. The filling should look thick, glossy, and hold soft peaks when you lift the whisk.
A tip from my kitchen: make sure the cream cheese is soft at room temperature. That makes it easy to whip to a velvety texture without lumps. If you have a small fall of time, chill the cups after filling so the crust and filling firm up and the flavors marry. For a seasonal twist that pairs well with pumpkin flavors, I often look back at this easy no-bake pumpkin cheesecake for ideas on spices and presentation.
This method keeps things simple and precise. Use a spatula or a small offset knife to smooth the tops. Pipe the filling for a pretty finish or spoon it in for a more relaxed look. Once chilled, the cups will be easy to serve, and each spoonful will offer that buttery crust and melt-in-your-mouth filling mix.
Ingredients You’ll Need
1 1/2 cups gingerbread cookie crumbs
1/4 cup unsalted butter, melted
16 oz cream cheese, softened
1/2 cup powdered sugar
1 teaspoon ground ginger
1/2 teaspoon ground cinnamon
1 teaspoon vanilla extract
1/2 cup whipped cream
Use real butter if you can. It makes every bite worth it and helps the crust hold together with a slightly rich, golden feel. For the cookie crumbs, you can crush store-bought gingerbread cookies or bake a small batch and let them cool. The crumbs should look like fine sand with a few small bits for texture.
A little note on quantities and texture: if your crumbs seem too dry, add a teaspoon or two more melted butter until the mix holds when pinched. If the filling tastes too sweet for you, start with 1/3 cup powdered sugar and taste before adding the rest. A gentle fold of whipped cream into the filling keeps it airy and light so the cups do not feel heavy.
If you enjoy layered desserts, this mix of crumbs and cream will remind you of other no-bake favorites like this fruity creation, the no-bake strawberry cheesecake lasagna, which also uses whipped layers for lovely texture.
Step-by-Step Directions
- Combine gingerbread cookie crumbs and melted butter in a bowl until mixture resembles wet sand.
Press a handful between your fingers; it should hold together without being greasy.
If it feels crumbly, add a teaspoon of melted butter and press again. - Press the crumb mixture evenly into the bottom of serving cups or glasses.
Use the back of a spoon or a small measuring cup to press firmly for a neat crust.
Chill the cups for 10 minutes to help the crust set before adding the filling. - In a separate bowl, beat softened cream cheese and powdered sugar until smooth.
Start slowly to avoid splatters, then increase speed until the mix is silky and free of lumps.
Scrape the sides of the bowl for a uniformly smooth texture. - Add ground ginger, cinnamon, and vanilla extract to the cream cheese mixture and mix well.
Taste a small spoonful to check the spice level and adjust if you like it warmer or milder.
The spices should be present but not overwhelming. - Fold in whipped cream gently until combined.
Use a spatula to keep the mixture light and airy, folding until there are no streaks.
Stop as soon as the filling looks uniform to keep it fluffy. - Spoon or pipe the cream cheese filling over the crust in each cup.
Fill to about three quarters full for an elegant look and room for a topping.
Smooth the top or add a swirl using a small piping bag for a polished finish. - Refrigerate for at least 2 hours before serving to set.
Overnight chill gives the best texture and flavor melding, so if you can wait, it is worth it.
The filling will firm slightly and the crust will hold a clean edge. - Garnish with additional spices or whipped cream if desired before serving.
A light dusting of cinnamon or a small ginger snap on top adds charm and spice.
Serve cold and enjoy the contrast of crisp crust and silky filling.
Texture tips: the crust should be crisp-edged and crumbly, while the filling stays smooth and creamy. If you notice the filling separating, whisk gently until it comes back together. Timing tip: allow the cups to chill fully; rushing to serve can leave the filling too soft to hold a clean shape.
Serving No-Bake Gingerbread Cheesecake Cups With Love
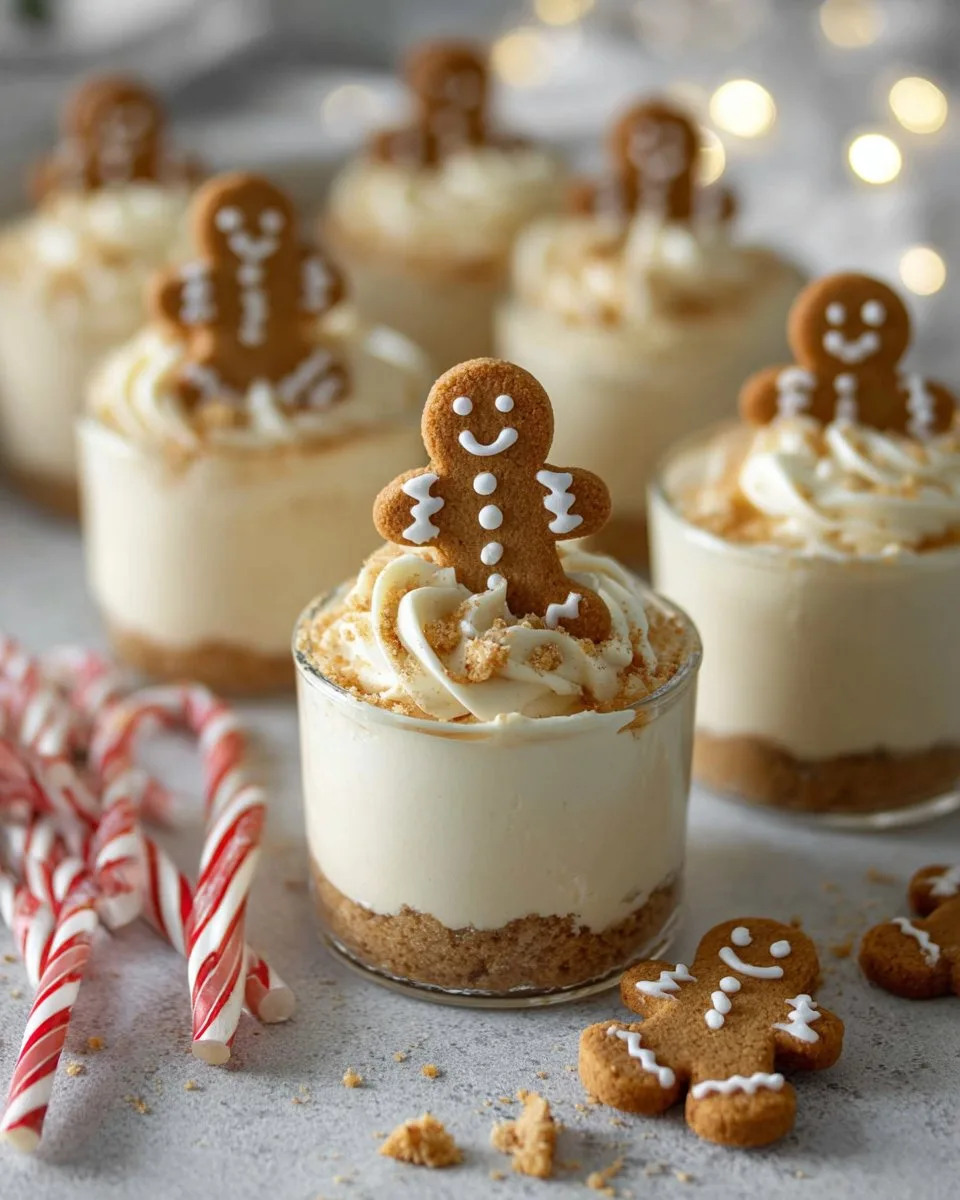
These cups are small luxuries, perfect for pairing with a strong cup of coffee or a fragrant tea. For a birthday table, line up a few cups on a pretty tray and top each one with a star of whipped cream and a tiny gingerbread man. For a quiet night in, serve one with a spoonful of thick vanilla ice cream or a handful of toasted nuts.
When I bring these to a casual gathering, I arrange them with small spoons and a pot of black coffee. The heat of the coffee and the coolness of the cheesecake make a simple, satisfying contrast. You can also serve them with a tart fruit compote on the side for balance. Sliced pears or cooked cranberries are lovely with ginger and cream.
For a small presentation touch, tie a little twine around the rim of the cup or place the cups on individual doilies. These details are easy to do and make each serving feel like a little celebration. If you want a warm take, offer a small pitcher of lightly heated caramel to drizzle on top just before eating. For other seasonal small desserts that travel well, I sometimes bring along apple crisp mini cheesecakes for variety.
Keeping No-Bake Gingerbread Cheesecake Cups Fresh
Store the finished cups in the refrigerator, covered, for up to 4 days. Use a shallow container or a tray with plastic wrap over the tops to keep the cups from absorbing other fridge smells. If you add a crunchy garnish like nuts or cookie pieces, keep those separate and add just before serving so they do not soften.
Freezer notes: you can freeze these cups for up to 1 month. Freeze them on a tray until firm, then wrap each cup in plastic wrap and place in an airtight container. Thaw in the refrigerator overnight before serving. Do not refreeze after thawing.
Reheat tips: these are best served chilled. If you want a warmer contrast, serve with a small amount of warm sauce on the side, not poured into the cup. That keeps the texture intact while giving you the comfort of warmth. If the crust becomes slightly soft after refrigeration, let the cups sit at room temperature for 10 to 15 minutes before serving to let the filling soften to a melt-in-your-mouth texture.
For travel: keep the cups chilled in a cooler with ice packs. Fill a small cooler with a layer of ice packs and place the cups upright, separated by a cloth so they do not clatter. This method keeps them fresh for several hours and safe for potluck or picnic travel.
Susan’s Baking Notes
- Cream cheese texture matters. Let it sit at room temperature for 30 to 45 minutes so it mixes smoothly. Cold cream cheese will make a lumpy filling.
- Whip the filling just enough. Over-whipping can make it grainy. Stop when the mixture looks glossy and holds soft peaks.
- Press the crust firmly for neat edges. A compact crust looks polished and provides that satisfying crisp bite underneath the creamy top.
- Make ahead with care. These cups taste even better after a night in the fridge. The spices have time to bloom and the crust softens just enough to be tender.
- Cleanup tip: rinse your mixing bowl with warm water right away. The cream cheese comes off easily when it does not sit and dry.
These notes come from many small adjustments I have made over the years. They keep the process calm and predictable. A few small steps save time and give you a dessert that looks and tastes crafted.
Flavor Twists & Variations
Try a maple ribbon for a warm fall feel. Fold in a tablespoon of pure maple syrup into the filling and top with a tiny spoon of reduced maple for a glossy finish. For a bright winter contrast, stir a spoonful of citrus curd into the filling before folding in whipped cream. The citrus cuts through the sweet spice and makes the dessert lively.
Add a nutty crunch by sprinkling toasted pecans or walnuts on top right before serving. You can also use a chocolate ginger cookie crust for a deeper, richer base. For a child-friendly version, top with mini gingerbread stars dipped in chocolate.
If you like seasonal platters, build a tray with a mix of small cheesecakes and spiced cups. For holiday inspiration and a wider range of no-bake ideas to pair with these cups, look through this helpful collection for more playful combinations and crowd-pleasing recipes, like the ideas in no-bake Thanksgiving desserts.
A note on spice balance: ginger can be strong. Start with the amounts given and taste a spoonful of filling. Add a pinch more if you like a warmer bite. Cinnamon rounds the ginger out and makes the filling feel cozy. Remember, small changes in spice will change the dessert as a whole, so make small adjustments and taste.
No-Bake Gingerbread Cheesecake Cups
Ingredients
Crust
- 1.5 cups gingerbread cookie crumbs Use crushed store-bought gingerbread cookies or homemade.
- 0.25 cups unsalted butter, melted Real butter provides a rich flavor.
Filling
- 16 oz cream cheese, softened Ensure cream cheese is at room temperature for smooth mixing.
- 0.5 cups powdered sugar Start with less if you prefer less sweetness.
- 1 teaspoon ground ginger Adjust to taste for spiciness.
- 0.5 teaspoon ground cinnamon Provides warmth and depth to the filling.
- 1 teaspoon vanilla extract Adds flavor complexity.
- 0.5 cups whipped cream Lightens the filling; fold gently to maintain airiness.
Instructions
Prepare Crust
- Combine gingerbread cookie crumbs and melted butter in a bowl until mixture resembles wet sand.
- Press a handful between your fingers; it should hold together without being greasy. If it feels crumbly, add a teaspoon of melted butter and press again.
- Press the crumb mixture evenly into the bottom of serving cups or glasses, using the back of a spoon to create a neat crust.
- Chill the cups for 10 minutes to help the crust set before adding the filling.
Make Filling
- In a separate bowl, beat softened cream cheese and powdered sugar until smooth.
- Add ground ginger, cinnamon, and vanilla extract to the cream cheese mixture and mix well.
- Fold in whipped cream gently until combined, keeping the mixture light and airy.
Assemble
- Spoon or pipe the cream cheese filling over the crust in each cup, filling them to about three quarters full.
- Smooth the top or add a swirl for a polished finish.
- Refrigerate for at least 2 hours before serving to set, preferably overnight.
Serve
- Garnish with additional spices or whipped cream before serving.
- Serve cold and enjoy the contrast of crisp crust and silky filling.
Notes
Nutrition
FAQs About No-Bake Gingerbread Cheesecake Cups
Can I make this ahead?
Yes. Most desserts taste even better after resting overnight when the flavors meld perfectly. Make the cups the day before, keep them covered in the fridge, and add any crunchy or soft toppings just before serving.
What if my cream cheese is lumpy?
If your cream cheese is cold, lumps can form. Let it warm at room temperature for 30 minutes, then beat it on low speed until smooth. If you are short on time, microwave the block for 5 to 8 seconds, then beat. Work gently to avoid overheating.
Can I use other cookies for the crust?
Absolutely. Graham crackers, speculoos, or chocolate ginger cookies make fine swaps. Each cookie changes the flavor profile, so choose one that complements the spices in the filling.
How long do these keep in the freezer?
Freeze up to 1 month. Thaw in the refrigerator overnight. Do not refreeze after thawing.
Are there dairy-free options?
Yes. Use a creamy dairy-free cream cheese and coconut whipped cream. Make sure your cookie crumbs are also dairy-free. The texture will be slightly different but still delicious.
A Final Sweet Note
I hope these No-Bake Gingerbread Cheesecake Cups bring your kitchen the same buttery joy they bring mine. They are small, pretty, and full of flavor, the sort of dessert that turns a simple day into a tiny celebration. Make them for a friend, tuck them into a picnic, or keep a few in your fridge for moments when you want something indulgent but easy.
They are simple to love: a crisp, buttery base, a melt-in-your-mouth filling, and a warm spice that reads of home. Thank you for letting me share this recipe and these quiet kitchen stories. I cherish the chance to sit at a table with you, even if just in word, and offer a spoonful of comfort.
Conclusion
For more no-bake ideas and a similar festive spin, you might enjoy the detailed take in No-Bake Gingerbread Spice Cheesecake Cups – Ready in One …, which pairs spices in a slightly different style. If you want mini cheesecake inspiration with warm flavors, take a look at No Bake Gingerbread Mini Cheesecakes – Cooking in my Genes for another lovely approach.